Best Tools and Techniques for Removing Supports from 3D Prints in 2024
Have you ever marveled at a flawlessly finished 3D print and wondered how such perfection is achieved? The secret often lies in the art of removing supports. Let’s dive into the best tools and techniques for this crucial step in 2024!
Understanding 3D Print Supports
What Are 3D Print Supports?
3D print supports are temporary structures printed alongside the main object, which play a crucial role in the 3D printing process, especially when dealing with complex or overhanging geometries. These supports are not part of the final product but serve as a scaffold that ensures the print’s integrity during the manufacturing process.
Why Are They Necessary?
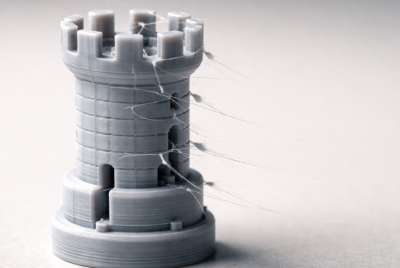
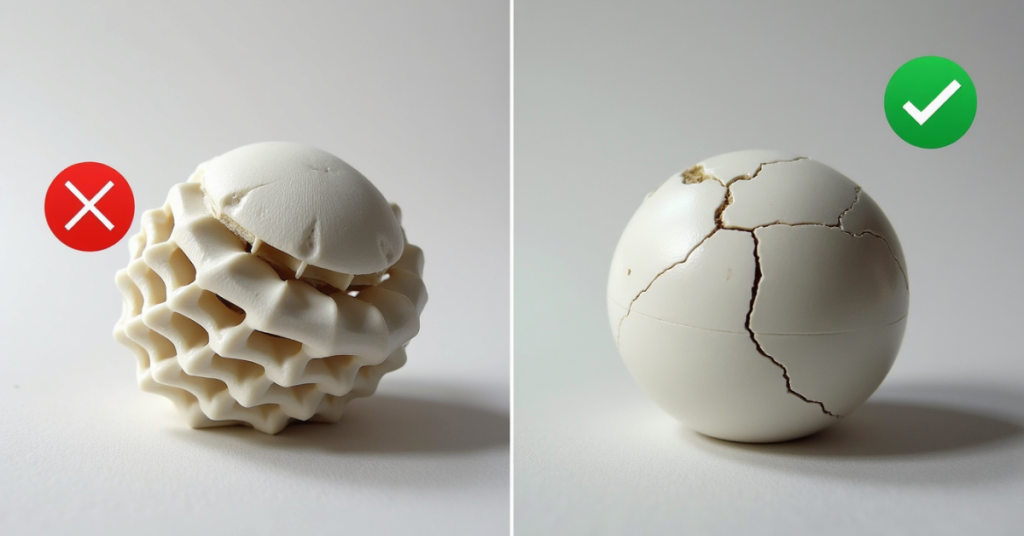
- Overhangs and Bridges: In 3D printing, any part of the design that extends beyond a certain angle (typically over 45 degrees) relative to the build platform is known as an overhang. Similarly, bridges are parts of the design that stretch across open space. Both overhangs and bridges cannot be printed in mid-air, as the molten material needs support until it solidifies. Without supports, these structures would fail, leading to a deformed or incomplete print.
- Print Quality: Supports help in maintaining the shape and details of the design. They prevent the sagging or collapsing of unsupported structures, ensuring the final product is true to its intended design.
Types of Supports
- Breakaway Supports: These are typically made from the same material as the object being printed. They are designed to be manually removed after the printing process.
- Soluble Supports: Made from a different material than the object, soluble supports dissolve in certain solvents (like water or limonene), making the removal process easier and less risky for delicate parts.
Design Considerations
- Support Placement: Effective support placement is crucial. It should be enough to support the structure but minimal to reduce material usage and post-processing time.
- Support Density: This refers to how solid the support structures are. Higher density provides more support but is harder to remove and uses more material.
- Support Geometry: The shape and style of support structures can vary. Some are designed for easy breakaway, while others are meant to dissolve or provide specific types of support for complex geometries.
3D print supports are foundational to successful 3D printing, particularly for complex models. They provide the necessary support to ensure that overhangs, bridges, and intricate details are accurately represented in the final print. Understanding how to effectively use supports can significantly enhance the quality and fidelity of 3D printed objects.
👉 Want cleaner prints and easier support removal from the start?
Start with the right tools and gear here:
👉 View Recommended 3D Printing Gear
The Evolution of Support Structures
The evolution of support structures in 3D printing mirrors the broader development of the technology itself. Over the years, these supports have become more sophisticated, offering greater flexibility and efficiency in the printing process.
Early Days: Basic Structures
In the early days of 3D printing, support structures were rudimentary. They were often dense and challenging to remove, which could damage the main object. These supports were primarily uniformin design, regardless of the complexity of the print.
Advancements in Material Science
A significant leap in the evolution of support structures came with advancements in material science. The introduction of soluble supports, which could be dissolved in various solvents, marked a turning point. This innovation allowed for more complex designs to be printed with less risk of damage during support removal.
Software Innovations
Parallel to material advancements, software developments played a key role. Slicing software began to offer more sophisticated support options, allowing users to customize support density, placement, and style. This customization meant supports could be strong where necessary and minimal where possible, saving material and reducing post-processing time.
Dual Extrusion Technology
The advent of dual extrusion printers further revolutionized support structures. These printers can use two different materials simultaneously: one for the object and one for easily removable supports. This technology made printing complex geometries simpler and more reliable.
Eco-Friendly and Reusable Supports
As sustainability became a more prominent concern, the focus shifted towards eco-friendly and reusable support options. Efforts have been made to develop supports that can either be recycled or reused in subsequent print jobs, reducing waste and environmental impact.
Automated Support Generation
The latest development in this field is automated support generation algorithms. These algorithms analyze the 3D model and intelligently place supports where needed, optimizing both material usage and ease of removal. This automation has significantly reduced the manual effort involved in preparing a model for printing.
Today’s support structures are a far cry from their predecessors. They are now designed to be more material-efficient, easier to remove, and tailored to the specific needs of each print. This evolution reflects the ongoing innovation in 3D printing technology, striving for efficiency, sustainability, and user-friendliness.
The Right Tools for the Job
👉 Want all the essential support removal tools in one place?
A complete toolkit makes the process faster, easier, and safer:
👉 Check current price on Amazon: Tool Kit Link
Basic Tools
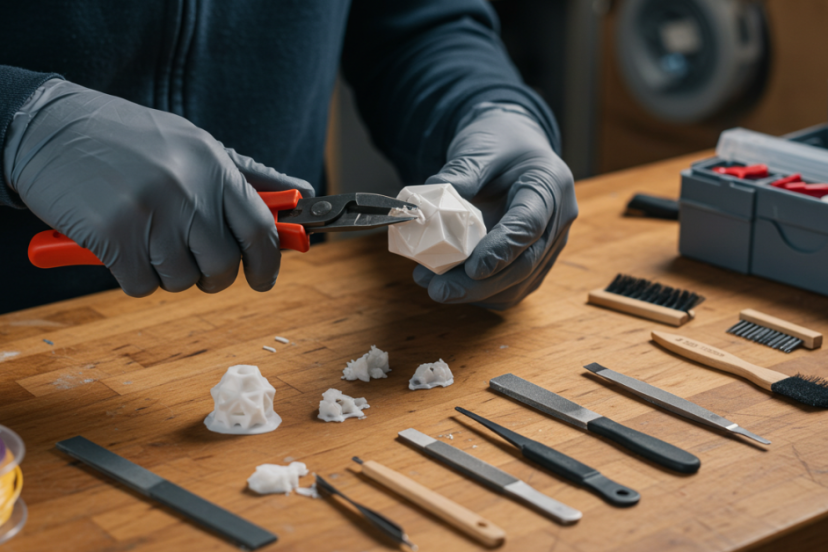
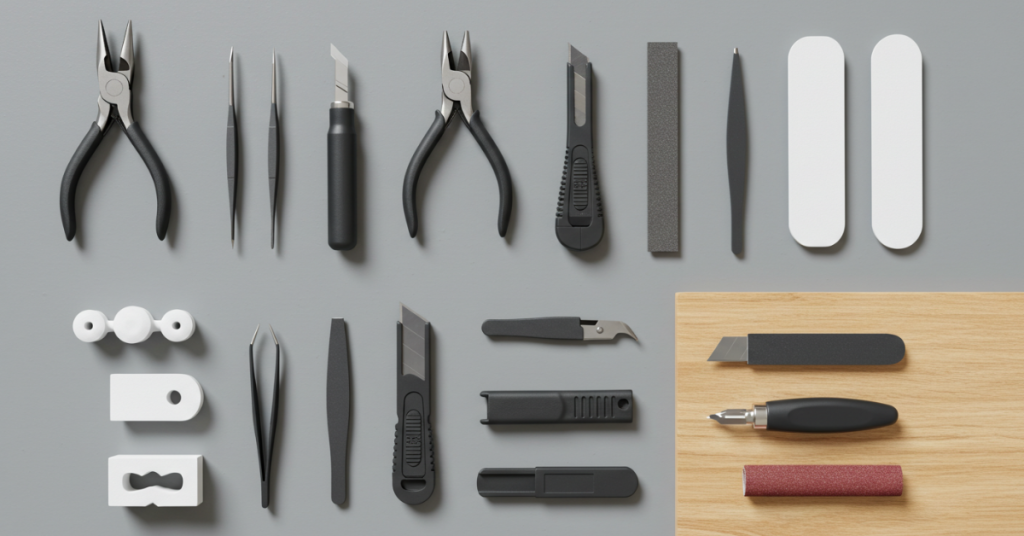
When it comes to removing supports from 3D prints, having the right tools at your disposal is crucial. For beginners or those handling less complex projects, a set of basic tools can be sufficient and effective. Here’s an overview of some essential basic tools for support removal:
Pliers
- Needle-Nose Pliers: These are perfect for getting into tight spaces and gripping small supports. Their long, thin shape allows for precise control, making them ideal for delicate operations.
- Flat-Nose Pliers: These pliers provide a broader surface area, useful for removing larger supports. They help apply even pressure, reducing the risk of breaking the print.
Tweezers
- Fine-Tip Tweezers: These are excellent for removing very small or intricate supports. They offer precision and are especially useful in areas where fingers can’t reach.
- Heavy-Duty Tweezers: For tougher supports, heavy-duty tweezers can provide the necessary strength without damaging the print.
Cutting Tools
- Flush Cutters or Side Cutters: These are a staple in any 3D printer’s toolkit. Flush cutters allow for close cuts, minimizing the amount of post-processing needed. They are great for cutting away supports from the base or sides of a print.
- Craft Knives or Scalpels: For more detailed work, a sharp craft knife or scalpel can be used to carefully trim away excess material or to refine areas where supports were attached.
Sanding Tools
- Sanding Paper: After removing the supports, sanding paper (of various grits) can be used to smooth out the surface. Starting with a coarse grit for rough areas and moving to a finer grit for finishing can achieve a smooth, clean look.
- Sanding Sticks or Files: These tools offer more precision and control than sanding paper, especially for reaching into narrow spaces or grooves.
Safety Equipment
- Safety Glasses: Protect your eyes from flying pieces of plastic when cutting or sanding supports.
- Gloves: To protect your hands from sharp edges and splinters, wearing gloves is advisable, especially when handling sharp tools.
These basic tools are the foundation of support removal in 3D printing. They are generally affordable, easy to use, and sufficient for a wide range of prints. Proper use of these tools not only ensures a clean finish but also helps maintain the integrity and appearance of your 3D printed objects.
👉 Pro Tip: Having the right tools makes support removal faster and prevents damage to your prints.
👉 Check out a complete tool kit designed for 3D printing:
👉 View Recommended 3D Printing Gear
Advanced Tools
For more intricate and demanding 3D printing projects, advanced tools can significantly improve the process of support removal, offering greater precision, efficiency, and less risk of damaging the print. Here’s a look at some of the advanced tools used by seasoned 3D printing enthusiasts and professionals:
Dremel or Rotary Tools
- Functionality: A Dremel or similar rotary tool can be incredibly versatile. Equipped with various attachments like cutting wheels, sanding drums, and grinding bits, it can quickly remove larger supports and refine surfaces.
- Precision: These tools are excellent for working on detailed areas where precision is key. With adjustable speed settings, they can be controlled to suit the delicacy of the task.
Heat Guns
- Purpose: Heat guns can be used to soften supports, making them easier to remove. This is particularly helpful for filaments that become more malleable when heated.
- Technique: Care must be taken to apply heat evenly and not to overheat the print, as it can warp or deform.
Electric Sanding Tools
- Variety: Electric sanders, such as orbital sanders or detail sanders, can expedite the finishing process, especially for larger prints.
- Application: These tools are best used for initial smoothing, before moving on to finer manual sanding for the final finish.
Ultrasonic Cutters
- Innovation: Ultrasonic cutters are a high-tech option for precision cutting. They work by vibrating a blade at ultrasonic frequencies, allowing it to effortlessly slice through support material without applying excessive force.
- Usage: Ideal for delicate or highly detailed prints where traditional cutting tools might pose a risk of damage.
Pneumatic Cutters
- Design: Pneumatic cutters, which operate on compressed air, offer a high degree of control and power. They are particularly effective for thick or stubborn support structures.
- Advantage: These tools reduce the physical effort required for support removal, lessening the risk of accidental slips or cuts.
Specialized Support Removal Kits
- Components: These kits often contain a curated selection of tools specifically designed for 3D print support removal, including specialized pliers, cutters, and finishing tools.
- Convenience: Having a kit dedicated to support removal ensures that you have the right tool for each aspect of the process, tailored to the unique challenges of 3D printed objects.
Safety Precautions
- Protective Gear: When using advanced tools, especially power tools, it’s crucial to wear appropriate safety gear, including eye protection, gloves, and sometimes even a dust mask or respirator for fine particulates.
Advanced tools bring a new level of precision and efficiency to the process of removing supports from 3D prints. While they represent a higher investment in terms of cost and the skill required for their operation, they can significantly enhance the quality and appearance of the final product, especially for complex and high-detail prints.
Techniques for Beginners
Step-by-Step Guide
Removing supports from a 3D print can be a meticulous task, especially for those new to 3D printing. Here’s a simple step-by-step guide to make the process smoother and ensure a clean, damage-free result.
Step 1: Assess the Print
- Inspect the Print: Before you start, examine your print closely. Identify areas where supports are attached and assess how they connect to the main object.
- Plan Your Approach: Decide which supports to remove first. Typically, you should start from the outermost supports and work your way in.
Step 2: Initial Separation
- Use Pliers: Gently wiggle the pliers under the support structures and apply steady pressure. Be careful not to grip the actual print too tightly.
- Start with Larger Supports: Begin with the more significant support structures, as they often come off more easily and provide better access to smaller supports.
Step 3: Fine Removal
- Switch to Tweezers or a Craft Knife: For smaller supports or those in hard-to-reach areas, use fine-tip tweezers or a craft knife for more precise control.
- Be Patient: Take your time with this step to avoid snapping delicate parts of your print.
Step 4: Sanding and Smoothing
- Begin with Coarse Sandpaper: Once all supports are removed, use coarse sandpaper to smooth out the rough areas where supports were attached.
- Progress to Finer Grits: Gradually move to finer grit sandpapers for a smooth finish. Be gentle to avoid wearing down details of your print.
Step 5: Final Inspection and Touch-Up
- Inspect the Print: After sanding, inspect your print for any missed supports or rough spots.
- Detail Work: Use a craft knife or fine sandpaper to clean up any remaining imperfections.
Step 6: Post-Processing (Optional)
- Heat Treatment: For some materials, a heat gun can be used to gently heat the surface, helping to smooth out minor flaws.
- Chemical Smoothing: For certain plastics, like ABS, chemical smoothing with a solvent can give a glossy, smooth finish.
Safety Tips
- Wear Protective Gear: Always wear safety glasses to protect your eyes from flying bits of plastic.
- Handle Tools Carefully: Be cautious when using sharp tools, and always cut away from yourself.
Removing supports from a 3D print is a blend of art and science. Each print may require a slightly different approach, depending on its complexity and the material used. With practice, you’ll develop a feel for the best tools and techniques to use, leading to flawless finishes on your 3D printed objects.
Learning Curve
The process of removing supports from 3D prints is as much a learning experience as it is a physical task. For those new to 3D printing, understanding the nuances and developing the required skills can take time. Here’s a look at the learning curve involved in this crucial post-processing step.
Understanding Material Behavior
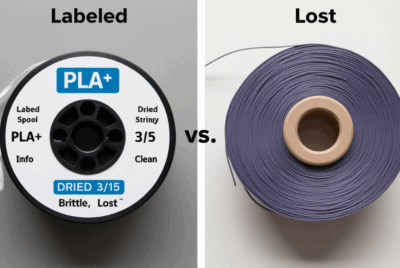
- Different Filaments, Different Techniques: Each type of filament behaves differently. For instance, PLA supports are generally easier to remove than ABS or PETG, which might require more delicate handling.
- Temperature Sensitivity: Learning how different materials respond to heat and stress during support removal is key. Some materials may become more brittle or pliable, affecting the approach needed.
Developing a Feel for the Tools
- Tool Familiarity: Gaining proficiency with various tools like pliers, cutters, and tweezers is a gradual process. Understanding the level of force needed and the best angles for approach comes with practice.
- Precision and Patience: Developing a steady hand and patience is crucial, especially when working with intricate designs or delicate parts of the print.
Recognizing Print Geometries
- Analyzing Structures: With experience, you’ll learn to quickly identify which supports will be easy or challenging to remove based on the geometry of the print.
- Planning Removal Strategy: Knowing where to start and how to proceed without damaging the print is a skill that improves over time.
Trial and Error
- Learning from Mistakes: Mistakes are inevitable and form a crucial part of the learning curve. Whether it’s applying too much force or not using the right tool, each error provides a valuable lesson.
- Experimentation: Trying different techniques and tools to see what works best for you and your prints is essential. There’s often no one-size-fits-all solution.
Community Learning
- Sharing Experiences: Engaging with the 3D printing community, either online or in local groups, can accelerate learning. Sharing experiences and tips with fellow enthusiasts can provide insights and shortcuts to mastering support removal.
Reflecting on Past Projects
- Reviewing Previous Prints: Look back at your past projects. Analyzing what went well and what didn’t can provide clear indicators of your progress and areas for improvement.
The learning curve in removing 3D print supports is a blend of technical knowledge, hands-on experience, and continuous learning. As you progress, your techniques will refine, and what once seemed challenging will become second nature. Embrace the journey, and remember that each print, with its unique challenges, is an opportunity to enhance your skills.
Advanced Techniques
Heat Treatment
Heat treatment is a nuanced technique in the process of removing supports from 3D prints. It involves carefully applying heat to soften the support structures, making them easier to remove and reducing the risk of damaging the print. Let’s explore how this method can be effectively utilized.
Understanding the Role of Heat
- Softening the Material: Heat can make certain types of filament more pliable. This flexibility allows supports to be removed more easily, especially in areas where they are firmly attached to the print.
- Ideal for Tough Supports: For filaments that are particularly hard or tough, heat treatment can be a game-changer, simplifying what would otherwise be a challenging removal process.
Tools for Heat Treatment
- Heat Guns: A common tool for this purpose, offering adjustable temperature settings for precise control.
- Hot Water Baths: For certain materials, immersing the print in hot water can be effective. The water’s heat evenly softens the supports without direct, intense heat application.
- Hair Dryers: In a pinch, a hair dryer can be used, though it offers less control than a heat gun.
Techniques and Precautions
- Gradual Application: Apply heat gradually, moving the heat source around to avoid concentrating on one spot, which could warp or deform the print.
- Temperature Control: Be mindful of the temperature. Excessive heat can damage not just the supports but the print itself.
- Direct Contact Avoidance: Avoid direct contact between the heat source and the print. A distance of a few inches is usually recommended.
Material Considerations
- PLA: While PLA can benefit from heat treatment, it’s also more prone to warping, so caution is needed.
- ABS and PETG: These materials generally respond well to heat, allowing for easier support removal.
Post-Heat Removal
- Immediate Action: Once the supports are sufficiently softened, quickly but carefully start the removal process. As the material cools down, it will regain its rigidity.
- Tool Assistance: Even with softened supports, using tools like pliers or tweezers can help with precision and ensure complete removal.
Finishing Touches
- Cooling Down: Allow the print to cool completely after support removal. This step ensures the print settles into its final, stable form.
- Final Inspection: Check for any remnants of supports or areas that might need additional sanding or finishing.
Heat treatment, when done correctly, can significantly ease the process of removing supports from 3D prints, particularly for more challenging materials. It requires a careful balance of temperature control and timing, but with practice, it can become a valuable technique in any 3D printer’s toolkit.
Soluble Supports
Soluble supports represent a significant advancement in 3D printing technology, offering a sophisticated solution to the challenge of support removal. These supports are designed to dissolve in a specific solvent, making the post-processing of complex prints much easier and less risky for the finished object.
Concept of Soluble Supports
- Material Composition: Soluble supports are made from materials that dissolve in certain chemicals or even in water. This property contrasts with the traditional, non-soluble supports which are typically made from the same material as the printed object.
- Compatibility: They are often used in dual-extrusion 3D printers where one nozzle prints the primary material and the other prints the soluble support.
Common Soluble Support Materials
- PVA (Polyvinyl Alcohol):
– Soluble in water, PVA is commonly used with PLA and some types of PETG.
– Ideal for prints with intricate supports or internal structures that would be difficult to remove mechanically.
- HIPS (High Impact Polystyrene):
– Requires limonene as a solvent.
– Often used with ABS as it bonds well and has similar temperature requirements.
Advantages
- Ease of Removal: The most significant advantage is the ease of support removal. Once the print is immersed in the appropriate solvent, the supports dissolve without any mechanical intervention, leaving the print intact and unharmed.
- Complex Structures: Soluble supports make it feasible to print highly complex and delicate structures that would be impossible or impractical to achieve with traditional supports.
Process of Dissolving Supports
- Immersing in Solvent: The printed object is submerged in a container filled with the solvent. The time required for complete dissolution varies depending on the support material and the solvent’s temperature.
- Agitation: Gentle agitation of the solvent can expedite the process, ensuring the solvent reaches all parts of the support.
- Rinse and Dry: After the supports have dissolved, the object should be rinsed with water (if compatible) and allowed to dry.
Considerations
- Print Time and Material Cost: Soluble supports often require more time to print and more material, which can increase the overall cost of printing.
- Solvent Handling: Proper handling and disposal of solvents like limonene are essential for safety and environmental reasons.
- Storage of Materials: Soluble materials like PVA are hygroscopic and need to be stored properly to prevent them from absorbing moisture from the air, which can affect their printing properties.
Soluble supports have revolutionized the way complex and detailed 3D prints are processed. While they come with considerations of cost and material handling, the benefits they offer in terms of ease of support removal and the ability to print intricate designs make them a valuable tool in the 3D printing arsenal.
Safety Tips
Protective Gear
Safety is a paramount consideration in any form of manufacturing or crafting, and 3D printing is no exception. When it comes to removing supports from 3D prints, using appropriate protective gear is crucial to prevent injuries. Here’s an overview of the essential safety equipment for this task.
Eye Protection
Safety Glasses or Goggles: During the support removal process, small pieces of plastic can fly off unexpectedly. Safety glasses or goggles protect your eyes from these fragments. It’s important to choose glasses that fit well and offer side protection.
Hand Protection
- Gloves: Wearing gloves is advisable to protect your hands from sharp edges of the supports and the tools used to remove them. There are various types of gloves suitable for this purpose:
– Cut-resistant Gloves: These are ideal for protecting against accidental cuts, especially when using sharp tools like craft knives or scalpel blades.
– Nitrile or Latex Gloves: When handling chemical solvents (in the case of soluble supports), these gloves provide necessary chemical resistance and dexterity.
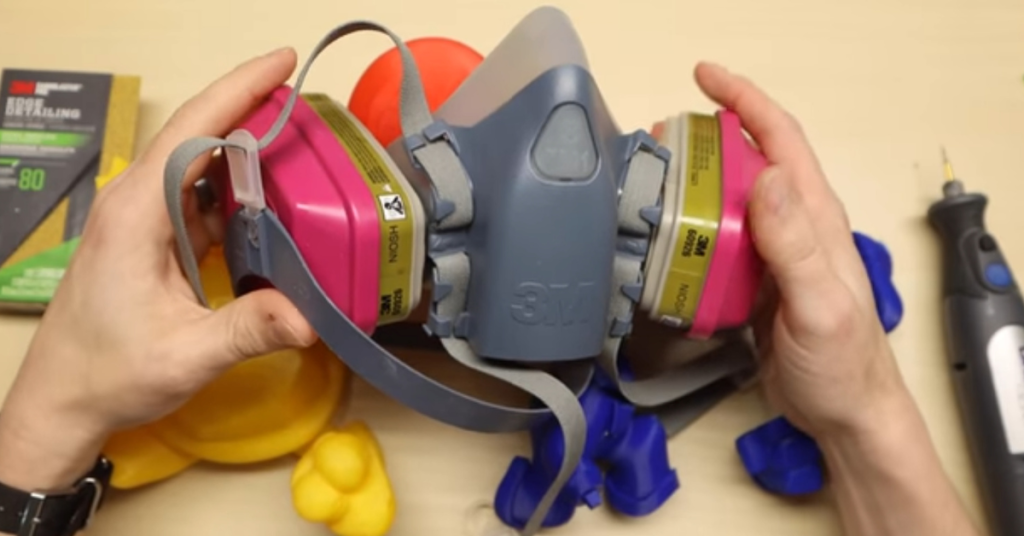
Respiratory Protection
- Dust Masks or Respirators: If you are sanding the print after support removal, or if you’re using any chemical processes that produce fumes, a dust mask or respirator is important. This is particularly crucial when working with materials that release fine particles or toxic fumes.
Protective Clothing
- Long-Sleeved Shirts and Pants: To protect your skin from plastic splinters or chemical splashes, wearing long-sleeved shirts and pants is recommended. This is especially important when working with heated tools or chemicals.
Hearing Protection
- Earplugs or Earmuffs: If you are using loud power tools for extended periods, such as rotary tools or electric sanders, hearing protection is advisable to prevent long-term hearing damage.
Workspace Safety
- Well-Ventilated Area: Ensure that your workspace is well-ventilated, especially if you are using solvents or engaging in processes that generate fumes.
- Organized Workspace: Keeping your workspace organized and free of clutter reduces the risk of accidents. Ensure that all tools are safely stored when not in use.
While removing supports from 3D prints may seem like a relatively safe activity, taking the proper safety precautions is essential. The use of appropriate protective gear not only ensures your safety but also makes the process more comfortable, allowing you to focus on achieving the best results with your 3D prints.
Handling Sharp Tools
Sharp tools, such as craft knives, scalpels, and cutters, are often essential for removing supports from 3D prints. While these tools can greatly aid in achieving a clean finish, they require careful handling to ensure safety and prevent damage to the print. Here’s a guide to safely and effectively using sharp tools in the support removal process.
Selection of Appropriate Tools
- Choosing the Right Tool: Select the right tool for the job based on the type of support, material, and the level of precision required. For instance, a craft knife may be ideal for fine trimming, while side cutters might be better for removing larger supports.
- Maintaining Sharpness: Ensure that the tools are sharp and in good condition. Dull tools require more force, increasing the risk of slipping and causing injury or damaging the print.
Safe Handling Techniques
- Secure Grip: Hold the tool firmly but comfortably. A secure grip provides better control and reduces the risk of slipping.
- Cut Away from Your Body: Always cut or trim away from your body to minimize the risk of injury in case the tool slips.
- Steady the Print: Make sure the 3D print is stabilized on a flat, non-slip surface. Holding the print in your hand while using sharp tools is not recommended.
Controlled Force and Precision
- Gentle Pressure: Apply gentle, controlled pressure. Excessive force can break the tool, damage the print, or cause loss of control.
- Incremental Removal: Remove supports in small increments, especially when working in tight or delicate areas. This approach allows for more precision and reduces the chance of accidental damage.
Awareness of Surroundings
- Focused Attention: Stay focused on the task at hand. Avoid distractions that might cause you to lose concentration.
- Clear Workspace: Ensure your workspace is free of unnecessary clutter and that all tools are well-organized.
After-Use Care
- Proper Storage: Store sharp tools safely after use. Blade covers or dedicated tool storage units can prevent accidental cuts and prolong the life of the tools.
- Regular Inspection: Regularly inspect your tools for signs of wear or damage. Replace or sharpen them as needed.
Using sharp tools for support removal in 3D printing requires a balance of precision, control, and safety. By selecting the appropriate tools, maintaining them well, and employing safe handling techniques, you can effectively remove supports while minimizing the risk to both yourself and your 3D prints.
Post-Removal Finishing Touches
Sanding and Polishing
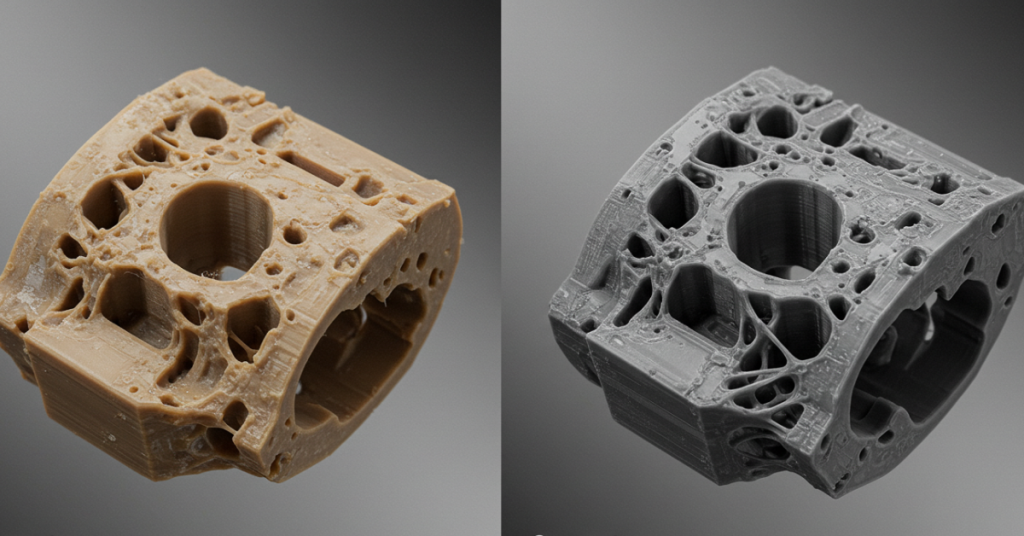
After removing supports from a 3D print, the next steps in achieving a smooth and refined finish involve sanding and polishing. These processes help to eliminate marks left by support structures and enhance the overall appearance of the print. Let’s delve into the best practices for sanding and polishing 3D printed objects.
Sanding: The First Step to a Smooth Finish
- Start with Coarser Grits: Begin with a coarser grit sandpaper to remove the larger imperfections and support marks. Grit numbers around 200 to 400 are typically used for this initial phase.
- Progress to Finer Grits: Gradually move to finer grit sandpapers (like 600 to 800 grit) for smoothing the surface. The goal is to remove the scratches made by the coarser sandpaper.
- Wet Sanding Option: For some materials, wet sanding can be effective. This involves using water to lubricate the surface, which reduces dust and helps achieve a finer finish.
Techniques for Effective Sanding
- Even Pressure: Apply consistent, gentle pressure to avoid creating indentations or low spots on the print.
- Circular Motions: Use circular or cross-hatch sanding motions for an even finish.
- Patience is Key: Sanding can be time-consuming, especially for detailed prints, but patience ensures a better outcome.
Polishing: Achieving a Glossy Finish
- Polishing Compounds: After sanding, apply a polishing compound suitable for the material of your print. This helps in further smoothing the surface and adding shine.
- Buffing Tools: Use a soft cloth or buffing wheel for polishing. For intricate designs, cotton swabs can be used to reach small or detailed areas.
Alternative Polishing Methods
- Flame Polishing: For certain plastics, like acrylics, flame polishing (using a heat source like a propane torch) can be used to quickly achieve a glossy finish. This technique requires extreme care to avoid melting or deforming the print.
- Chemical Polishing: Chemicals like acetone (for ABS) can be used to smooth the surface. The chemical melts the outer layer, creating a smooth, glossy finish upon drying.
Safety and Precautions
- Protective Gear: Always wear safety glasses and gloves, especially when working with chemicals or heat sources.
- Ventilation: Ensure good ventilation in your workspace, particularly if using chemical or flame polishing methods.
Sanding and polishing are crucial steps in transforming your 3D prints from rough, support-marked objects into smooth, aesthetically pleasing creations. While these steps require time and patience, the resulting smooth and polished finish significantly enhances the overall quality and appearance of your 3D printed objects.
Chemical Smoothing
Chemical smoothing is a technique used to improve the surface finish of 3D printed objects. It involves using chemicals to slightly melt the outer surface of a print, smoothing out layer lines and imperfections. This process can give prints a glossy, injection-molded look. Here’s an overview of the process and best practices.
Commonly Used Chemicals
- Acetone: Widely used for smoothing ABS prints. Acetone vapor can dissolve the surface of ABS, leading to a smooth and glossy finish.
- Isopropyl Alcohol (IPA): Effective on some types of PLA and TPU, IPA can smooth surfaces without the same level of melting as acetone.
- Ethyl Acetate: Sometimes used for PLA, it’s less aggressive than acetone but can still achieve a smooth finish.
The Smoothing Process
- Preparation: Ensure the print is free from dust and grease. Remove all support material and perform initial sanding if necessary.
- Application:
– Vapor Smoothing: For acetone and similar chemicals, a vapor smoothing method is often used. Place the print in a sealed container with a small amount of chemical at the bottom. The vapor from the chemical smooths the surface of the print.
– Direct Application: For chemicals like IPA, apply directly to the surface of the print using a brush or cloth.
- Timing and Control: The time the print is exposed to the chemical is crucial. Overexposure can lead to too much melting and loss of detail.
- Post-Treatment: Once the desired level of smoothness is achieved, remove the print and allow it to dry in a well-ventilated area.
Safety Considerations
- Ventilation: Perform chemical smoothing in a well-ventilated area to avoid inhalation of harmful fumes.
- Protective Gear: Wear gloves, safety glasses, and possibly a respirator to protect against chemical exposure.
- Chemical Handling: Handle chemicals with care, following the safety guidelines and disposal regulations.
Pros and Cons
- Advantages:
– Achieves a high-quality finish, especially for parts that will be visible or handled frequently.
– Reduces the visibility of layer lines and imperfections.
- Disadvantages:
– Risk of losing fine details or dimensional accuracy due to material melting.
– Not suitable for all types of filaments.
– Requires handling of potentially dangerous chemicals.
Chemical smoothing is a powerful technique for enhancing the finish of 3D printed parts, particularly for materials like ABS. While it can significantly improve the appearance of prints, it requires careful handling and consideration of safety procedures. When done correctly, it can turn a simple 3D print into a polished, professional-looking product.
Eco-Friendly Practices
Support Recycling
In the realm of 3D printing, the topic of sustainability and waste reduction is increasingly pertinent. Support recycling is a method to address these concerns by repurposing the often substantial amount of material used for supports in 3D printing. Let’s explore how support recycling can be implemented and its benefits.
Understanding the Importance
- Material Waste: Supports, necessary for printing overhangs and complex geometries, often contribute to a significant amount of waste material, especially in intricate prints.
- Environmental Concern: With the growing use of 3D printing, the environmental impact of this waste becomes a notable concern, making recycling an attractive option.
Methods of Recycling Supports
- Industrial Recycling: Some facilities specialize in recycling various plastics, including those used in 3D printing. Supports can be collected and sent to these facilities for processing.
- In-House Filament Making: For enthusiasts and professionals, devices like filament extruders can recycle supports and other plastic waste into new filament. This process involves grinding the supports into small pieces, which are then melted and extruded as filament.
- Community Programs: In some areas, community programs or maker spaces may offer recycling services for 3D print materials, including supports.
Choosing Recyclable Materials
- Material Selection: Opting for materials known for their recyclability, such as PLA, can make support recycling more feasible.
- Quality of Recycled Filament: It’s important to note that the quality of recycled filament can vary, and it may not always be suitable for high-precision prints.
Preparing Supports for Recycling
- Cleaning: Remove any excess print material or adhesives from the supports before recycling.
- Sorting: If using different types of materials, sort the supports by material type to ensure the integrity of the recycled filament.
Benefits of Support Recycling
- Reduced Waste: Recycling supports significantly reduce the amount of plastic waste generated from 3D printing.
- Cost Savings: By recycling supports into new filament, the overall material costs can be lowered.
- Sustainability: It’s a step towards more sustainable 3D printing practices, aligning with environmental consciousness.
Challenges and Considerations
- Initial Investment: For in-house recycling, the initial investment in equipment like a filament extruder and grinder can be significant.
- Time and Effort: The recycling process requires additional time and effort, from sorting and cleaning to the actual recycling process.
- Quality Control: Maintaining consistent quality with recycled filament can be challenging and requires careful monitoring.
Support recycling in 3D printing not only addresses environmental concerns but also presents an opportunity for cost savings and sustainable practices. While it involves additional effort and potential investment in equipment, the benefits of reducing waste and reusing materials make it a worthwhile endeavor for both individuals and organizations in the 3D printing community.
Reducing Waste
In the context of 3D printing, reducing waste is not only environmentally responsible but also cost-effective. With a focus on supports, which can constitute a significant portion of material used in prints, there are strategies to minimize waste without compromising the quality of the final product.
Design Optimization
- Efficient Support Design: Using slicing software, optimize support structures to use the least amount of material necessary. This can include reducing support density, using tree-like support structures, or only placing supports where absolutely necessary.
- Orientation and Layout: By strategically orienting the object in the print setup, you can reduce the need for extensive supports, thereby saving material.
- Hollowing Out Models: For models that don’t need to be solid, hollowing them out can reduce both the internal and external support requirements.
Material Consciousness
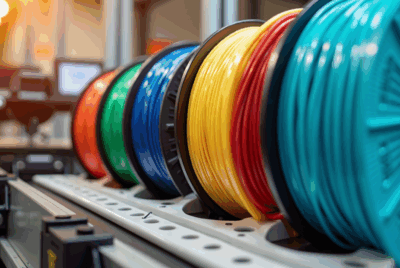
- Material Selection: Choosing materials that are more efficient and require fewer supports can significantly reduce waste. For example, some filaments are better at bridging gaps and might reduce the need for supports.
- Quality Filament: Using high-quality filament reduces the likelihood of print failures, which in turn minimizes waste from reprinting.
Utilizing Advanced Technologies
- Dual Extrusion Printers: Printers that allow for dual material extrusion can use soluble supports, which, while still using material, don’t contribute to physical waste as they dissolve away.
- Software Improvements: Utilize the latest slicing software that offers advanced support algorithms, which help in reducing unnecessary support without compromising the stability of the print.
Reusing and Recycling
- Reuse of Supports: In some cases, particularly with large, flat supports, it’s possible to reuse them for other prints as a raft or base layer.
- Recycling Programs: Engage in or set up recycling programs for 3D printing materials. This can include both the supports and any failed prints or scraps.
Education and Awareness
- Learning Best Practices: Stay informed about the latest techniques and best practices in 3D printing to continually improve efficiency and reduce waste.
- Community Involvement: Share knowledge and strategies with the 3D printing community, learning from others’ experiences and insights.
Responsible Post-Processing
- Minimizing Post-Processing Waste: When removing supports and finishing prints, be mindful of the waste generated. Plan and execute these steps in a way that minimizes excess material removal.
Reducing waste in 3D printing, particularly regarding support material, is a multifaceted approach that involves thoughtful design, material selection, and embracing new technologies. By adopting these practices, individuals and organizations can significantly contribute to more sustainable, efficient, and cost-effective 3D printing operations.
Cost-Effective Solutions
DIY Tools
In the world of 3D printing, having a set of specialized tools for support removal can significantly ease the post-processing work. However, commercial tools can be expensive or hard to come by. This is where DIY (Do-It-Yourself) tools come into play, offering cost-effective and customizable alternatives. Let’s explore some common DIY tools for removing 3D print supports.
Homemade Pliers and Tweezers
- Modified Pliers: Regular pliers can be modified for 3D print support removal. You can grind the edges to make them thinner for better access to tight spaces.
- Tweezers from Old Electronics: Tweezers from old electronics repair kits can be repurposed as support removal tools. They can be bent or reshaped to fit the specific needs of your prints.
Crafting Custom Knives and Scrapers
- Old Blades: Repurpose old blades from utility knives or box cutters. You can modify the blade shape with a grinder or file to suit your needs.
- DIY Scrapers: Using old credit cards or plastic rulers, you can create custom scrapers. Cut and shape them to desired sizes for removing larger supports or for working on broad surfaces.
Sanding Tools
- Handmade Sanding Blocks: Create your own sanding blocks by attaching sandpaper to pieces of wood or dense foam. This allows for customized shapes and sizes that fit comfortably in your hand.
- Drill Attachments: For powered sanding, you can modify old drill bits by attaching pieces of sandpaper or foam pads, turning your standard drill into a makeshift rotary sander.
Heating Tools
- Modified Soldering Irons: An old soldering iron can be repurposed for delicate heat applications. Modify the tip to be less sharp to avoid damaging the print.
- DIY Heat Gun: In a pinch, a hairdryer can act as a makeshift heat gun for softening supports, although with less heat control than a standard heat gun.
Safety Implements
- Custom Safety Gear: While not recommended to DIY safety glasses, you can customize gloves or aprons for comfort and better protection. Enhancing grip or adding extra padding where needed can be beneficial.
- Tool Organizers: Use household items like jars, magnetic strips, or homemade pouches to organize your DIY tools. Keeping tools well-organized ensures they are easy to find and safe to handle.
The Benefits of DIY Tools
- Cost-Effective: DIY tools can save money, especially for hobbyists or those just starting with 3D printing.
- Customization: You can tailor tools to your specific needs and preferences, which can be especially useful for unique or complex prints.
- Resourcefulness: Utilizing existing materials or repurposing old tools aligns with the ethos of sustainability and resourcefulness in the maker community.
DIY tools for 3D print support removal offer a practical and personalized approach to post-processing. By creatively repurposing materials and tools, you can effectively manage the support removal process without the need for expensive, specialized equipment.
Balancing Cost and Quality
Achieving a balance between cost and quality is a crucial aspect of 3D printing, especially when it comes to removing supports and post-processing. This balance involves making informed decisions about the materials, tools, and techniques used, ensuring that you don’t compromise the quality of your prints while keeping expenses in check. Here’s how to strike this balance effectively.
Material Selection
- Filament Choices: High-quality filament can be more expensive, but it often results in fewer printing errors and a better surface finish, reducing post-processing work. Conversely, cheaper filaments might save costs upfront but can lead to increased waste and time spent on finishing.
- Support Material: Opt for filaments that offer easier support removal. Some filaments might be more expensive but can save time and effort in post-processing.
Tool Investments
- DIY vs. Commercial Tools: While DIY tools can save money, investing in a few key commercial tools (like a good pair of flush cutters or a precision craft knife) can improve the ease and quality of support removal.
- Cost-Benefit Analysis: Assess the cost of tools against the time and effort they save. A tool that significantly reduces labor or improves finish quality might be worth the investment.
- Efficient Design: Designing with minimal support requirements can save on material costs. Use design strategies like angles and bridges that require less support.
- Optimized Settings: Experiment with printer settings to find the optimal balance between print speed, quality, and support material usage. Sometimes, slight adjustments can lead to significant material savings.
Post-Processing Choices
- Time vs. Quality: Manual finishing methods like sanding and polishing are time-consuming but cost-effective and can result in high-quality finishes. Assess whether the time invested is worth the cost savings.
- Alternative Finishing Methods: Explore cost-effective finishing methods like chemical smoothing or heat treatments that can save time and improve quality but require careful handling.
Reuse and Recycle
- Support Recycling: If possible, recycle support material, either by using it in future prints as rafts or by processing it into new filament, if you have the necessary equipment.
- Resource Utilization: Utilize resources efficiently, such as reusing partially used spools or combining leftover materials creatively in prints.
Long-Term Perspective
- Initial Costs vs. Long-Term Savings: Higher initial investments in quality materials and tools can lead to long-term savings in terms of reduced waste and less time spent on post-processing.
- Skill Development: Investing time in developing your skills can lead to better print quality, reducing the need for costly materials or tools.
Balancing cost and quality in 3D printing, particularly in the realm of support removal and post-processing, requires a strategic approach. By carefully selecting materials, investing wisely in tools, optimizing printing techniques, and embracing efficient post-processing methods, you can achieve high-quality prints without breaking the bank.
👉 Ready to make support removal easier and get cleaner finishes every time?
The right tools can save time, reduce frustration, and protect your prints.
👉 Explore the exact tools we recommend here:
👉 View Recommended 3D Printing Gear
Conclusion
Mastering the art of support removal in 3D printing is a journey that combines skill, knowledge, and the right tools. From understanding the nature of different materials and their support requirements to utilizing both basic and advanced tools effectively, each step plays a crucial role in achieving the perfect finish. Whether you’re a hobbyist or a professional, balancing cost and quality is essential. Embracing DIY solutions, optimizing your designs for minimal support, and continually refining your techniques can lead to significant improvements in both the efficiency and quality of your prints. Remember, the key lies in patience, practice, and a willingness to learn and adapt. As you grow in your 3D printing endeavors, each print becomes not just an object but a testament to your craftsmanship and dedication to this remarkable form of creation.
FAQs
- What are the easiest support materials to remove?
Soluble supports are the easiest but require specific materials and printers. - Can you reuse 3D print supports?
While reusing supports isn’t typical, recycling them is possible and eco-friendly. - How long should you wait before removing supports?
It’s best to wait until the print has completely cooled to avoid deformation. - Are there any software tools that help with support removal?
Yes, some slicing software offers settings to make supports easier to remove. - What’s the most common mistake when removing supports?
Rushing the process and not using the right tools, leading to damage.