Eco-Friendly Ways to Clean Your 3D Printer Nozzle: Safe and Effective Methods
Have you ever noticed your 3D prints losing their finesse, showing signs of poor quality, or even failing altogether? Often, the culprit is a clogged nozzle. But fear not, eco-warriors and tech enthusiasts! Today, we’re diving into the world of eco-friendly ways to clean your 3D printer nozzle, ensuring your prints are not just flawless, but also kind to Mother Earth.
Understanding Your 3D Printer Nozzle
At the heart of every 3D printing endeavor lies the printer nozzle – a critical component that often doesn’t get the spotlight it deserves. This tiny but mighty part of your printer plays a pivotal role in determining the success of your prints. Here’s why understanding your 3D printer nozzle is crucial:
The Gatekeeper of Filament Flow
Imagine the nozzle as the gatekeeper of your 3D printer. It’s the final checkpoint for the filament before it becomes part of your creation. The nozzle controls the flow, speed, and deposition of the filament on the print bed. Its diameter directly influences the resolution of your print; smaller nozzles can produce finer details, while larger ones are better for faster, bulkier prints.
Material Matters
Nozzles come in various materials, each suited to different types of filament. Standard brass nozzles are great for basic filaments like PLA and ABS. However, for abrasive materials like carbon fiber-reinforced filament, you’ll need a nozzle made from tougher stuff, like hardened steel, to prevent wear and tear.
The Perfect Temperature
The nozzle also acts as a mediator for temperature. It heats the filament to the perfect melting point, ensuring smooth extrusion and adhesion. Too cold, and the filament won’t flow properly; too hot, and you may end up with blobs or strings ruining your print’s surface.
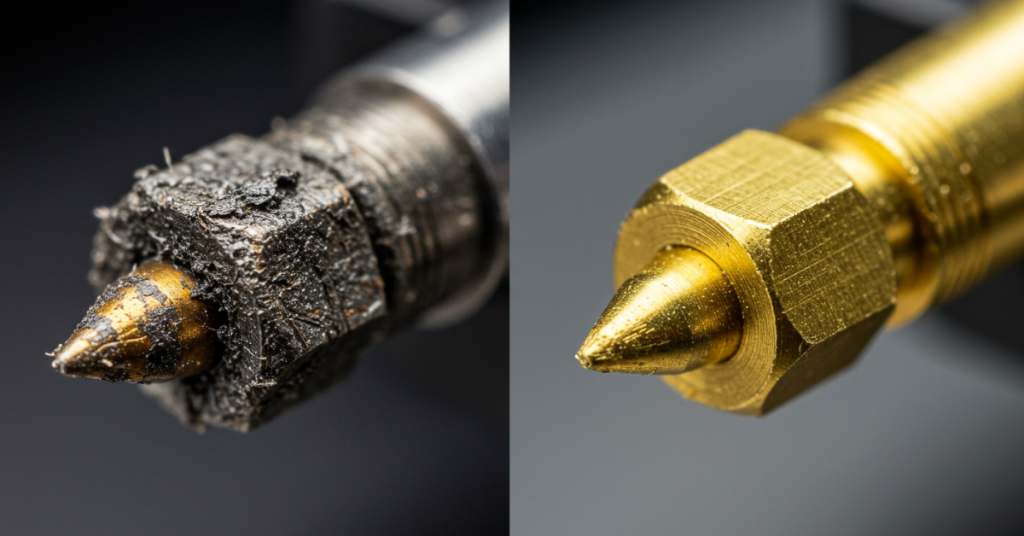
Precision and Clogging
A clean and well-maintained nozzle is key to precision in 3D printing. Over time, filament residues can accumulate inside the nozzle, leading to clogs. These blockages disrupt the flow of filament, resulting in uneven extrusion and failed prints. Regular cleaning and maintenance are essential to keep your nozzle in optimal condition and your prints looking their best.
A Symphony of Settings
Finally, understanding your nozzle means knowing how to adjust your printer’s settings to match its characteristics. The nozzle diameter, material, and condition affect how you should set your printing temperature, speed, and retraction settings. Mastering these adjustments can significantly improve your print quality and success rate.
The 3D printer nozzle might be small, but its impact on the printing process is monumental. By understanding and taking care of your nozzle, you’re setting the stage for consistently successful and high-quality 3D prints. Whether you’re a hobbyist or a professional, giving your nozzle the attention it deserves can dramatically enhance your 3D printing experience.
👉 Want to keep your prints clean, consistent, and clog-free?
Start with the right tools and gear here:
👉 View Recommended 3D Printing Gear
Signs Your Nozzle Needs Cleaning
Let’s delve deeper into the signs indicating that your 3D printer nozzle needs cleaning. Recognizing these signs early can save you from a multitude of printing problems and ensure the longevity and efficiency of your 3D printer. Understanding when your 3D printer nozzle needs cleaning is key to maintaining optimal print quality and printer performance. Here are some telltale signs that it’s time to give your nozzle some TLC:
Inconsistent Extrusion
One of the first signs of a nozzle needing attention is inconsistent extrusion. If you notice that your filament is not being laid down smoothly or there are gaps in the layers, it might be due to partial blockages in the nozzle. These blockages disrupt the steady flow of filament, leading to uneven layers and poor print quality.
Poor Surface Finish
A clean nozzle is essential for achieving a smooth and aesthetically pleasing surface finish on your prints. If your finished objects have rough surfaces, blobs, or zits, it could be a sign that your nozzle is partially clogged, affecting the precision of filament deposition.
Unexplained Print Failures
When prints fail for no apparent reason, such as layers not adhering properly or the print not sticking to the bed, it’s worth checking the nozzle. A dirty or clogged nozzle can prevent the filament from extruding correctly, leading to adhesion problems and failed prints.
Increased Filament Grinding
If you hear a clicking sound from the extruder or notice that the filament is being ground down, it could indicate that the nozzle is clogged. The extruder’s gears might be trying to push filament through a blocked nozzle, resulting in the filament being chewed up instead of extruded.
Changes in Required Extrusion Temperature
Needing to increase the temperature to achieve the same extrusion quality as before can be a subtle sign that your nozzle is dirty. Residue buildup inside the nozzle can change its thermal properties, requiring higher temperatures for the filament to flow properly.
Difficulty Loading or Unloading Filament
If loading or unloading filament becomes unusually difficult, it may be due to residue inside the nozzle creating friction. This resistance can make it hard to insert or remove filament, indicating it’s time for a cleaning.
Recognizing these signs and taking action to clean your nozzle can greatly improve your 3D printing results. Regular maintenance not only ensures consistent print quality but also extends the life of your printer. Stay vigilant for these symptoms, and your nozzle will thank you with flawless prints every time.
The Impact of a Dirty Nozzle on Print Quality
Let’s explore in more detail how a dirty or clogged nozzle can negatively impact your 3D prints. Understanding these effects can help highlight the importance of regular nozzle maintenance. A dirty nozzle can significantly compromise the quality and success of your 3D prints. Below are key ways in which a clogged or dirty nozzle affects print quality:
- Poor Layer Adhesion
One of the primary consequences of a dirty nozzle is poor layer adhesion. When the nozzle is partially clogged, it can’t extrude enough filament, leading to weak layers that don’t stick well to each other. This results in prints that are brittle and easily breakable.
- Under-Extrusion
Under-extrusion occurs when the printer fails to supply the correct amount of filament. A dirty nozzle, with its partial blockages, restricts the flow of filament, leading to thin, missing, or incomplete layers. This not only weakens the structural integrity of the print but also affects its aesthetic appearance.
- Over-Extrusion
Conversely, a nozzle that’s beginning to clog can sometimes lead to over-extrusion. This happens when the printer compensates for resistance in the nozzle by pushing out too much filament whenever it can. The result is excess material on the print, causing blobs, zits, and other surface imperfections.
- Stringing and Oozing
Dirty nozzles can lead to stringing and oozing, where thin strands of filament are dragged across non-printing sections, or excess filament leaks out while moving between print areas. These issues arise from inconsistent flow due to partial blockages, making prints look messy and requiring post-processing cleanup.
- Nozzle Strikes and Print Disruptions
Severe clogs can cause the nozzle to drag across the print, potentially knocking it off the build plate or causing layer shifts. These nozzle strikes are not just disruptive but can ruin a print partway through, wasting time and materials.
- Reduced Detail and Accuracy
For prints requiring high detail and precision, a clean nozzle is essential. A dirty nozzle affects the printer’s ability to accurately deposit filament, blurring details and distorting dimensions. This is particularly problematic for models with intricate textures or fine features.
- Increased Wear and Potential Damage
Lastly, operating with a dirty nozzle can put additional strain on your printer’s extruder and drive mechanism. Over time, this can lead to wear and even damage, potentially resulting in costly repairs or replacements.
The condition of your 3D printer nozzle plays a pivotal role in the outcome of your prints. A dirty or clogged nozzle can lead to a wide range of print quality issues, from aesthetic imperfections to structural weaknesses. Regularly cleaning your nozzle and performing maintenance checks can significantly improve your printing results, ensuring consistent, high-quality prints every time.
Post-Cleaning Maintenance
Preparing properly for the cleaning process of your 3D printer nozzle is crucial for both the effectiveness of the cleaning and the safety of both the user and the printer. Here’s a detailed breakdown of the steps and considerations involved in getting ready for this task.
Safety First: What You Need to Know
Before embarking on any maintenance task, prioritizing safety is paramount. Ensure your 3D printer is turned off and unplugged to avoid any risk of electrical shock or burns from the heated parts. Allow the printer and especially the nozzle to cool down to a safe temperature to prevent burns.
Focusing on safety is paramount when cleaning your 3D printer nozzle, as overlooking safety precautions can lead to accidents, including burns, cuts, or even damage to your printer. Here’s an in-depth look at what you need to know to ensure a safe cleaning process.
Handling the Printer and Nozzle
- Electric Safety: Always turn off and unplug your 3D printer before attempting any maintenance tasks. This precaution prevents the risk of electric shock and reduces the likelihood of accidentally heating the nozzle or moving the printer parts.
- Thermal Safety: The nozzle and surrounding components can retain heat for a significant period after use. Wear heat-resistant gloves when handling these parts to avoid burns. Allow the printer to cool down completely before starting the cleaning process.
Using Tools Safely
- Precision Tools: When using needles, acupuncture needles, or other sharp tools to clean the nozzle, handle them with care to avoid injury. These tools should be inserted gently into the nozzle to prevent damage to the nozzle or injury to yourself.
- Chemical Safety: If using biodegradable solvents or any chemical cleaners, ensure you’re working in a well-ventilated area. Wear protective gloves and possibly goggles to protect your skin and eyes from irritation. Always follow the manufacturer’s instructions for use and disposal.
Environmental Considerations
- Ventilation: Cleaning solvents can emit fumes that are harmful if inhaled in enclosed spaces. Ensure adequate ventilation in your workspace by opening windows or using fans to circulate air.
- Material Disposal: Dispose of any used solvents, cloths, or filaments according to local regulations. Proper disposal ensures that hazardous materials do not harm the environment or pose a risk to people.
Ergonomic Practices
- Comfortable Workspace: Set up your cleaning station on a stable, flat surface at a comfortable height. This setup reduces strain on your back and arms, making the cleaning process more comfortable and safer.
Knowledge and Preparation
- Understand the Process: Before starting, familiarize yourself with the cleaning method you plan to use. Understanding each step can prevent mistakes that might lead to accidents or damage.
- Emergency Plan: Know what to do in case of an accident, such as a chemical spill or a burn. Having a first aid kit nearby and knowing how to use it is crucial.
Machine Safety
- Respect Your Printer’s Limits: Avoid disassembling your printer beyond what is necessary for cleaning the nozzle. Unnecessary disassembly can lead to parts being reassembled incorrectly, which might cause the printer to operate unsafely.
- Reassembly Checks: After cleaning and reassembling your nozzle and any other parts, double-check that everything is correctly and securely in place. This check prevents loose parts from causing accidents or damage during printing.
By prioritizing safety first, you ensure not only your well-being but also the longevity and optimal performance of your 3D printer. These precautions might seem time-consuming, but they are essential for maintaining a safe and effective workspace for 3D printing activities.
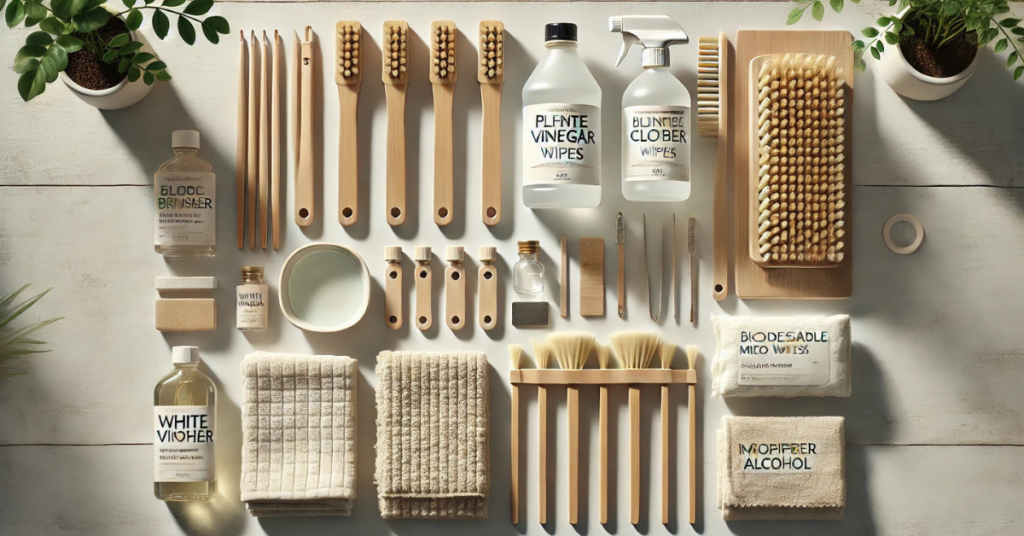
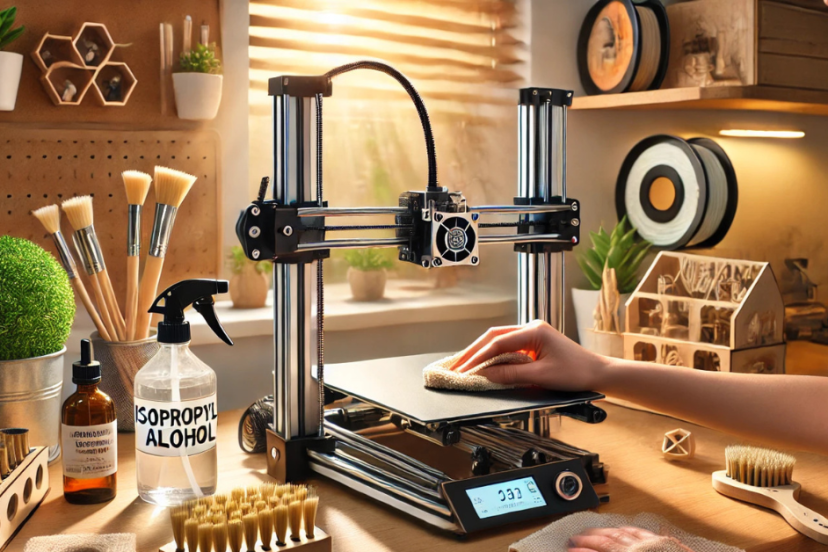
Gather Your Tools and Materials for Eco-Friendly Cleaning
When embarking on the eco-friendly cleaning of your 3D printer nozzle, selecting the right tools and materials is essential. These items should effectively remove debris and buildup without harming the environment or compromising the integrity of your printer. Here’s a deeper look at what you might need for an eco-friendly cleaning process.
- Biodegradable Solvents
- Purpose: Used for soaking the nozzle to dissolve or loosen the filament residue without harsh chemicals. Examples: Solutions made from natural, plant-based ingredients. Look for products specifically labeled as biodegradable and safe for use with 3D printer components.
- Usage Tips: Ensure the solvent is compatible with your nozzle’s material to avoid damage. Always use in a well-ventilated area and follow the manufacturer’s instructions for soaking times and disposal.
- Precision Tools
- Needles and Acupuncture Needles: Fine needles are perfect for gently removing clogs from within the nozzle. Acupuncture needles, in particular, are designed to be both strong and thin, making them ideal for this delicate task.
- Tweezers: Precision tweezers can be used to remove any loose debris from the nozzle tip and the exterior parts of the extruder assembly.
- Cleaning Filament
- Purpose: Specially designed filaments that, when heated and passed through the nozzle, help remove residue and clean the internal surfaces.
- Eco-Friendly Options: Look for cleaning filaments made from biodegradable materials to ensure your cleaning process remains environmentally friendly.
- Usage Tips: Follow the temperature guidelines for the cleaning filament, as some may require different temperatures to be effective.
- Mechanical Cleaning Tools
- Brushes: Soft-bristled brushes made from natural materials can be used to clean the exterior of the nozzle and the extruder assembly. These are useful for removing dust and filament fragments without scratching the surfaces.
- Pipe Cleaners: Flexible and soft, pipe cleaners can gently clean the nozzle’s exterior and can sometimes be carefully inserted into the lower part of the nozzle to remove loose debris.
- Protective Gear
- Gloves: Wear gloves to protect your hands, not just from the heat, but also from any solvents or debris. Biodegradable or compostable gloves are available for those seeking the most eco-friendly options.
- Safety Goggles: When using any form of solvent, safety goggles can protect your eyes from splashes.
- Heating Source
- Purpose: Some eco-friendly cleaning methods involve heating the nozzle to melt away the clogs.
- Tools: A standard 3D printer’s heating capability is usually sufficient, but for detached nozzle cleaning, a safe, controlled heat source like a heat gun can be used, with caution to avoid overheating and damaging the nozzle.
👉 Pro Tip: Using the right tools makes nozzle cleaning easier and prevents long-term damage.
👉 See the essential tools we recommend for maintenance:
👉 View Recommended 3D Printing Gear
Best Practices for Eco-Friendly Cleaning
- Minimize Waste: Use tools and materials that can be reused or recycled to reduce waste. For example, metal needles and tweezers can be cleaned and reused multiple times.
- Responsible Disposal: Properly dispose of any waste materials, especially solvents, in accordance with local regulations to minimize environmental impact.
- Efficiency: Aim for cleaning methods that use less energy and resources. For instance, choosing a cleaning filament that works at a lower temperature can save electricity.
By choosing eco-friendly tools and materials for cleaning your 3D printer nozzle, you not only protect the environment but also maintain the efficiency and longevity of your printer. These methods are not just gentle on the planet but also effective in keeping your printer in top condition, ensuring the quality of your prints remains high.
Eco-Friendly Cleaning Methods
Eco-friendly cleaning methods for your 3D printer nozzle focus on sustainability and minimizing environmental impact while maintaining or restoring optimal printer performance. These methods leverage less harmful substances and techniques that are effective yet gentle on both your printer and the planet. Here’s a more detailed exploration of various eco-friendly cleaning techniques.
- Cold Pull Technique
- Description: The cold pull technique involves using filament to remove clogs from the nozzle by heating the nozzle, inserting filament, then cooling it down and pulling it out, hopefully with any clogged material attached.
- Materials Needed: High-quality nylon filament or any other filament with a wide temperature range and good adhesive properties to clogs.
Procedure:
- Heat the nozzle to the filament’s recommended printing temperature.
- Insert the filament manually until you feel resistance.
- Cool the nozzle down to a temperature where the filament remains solid but pliable.
- Pull the filament out with a firm, steady force. The goal is to have the filament bond to the clog and pull it out as you remove the filament.
- Why It’s Eco-Friendly: This method does not require chemicals or produce waste beyond the filament used, which can be minimized with careful application.
- Use of Biodegradable Solvents
- Description: Biodegradable solvents can dissolve or loosen the filament residue inside the nozzle without the environmental impact of harsh chemicals.
- Materials Needed: Biodegradable cleaning solutions designed for 3D printers or compatible with the filament material.
Procedure:
- Detach the nozzle, if possible, and place it in a small container.
- Cover the nozzle with the solvent and let it soak for the recommended time, often several hours.
- Remove the nozzle and clean off loosened material with a soft brush or rinse with water.
- Why It’s Eco-Friendly: These solvents are designed to break down safely in the environment, reducing the risk of pollution.
- Mechanical Cleaning with Brushes and Needles
👉 Dealing with stubborn clogs inside your nozzle?
A precision cleaning kit makes it easy to clear blockages without damage:
👉 Check current price on Amazon: Nozzle Cleaning Kit
- Description: Using mechanical tools like brushes or needles to manually remove debris from the nozzle.
- Materials Needed: Fine needles (like acupuncture needles) and soft, natural-bristle brushes.
Procedure:
- Heat the nozzle to a low temperature that softens the filament without making it too liquid.
- Carefully insert the needle into the nozzle to dislodge any clogs.
- Use the brush to gently clean the outside of the nozzle and any accessible parts of the interior.
- Why It’s Eco-Friendly: This method avoids chemicals entirely, relying on manual removal of clogs, and the tools can be reused multiple times.
- Heating and Wiping
- Description: Applying heat directly to the nozzle to melt clogs, then wiping away the residue.
- Materials Needed: Heat gun or hairdryer (for detached nozzles), heat-resistant gloves, and lint-free cloths.
Procedure:
- Apply heat to the nozzle carefully to melt the clogged material without overheating.
- Wipe away the softened material with a cloth, being careful to avoid burns.
- Why It’s Eco-Friendly: This method uses physical removal of clogs without chemicals, though it does require energy to heat the nozzle.
- Ultrasonic Cleaning
- Description: Using an ultrasonic cleaner with water or a biodegradable solvent to clean the nozzle.
- Materials Needed: Ultrasonic cleaner and biodegradable cleaning solution if not using plain water.
Procedure:
- Place the detached nozzle in the ultrasonic cleaner filled with water or a mild, eco-friendly cleaning solution.
- Run the cleaner according to the manufacturer’s instructions, typically for a few minutes.
- Why It’s Eco-Friendly: Ultrasonic cleaners are efficient and effective, using sound waves to dislodge debris. When used with water or eco-friendly solutions, they minimize chemical use and waste.
Best Practices for Eco-Friendly Nozzle Cleaning
- Regular Maintenance: Prevent severe clogs by incorporating eco-friendly cleaning routines into your regular maintenance schedule.
- Minimize Waste: Use the least amount of material necessary for cleaning and dispose of any waste responsibly.
- Energy Efficiency: When using methods that require electricity, such as heating the nozzle or using an ultrasonic cleaner, be mindful of energy consumption. Optimize the use of these devices by cleaning multiple items at once, if possible.
Eco-friendly cleaning methods for 3D printer nozzles offer a responsible way to maintain your equipment without compromising environmental values. By choosing sustainable practices, you ensure that your 3D printing hobby or profession remains in harmony with eco-conscious goals.

Understanding Biodegradable Solvents
The use of biodegradable solvents for cleaning 3D printer nozzles represents an environmentally friendly approach to maintaining your printer. These solvents are designed to dissolve or loosen the filament residue inside the nozzle without the harsh effects associated with traditional chemical cleaners. Biodegradable solvents are formulated from substances that break down naturally into non-toxic components when exposed to the environment. They are derived from renewable resources, such as plant-based oils and natural esters, which are not only effective in cleaning but also minimize harm to ecosystems. Let’s delve deeper into how biodegradable solvents work, their benefits, and best practices for their use.
How They Work
These solvents act on the organic compounds present in filament residues, breaking them down into smaller, less adhesive molecules. This process makes it easier to remove the residues from the nozzle, either by dissolving them directly into the solvent or loosening them for mechanical removal.
Benefits of Biodegradable Solvents
- Environmental Safety: These solvents decompose into harmless substances, reducing pollution and protecting water sources and soil from contamination.
- Health and Safety: Less hazardous to use, biodegradable solvents are generally safer for individuals, reducing the risk of skin irritation, respiratory issues, and other health concerns associated with more toxic chemicals.
- Effectiveness: Despite being less aggressive than traditional solvents, biodegradable options can be highly effective at breaking down common types of filament residues found in 3D printer nozzles.
Best Practices for Using Biodegradable Solvents
Choosing the Right Solvent
- Compatibility: Ensure the solvent is compatible with both the nozzle material and the type of filament residue you’re dealing with. Some solvents may be more effective with certain plastics or metals.
- Quality: Opt for high-quality, specifically designed biodegradable solvents for 3D printing applications to ensure the best results and safety for your equipment.
Using Solvents Safely and Effectively
- Ventilation: Work in a well-ventilated area to avoid inhaling any fumes, even though biodegradable solvents are less toxic.
- Protective Gear: Wear gloves and possibly goggles to protect your skin and eyes from splashes or prolonged exposure.
- Soaking Time: Follow the manufacturer’s recommendations for soaking times. Leaving the nozzle in the solvent for the right amount of time is crucial for effective cleaning without damaging the nozzle.
- Disposal: Dispose of used solvents according to local environmental regulations. Even biodegradable chemicals should be disposed of responsibly to ensure they break down properly without causing harm.
Cleaning Process
- Detachment: If possible, remove the nozzle from the printer to ensure thorough cleaning.
- Soaking: Place the nozzle in a small container with enough solvent to cover it completely. Allow it to soak for the recommended period.
- Agitation: Gently agitate the container occasionally to help dislodge the residues.
- Rinsing: After soaking, remove the nozzle and rinse it with clean water (if the solvent manufacturer recommends rinsing) to remove any remaining solvent and loosened residue.
- Drying: Allow the nozzle to dry completely before reattaching it to the printer.
The use of biodegradable solvents for cleaning 3D printer nozzles offers an effective, environmentally friendly alternative to traditional cleaning chemicals. By selecting the right solvent, using it properly, and following safety and disposal guidelines, you can maintain your printer’s performance while minimizing your environmental footprint. This approach aligns with the broader goals of sustainable practices and eco-consciousness in the 3D printing community.
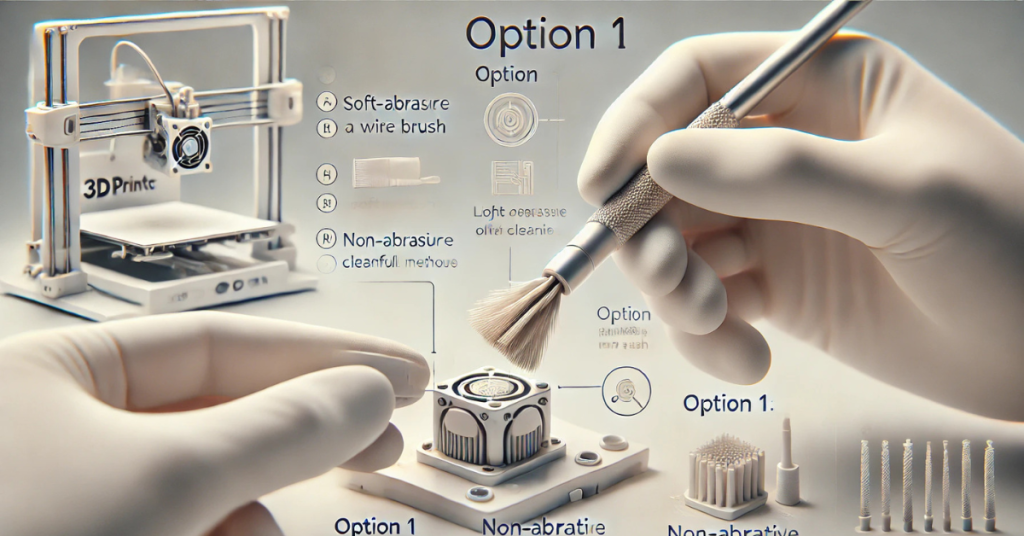
Mechanical Cleaning Techniques Overview
Mechanical cleaning techniques for 3D printer nozzles focus on physically removing clogs and residues without the use of chemicals. These methods are highly effective, especially for immediate clog removal and maintenance of nozzle integrity. Mechanical cleaning involves using tools to directly extract or dislodge filament material that has hardened inside the nozzle. This approach is often preferred for its simplicity, immediacy, and minimal environmental impact. Let’s delve deeper into the mechanical methods, including tools and step-by-step procedures for ensuring a clean and efficient nozzle.
Tools Required
- Needles or Acupuncture Needles: Fine, sharp needles that can penetrate the nozzle opening to remove clogs.
- Tweezers: Precision tweezers can be used to pull out softened filament residues from the nozzle tip.
- Wire Brushes: Small, soft-bristled wire brushes (often brass) are effective for cleaning the exterior of the nozzle and gently scrubbing the interior surface without causing damage.
- Pipe Cleaners: Flexible and soft, ideal for delicate cleaning around and inside the nozzle, especially after heating it to soften the residue.
Step-by-Step Mechanical Cleaning Process
- Preparation:
– Ensure the printer is turned off and cooled down.
– If possible, remove the nozzle from the printer to make cleaning easier and more thorough. - Initial Inspection:
– Examine the nozzle closely to identify the location and extent of the clogs or residue. - Heating (Optional):
– If residues are hard and difficult to remove, consider carefully heating the nozzle to soften them. This can be done by reattaching the nozzle to the printer and heating it to a moderate temperature or using a heat gun with caution. - Using Needles:
– Insert a fine needle or acupuncture needle into the nozzle tip. Gently move the needle around and in and out to dislodge any clogs.
– Be careful not to apply too much force, which could damage the interior of the nozzle. - Exterior Cleaning:
– Use a wire brush to clean the outer surface of the nozzle, removing any filament residues that may affect heat transfer and performance. - Interior Scrubbing:
– For a more thorough interior cleaning, gently insert a pipe cleaner if the diameter allows. Rotate and move it back and forth to scrub the inside walls of the nozzle. - Final Checks:
– Inspect the nozzle again to ensure all residues have been removed. You may need to repeat some steps for stubborn clogs.
– If the nozzle was removed, ensure it’s completely dry and free of debris before reattaching it to your printer.
Best Practices for Mechanical Cleaning
- Gentle Handling: Always use a gentle touch to avoid damaging the nozzle. The interior of a nozzle can be delicate, and scratches or dents can affect print quality.
- Regular Maintenance: Incorporating mechanical cleaning into your regular maintenance routine can prevent severe clogs and prolong the life of your nozzle.
- Safety Precautions: Wear protective gloves when handling the hot nozzle or sharp tools to avoid injuries.
- Tool Maintenance: Keep your cleaning tools in good condition. Clean and dry them after use to prevent rust or deterioration.
Mechanical cleaning techniques offer a straightforward and eco-friendly option for maintaining your 3D printer nozzle. By using the right tools and following a careful process, you can effectively remove clogs and residues, ensuring your nozzle remains in optimal condition for high-quality printing. Regular mechanical cleaning, combined with proper printer operation and maintenance, can significantly extend the life of your nozzle and improve your 3D printing results.
Understanding the Heat Treatment Method
The Heat Treatment Method for cleaning 3D printer nozzles is a technique that utilizes controlled heat to soften and remove filament residues inside the nozzle. This method is particularly effective for dissolving stubborn clogs that mechanical cleaning techniques cannot easily remove. The heat treatment takes advantage of the fact that most filament materials used in 3D printing, such as PLA, ABS, PETG, and others, have specific melting points. By heating the nozzle to a temperature that softens or melts the residue without damaging the nozzle itself, it becomes easier to remove the accumulated filament. Let’s explore this method in greater detail, including its benefits, how it works, and the steps to safely and effectively perform a heat treatment on your 3D printer nozzle.
Benefits of Heat Treatment
- Effectiveness: Efficient at softening and removing a wide range of filament types.
- Non-Abrasive: Minimizes physical stress on the nozzle, preserving its integrity.
- Accessibility: Can reach internal areas of the nozzle that are difficult to clean mechanically.
Tools and Materials Needed
- Heat Source: A soldering iron, heat gun, or the printer’s own heating function.
- Cleaning Tools: Needles, tweezers, or brushes for removal of softened material.
- Protective Gear: Heat-resistant gloves to protect your hands from burns.
Step-by-Step Heat Treatment Process
- Safety Precautions:
– Ensure the printer is turned off and unplugged before beginning.
– Wear heat-resistant gloves to protect your hands from high temperatures. - Heating the Nozzle:
– Using the Printer’s Heater: Reattach the nozzle (if it was removed) and heat it using the printer’s control to just above the melting point of the residue material. This approach offers precise temperature control.
– Using an External Heat Source: If using a soldering iron or heat gun, carefully apply heat to the exterior of the nozzle. Aim for a temperature that is hot enough to soften the filament without damaging the nozzle. Avoid overheating as it can alter the metal properties of the nozzle or damage nearby components. - Removing the Filament Residue:
– Once the filament is softened or melted, use the cleaning tools (needles, tweezers, or brushes) to gently remove the material. If using a needle, insert it into the nozzle tip to dislodge internal clogs.
– For external residues, a small brush can be used to sweep away melted filament from the nozzle surface. - Cooling Down:
– Allow the nozzle to cool down naturally before handling it further. This step is crucial for safety and to prevent damage to the nozzle or printer. - Final Inspection and Cleaning:
– After the nozzle has cooled, perform a final inspection to ensure all residue has been removed. If necessary, repeat the heat treatment for persistent clogs.
– Consider performing a cold pull (if applicable) after heat treatment for a comprehensive cleaning.
Best Practices and Considerations
- Temperature Control: Be mindful of the temperature used during the heat treatment. Excessive heat can damage the nozzle or alter its internal geometry, affecting print quality.
- Repetitive Use: Repeatedly applying high heat to the nozzle can cause wear over time. Use this method as part of a balanced maintenance routine that includes mechanical cleaning.
- Compatibility: Ensure the method is compatible with your nozzle material. Some metals may have lower tolerance for direct heating than others.
The Heat Treatment Method is a powerful tool in your 3D printer maintenance arsenal, especially for dealing with difficult clogs. By applying controlled heat to soften and remove filament residues, this method can restore your nozzle to optimal condition, ensuring consistent print quality. However, it’s important to use this method judiciously, complementing it with mechanical cleaning techniques and adhering to safety guidelines to protect both your printer and yourself.
Post-Cleaning Maintenance Overview
After successfully cleaning your 3D printer nozzle, engaging in post-cleaning maintenance is crucial to ensure the longevity of your nozzle and maintain optimal printing performance. This phase is about taking preventative measures to reduce the likelihood of future clogs and ensuring the printer is in the best possible condition for your next project. Post-cleaning maintenance involves a series of checks and tasks following the cleaning of the nozzle to ensure everything is set up correctly for continued use. It’s about reassessing the printer’s condition, reassembling parts if necessary, and implementing strategies to minimize future issues. Here’s a deeper look into the steps and best practices involved in post-cleaning maintenance.
- Reassembly and Tightening
- After cleaning, if the nozzle or any other parts were removed, carefully reassemble them. Ensure the nozzle is screwed back in place firmly but not overtightened, as this could strip the threads or damage the heater block.
- For printers with a Bowden setup, make sure the tube is securely fastened to prevent filament leakage.
- Calibration Checks
- Once the nozzle is back in place, perform calibration checks. This may include leveling the print bed and ensuring the nozzle height is correctly set to avoid scraping against the bed or being too far, which can affect adhesion and print quality.
- Flow Rate and Temperature Adjustments
- After a thorough cleaning, the flow characteristics of the nozzle might slightly change, especially if there was significant buildup removed. Conduct test prints to check if adjustments to the flow rate or temperature settings are needed to maintain optimal print quality.
- Filament Quality and Storage
- Use high-quality filament to reduce the risk of future clogs. Poor quality filament can contain impurities that contribute to nozzle buildup.
- Store filament correctly to prevent moisture absorption, which can lead to bubbling, popping, and further clogging issues during printing.
- Regular Maintenance Schedule
- Implement a regular maintenance schedule for your 3D printer. This includes not only the nozzle but also other critical components like the print bed, belts, and extruder assembly. Regular checks can help identify potential issues before they become significant problems.
- Use of Cleaning Filament
- Consider running cleaning filament through the printer after a set number of prints or when switching between different types of filament. This practice can help keep the nozzle clear and extend the intervals between deep cleanings.
Best Practices for Post-Cleaning Maintenance
- Documentation: Keep a log of maintenance activities, including nozzle cleanings, to track the health of your printer and predict when future maintenance might be needed.
- Gentle Handling: Be cautious not to damage the nozzle or any components during reassembly. This includes avoiding cross-threading and ensuring all connections are secure but not overly tightened.
- Educate Yourself: Stay informed about the best maintenance practices for your specific printer model. Manufacturer guidelines can provide valuable insights into keeping your printer running smoothly.
Post-cleaning maintenance is an essential part of 3D printer care, crucial for extending the life of your nozzle and maintaining the quality of your prints. By following these steps and best practices, you can ensure that your printer remains in top condition, ready for whatever project comes next. Regular maintenance not only prevents future problems but also enhances your overall 3D printing experience, making it more enjoyable and less frustrating.
Regular Maintenance Tips for 3D Printers
Regular maintenance of your 3D printer, especially focusing on the nozzle, is key to ensuring consistent print quality and prolonging the lifespan of your printer. By adopting a routine maintenance schedule, you can prevent many common printing issues. Here’s a deeper exploration of regular maintenance tips that will help keep your 3D printer in optimal condition.
- Nozzle Checks
- Visual Inspection: Regularly inspect the nozzle for signs of wear, damage, or clogging. Look for any deformities or residue buildup that could affect print quality.
- Clean Regularly: Even if not visibly clogged, perform routine cleaning of the nozzle to remove any internal buildup. This could be after a certain number of printing hours or when switching materials.
- Bed Leveling and Surface Maintenance
- Level the Bed: Frequently check and adjust the bed leveling. An uneven bed can cause adhesion problems, affecting the quality of prints.
- Clean the Bed: Remove any adhesive residue, filament scraps, or dust from the print bed. Use isopropyl alcohol for a thorough cleaning, ensuring a clean surface for each print.
- Filament Care
- Dry Filament: Store filament in a dry, cool place to prevent moisture absorption, which can lead to printing issues like bubbling or poor layer adhesion. Consider using a filament dryer if your environment is particularly humid.
- Quality Check: Use high-quality filament to reduce the risk of clogs and ensure consistent extrusion.
- Belt Tension
- Adjust as Needed: Check the tension of your printer’s belts regularly. Loose belts can lead to inaccurate prints, while overly tight belts can cause wear on the motors and bearings.
- Listen for Noises: Any unusual sounds during printing can indicate issues with belt tension or alignment.
- Lubrication
- Moving Parts: Apply appropriate lubricants to the printer’s moving parts, such as rods and bearings, to ensure smooth operation. Use lubricants recommended by the printer manufacturer to avoid attracting dust or causing buildup.
- Firmware and Software Updates
- Stay Updated: Regularly check for and install firmware updates from your printer’s manufacturer. These updates can improve printer performance, introduce new features, and fix known issues.
- Software Checks: Keep your slicing software up to date to take advantage of the latest improvements and compatibility fixes.
- Extruder Maintenance
- Check for Wear: Inspect the extruder for signs of wear or damage, particularly the gear teeth, which can wear down over time and affect filament grip.
- Clean the Gear: Remove any filament particles from the extruder gear to maintain a strong grip on the filament.
Best Practices for Routine Maintenance
- Create a Schedule: Based on your printing frequency, develop a maintenance schedule. For heavy users, weekly checks might be necessary, while monthly checks may suffice for casual users.
- Keep Records: Document each maintenance activity, including what was done and when. This can help you track the health of your printer and anticipate future needs.
- Be Proactive: Don’t wait for problems to arise. Proactive maintenance can prevent many common issues and extend the life of your printer.
Regular maintenance is crucial for the longevity and performance of your 3D printer. By following these tips and establishing a routine maintenance schedule, you can ensure that your printer remains reliable and produces high-quality prints. Remember, spending a little time on maintenance can save you a lot of time and frustration in troubleshooting issues later on.
Signs That Indicate Nozzle Replacement Is Needed
Knowing when to replace your 3D printer nozzle is essential for maintaining the quality of your prints and the overall health of your printer. The nozzle, being in direct contact with the filament during the printing process, is prone to wear and tear over time, especially when printing with abrasive materials. Here’s a deeper look into the signs that indicate it’s time to replace your nozzle and the considerations to keep in mind.
- Decreased Print Quality
- If you notice a consistent decline in print quality that cannot be resolved through calibration, cleaning, or other maintenance efforts, it might be due to nozzle wear. Symptoms include poor surface finish, inaccurate extrusion, and difficulty with detailed parts.
- Visible Physical Damage
- Inspect the nozzle for any visible signs of damage, such as a deformed tip or cracks. Even slight deformations can significantly impact print quality by altering the shape and direction of the extruded filament.
- Inconsistent Extrusion
- A worn nozzle can lead to inconsistent extrusion, evident in prints with uneven layers, under-extrusion, or over-extrusion in parts of the model. This inconsistency often results from uneven wear inside the nozzle, affecting the flow rate of the filament.
- Frequent Clogging
- While clogs can often be cleaned, a nozzle that becomes clogged frequently and requires constant maintenance may have internal wear or damage that makes it more susceptible to clogging. This is especially true if you’re using filaments known to be less abrasive.
- Using Abrasive Filaments
- Regular use of abrasive filaments like carbon fiber-filled, metal-filled, or glow-in-the-dark materials accelerates nozzle wear. If you frequently print with these materials, plan for more frequent nozzle replacements as part of your maintenance routine.
Considerations for Replacing Your Nozzle
Choosing the Right Nozzle
- Material: Consider upgrading to a nozzle made of harder materials, such as hardened steel or tungsten carbide, if you regularly print with abrasive filaments. These materials are more resistant to wear compared to standard brass nozzles.
Size and Shape
- Diameter: The choice of nozzle diameter depends on your printing needs. A smaller diameter (e.g., 0.2 mm or 0.4 mm) is better for detailed prints, while a larger diameter (e.g., 0.6 mm or 0.8 mm) allows for faster printing of larger, less detailed objects.
- Shape: Some nozzles are designed with specific geometries to improve print quality for particular applications, such as nozzles with a flat tip for smoother top layers.
Installation and Calibration
- After replacing your nozzle, it’s crucial to recalibrate your printer. This includes leveling the print bed and adjusting the nozzle height to ensure optimal print quality. Also, re-tune your temperature settings, as different materials may have slightly different thermal properties.
Nozzle replacement is a fundamental aspect of 3D printer maintenance that directly impacts print quality and printer performance. By being vigilant about the signs of wear and understanding when to replace your nozzle, you can ensure your prints remain high quality and your printer operates efficiently. Incorporating nozzle checks and replacements into your regular maintenance schedule will contribute significantly to the longevity and success of your 3D printing projects.
Documentation
If your printer requires disassembly beyond simply removing the nozzle, it can be helpful to take photos or notes during the disassembly process to aid in reassembly. By thoroughly preparing for the cleaning process, you can ensure a safe, effective, and efficient return to high-quality 3D printing. Proper preparation not only safeguards the printer and the user but also sets the stage for a successful maintenance session, ensuring your 3D printer continues to operate at its best.
👉 Ready to keep your printer running smoothly and avoid clogged nozzles?
The right tools can save time, reduce failed prints, and improve consistency.
👉 Explore the exact tools we recommend here:
👉 View Recommended 3D Printing Gear
Conclusion
Maintaining your 3D printer nozzle through eco-friendly methods is more than a practice in good printer stewardship—it’s a commitment to sustainability and environmental responsibility. By adopting the techniques outlined in this article, from biodegradable solvents to mechanical cleaning and heat treatment, we not only ensure our printers operate at their best but also contribute to a greener planet. The journey towards eco-friendly 3D printing is ongoing, with each small step making a significant impact. As we continue to innovate and share knowledge within our community, the future of 3D printing looks not only creative but also sustainable. Let’s commit to making eco-friendly nozzle maintenance a standard practice, proving that high-quality printing and environmental stewardship can go hand in hand.
FAQs
- How often should I clean my 3D printer nozzle?
The frequency of cleaning depends on how often you use your printer and the types of filament you use. As a general guideline, a light cleaning after every print job and a deep cleaning every 1-2 months is recommended. If you frequently use abrasive filaments, consider cleaning your nozzle more often. - Can I use any biodegradable solvent for cleaning?
Not all biodegradable solvents are suitable for cleaning 3D printer nozzles. It’s important to use solvents specifically recommended for 3D printing applications, as they are formulated to effectively dissolve filament residues without damaging the nozzle or other printer components. - What are the signs that I need to replace my nozzle?
Key signs include a noticeable decrease in print quality, frequent clogging, visible physical damage, or if cleaning no longer restores the nozzle’s performance. Additionally, using abrasive filaments regularly can accelerate nozzle wear, necessitating more frequent replacements. - Is it safe to clean the nozzle while it’s hot?
Cleaning a hot nozzle can be effective for removing filament residues, but it requires caution. Always wear heat-resistant gloves to protect your hands and ensure the printer is turned off to avoid electrical hazards. Be mindful of the temperature to avoid damaging the nozzle. - How can I prevent my nozzle from getting clogged?
To minimize clogging, use high-quality filaments, ensure proper filament storage to avoid moisture, regularly clean your nozzle following the eco-friendly methods discussed, and maintain optimal printing temperatures. Additionally, using a dust filter on your filament can help catch debris before it enters the nozzle.