Can you help me optimize my printer?
Yes, I can help you optimize your 3D printer! Optimizing a 3D printer involves adjusting settings, calibrating the hardware, and improving printing conditions to achieve better print quality, reduce errors, and enhance overall performance. Here’s a step-by-step guide to help you get the best results from your printer:
1. Calibrate Your Printer
Proper calibration is essential for getting consistent and high-quality prints. Here’s what you should calibrate:
- Bed Leveling:
- Ensure your print bed is level to ensure the first layer adheres well and is smooth. You can do this manually or use the printer’s automatic bed leveling feature if available.
- A properly leveled bed ensures the nozzle is the correct distance from the print bed across the entire surface.
- Extruder Calibration:
- Ensure the extruder is feeding the correct amount of filament. Calibrate your extruder steps/mm (E-steps) to ensure accurate extrusion. This involves measuring the amount of filament the extruder pushes out and adjusting the settings to match the actual movement.
- Z-Axis Offset:
- Set the Z-axis offset correctly to ensure the nozzle is at the right height from the bed. This is especially important for the first layer. A misaligned Z-axis can result in poor adhesion or a damaged print bed.
2. Optimize Print Speed and Layer Height
- Print Speed:
- The optimal print speed depends on your printer and filament, but in general, slower speeds improve print quality. Start with around 40-50mm/s and adjust based on results.
- For high-quality prints, especially with detailed models, use slower speeds like 20-30mm/s.
- Layer Height:
- The layer height directly impacts the resolution of your print. Use a 0.2mm layer height for standard prints, but for fine details, try using 0.1mm.
- A larger layer height (e.g., 0.4mm) can speed up prints but may result in less detail.
3. Temperature Settings
- Extruder Temperature:
- Ensure your extruder temperature is correctly set for the filament you’re using. For example, PLA typically prints at 190-210°C, while ABS and PETG need higher temperatures (around 220-250°C).
- If you’re printing flexible filaments like TPU, set the extruder temperature to 210-230°C to get smooth extrusion.
- Bed Temperature:
- Bed temperature helps with adhesion. For PLA, set the bed temperature to around 50-60°C. For ABS, use 90-110°C. For PETG, around 70-80°C works well.
4. Retraction Settings
- Retraction Distance and Speed:
- Fine-tune retraction distance (typically 1-3mm) and retraction speed (20-40mm/s) to avoid stringing or oozing.
- Reduce retraction settings for flexible filaments like TPU to avoid jams, typically around 1mm distance and a slower retraction speed.
- Retraction Minimum Travel:
- This setting controls the minimum travel distance before retraction kicks in. Set it to 1-3mm to ensure that retraction only happens when necessary.
5. Cooling Settings
- Cooling Fans:
- Cooling fans help the filament harden quickly after extrusion, especially for materials like PLA. Set cooling fans to 100% for PLA, 50-60% for PETG, and minimal for ABS and TPU.
- If you’re printing with flexible filaments like TPU, lower fan speeds (around 30-40%) can help maintain layer adhesion and prevent warping.
- Fan Speed for Layers:
- In slicer settings, ensure the cooling fan gradually increases after the first few layers. Avoid full fan cooling on the first layer to allow for better bed adhesion.
6. Improve Adhesion to the Print Bed
- Use a Heated Bed:
- A heated bed improves adhesion and reduces warping. Make sure your bed is at the right temperature for the filament you’re using.
- Adhesion Aids:
- If you’re having trouble with bed adhesion, try using glue sticks, hairspray, or a PEI sheet. These help create a better bond between the first layer and the bed.
- First Layer Settings:
- Slow down the first layer print speed to 50% and increase the first layer height slightly (e.g., 0.3mm) to help it stick better.
7. Check the Filament Quality
- Use High-Quality Filament:
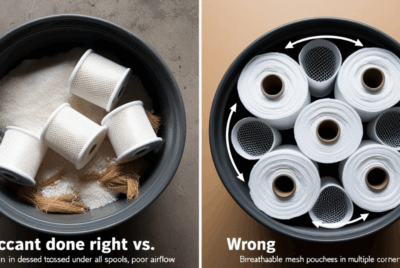
- Filament quality plays a significant role in print results. Use filament from reputable brands and store it properly (in airtight bags with desiccants) to avoid moisture absorption, which can lead to printing issues.
- Dry Filament:
- Moisture in filament can cause stringing, popping, and weak prints. If your filament has absorbed moisture, dry it in a filament dryer, oven, or food dehydrator at the recommended temperature.
8. Use the Right Slicer Settings
- Slicer Settings:
- Ensure you are using the correct slicer settings for your filament and printer. Some slicers, like Cura, have pre-configured profiles for specific materials, which can save time in finding optimal settings.
- Make use of advanced features in slicers like combing mode (keeps nozzle travel inside already printed areas) and Z-hop (lifts the nozzle slightly during travel moves to prevent dragging).
9. Maintain Your Printer
- Regular Maintenance:
- Clean and lubricate moving parts (rails, bearings) to reduce wear and tear.
- Check the nozzle for clogs and clean it regularly. A cold pull method can help clean out old filament and residue.
- Check the extruder gears for slippage, which can affect filament feeding.
- Ensure the motors and belts are properly calibrated to avoid any mechanical issues during printing.
10. Use Printer Enclosures (Optional)
- Why It Helps: Printing in an enclosure helps maintain a consistent temperature around the print, reducing the likelihood of warping and improving layer adhesion.
- How It Helps: If you’re printing with materials like ABS or PETG, an enclosure can prevent drafts and temperature fluctuations, leading to better print quality.
Summary of Key Optimization Tips:
- Calibrate your printer (bed leveling, extruder, and Z-offset).
- Optimize print speed and layer height to balance quality and time.
- Set correct temperature settings for your filament.
- Fine-tune retraction distance, speed, and minimum travel to reduce stringing and oozing.
- Control cooling fan speeds for different materials.
- Ensure good bed adhesion with the right surface and first-layer settings.
- Use high-quality filament and store it properly to prevent moisture.
- Regularly maintain your printer and clean the nozzle.
By following these steps, you can significantly improve your 3D printing results, ensuring higher-quality prints, fewer failures, and smoother operation. Every printer and filament may require some trial and error to fine-tune, but these guidelines will help you get started!