A Comprehensive Guide to Choosing and Using Slicer Software
Welcome to the fascinating world of 3D printing—a realm where imagination transforms into tangible reality right before your eyes. Central to this transformative process is a piece of software known as a slicer. But what is a slicer, and why does it play such a pivotal role in 3D printing?
In essence, a slicer takes your digital 3D design and turns it into a set of understandable instructions for a 3D printer. These instructions detail how the printer should deposit each layer of material to build your object from the ground up. It’s not merely about translating a design into printer language; the slicer also optimizes the print process, determining the best way to create high-quality objects efficiently.
Whether you’re a hobbyist looking to print your first 3D model, or a professional refining a complex prototype, understanding the function and importance of slicers is the first step toward mastering 3D printing. Join us as we delve deeper into what slicers are, their historical development, different types available, and how they intricately prepare your designs for the exciting process of 3D printing.
What is a Slicer?
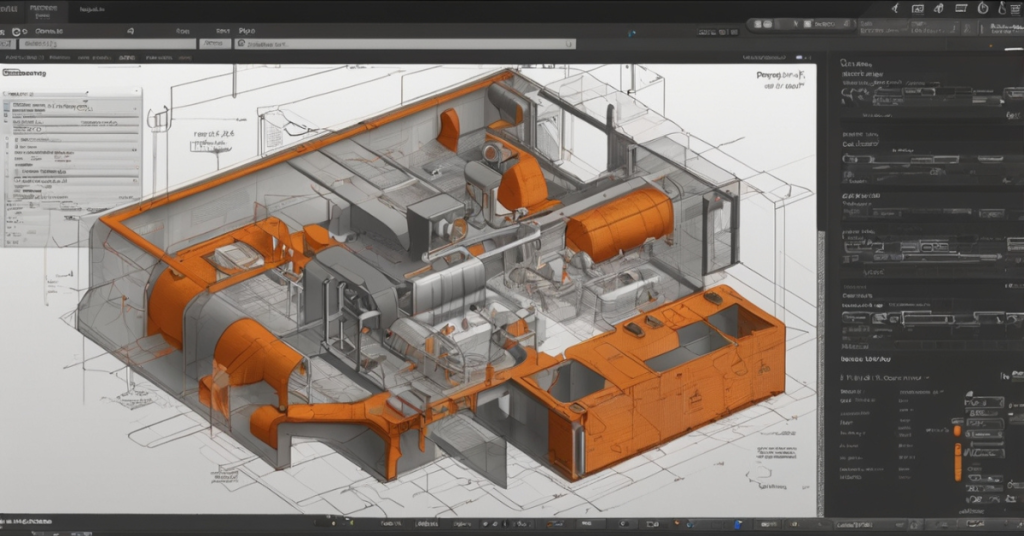
In the context of 3D printing, a slicer is essential software that acts as a mediator between your digital 3D model and the 3D printer itself. The primary function of a slicer is to convert your 3D design, typically saved in STL (StereoLithography) or OBJ format, into G-code, which is the language that your printer speaks. This conversion process involves the slicer taking the 3D model and “slicing” it into hundreds or thousands of horizontal layers. These layers are then used to instruct the printer on how to lay down the material, layer by layer, to build your final product.
But a slicer’s role extends beyond mere translation. It also allows users to adjust print settings that affect the quality and strength of the printed object as well as the speed and efficiency of the print job. For instance, within the slicer software, you can modify settings like layer height, which determines the resolution of your print; fill density, which impacts the strength and weight of your object; and print speed, which can alter how quickly a print job is completed.
Moreover, slicers come with the capability to add support structures to a print. These supports are essential for printing overhangs and undercuts which cannot be printed in mid-air and need a temporary structure during the printing process. Once the print is complete, these supports can be removed.
Thus, slicers are not just translators but sophisticated tools that enhance and ensure the success of the 3D printing process, allowing both novices and experts to turn complex digital models into real-world objects efficiently and effectively.
History of Slicers
The history of slicer software in 3D printing is a testament to the rapid evolution of technology over the past few decades. Initially, slicer software was rudimentary, serving basic functions and often tied exclusively to specific types of 3D printers. These early slicers were not user-friendly and required a deep understanding of both the software and the hardware to operate effectively. The options for customization and optimization were limited, which often resulted in less than optimal print quality.
As 3D printing technology became more widespread and accessible, the demand for more sophisticated and versatile slicer software grew. This led to the development of open-source projects like Slic3r, which was released in 2011. Open-source slicers played a significant role in democratizing 3D printing, allowing hobbyists and professionals alike to modify the code to suit their specific needs and share their improvements with the community.
Another significant milestone in the development of slicer software was the introduction of Cura by Ultimaker in 2011. Designed to be user-friendly and highly customizable, Cura quickly became popular not only among Ultimaker users but also within the broader 3D printing community. Its ability to support multiple file formats and its extensive customization options helped set new standards for what users could expect from slicing software.
Over the years, as 3D printing has evolved from a niche hobby to a critical tool in industries like manufacturing, healthcare, and education, slicers have become increasingly more powerful and easier to use. Modern slicers offer a range of features that were unimaginable in the early days, such as the ability to adjust micro-settings for print speed, temperature, and material flow, as well as advanced support generation algorithms that help print more complex models.
Today, the development of slicer software continues to be a dynamic field, reflecting the ongoing advancements in 3D printing technology itself. The focus has shifted towards making slicers more intelligent, with features like automatic error correction, enhanced model analysis, and integration with cloud-based platforms for remote printing. This evolution of slicer software not only marks significant technological progress but also showcases the growing importance of user-friendly, efficient tools in unlocking the full potential of 3D printing.
Types of Slicers
When you step into the world of 3D printing, choosing a slicer can feel a lot like picking out a new smartphone. There are so many types, each with its own set of features tailored to different needs and preferences. Just as you would decide between an iPhone or an Android based on what fits your lifestyle, selecting a slicer involves understanding the various types available and how they align with your 3D printing goals.
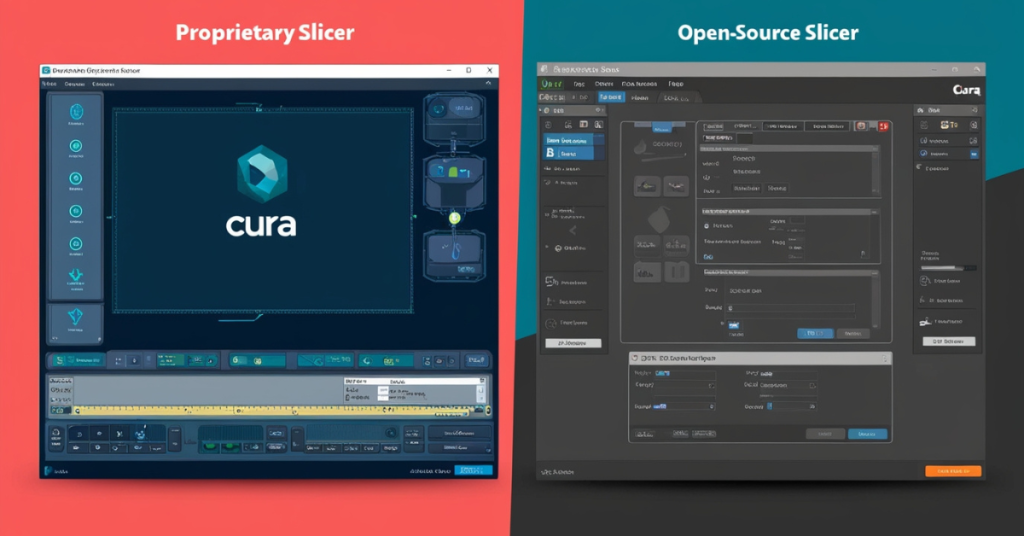
Proprietary vs. Open-Source Slicers:
Proprietary Slicers: These are like the high-end, brand-specific gadgets that come with customer support and regular updates. Companies like Ultimaker and Makerbot offer proprietary slicers designed specifically for their machines. They’re great if you want something that works ‘out of the box’ with minimal setup. They often come with user-friendly interfaces and are regularly updated to include the latest advancements in 3D printing technology.
Open-Source Slicers: Think of these like a custom-built PC. Open-source slicers such as Cura and Slic3r are flexible and customizable. They allow you to tweak almost every aspect of the printing process. The community support is robust; users share tweaks and post solutions, making these slicers evolve continuously. They’re ideal if you love to experiment and fine-tune your settings to get the perfect print.
Specialized Slicers:
Some slicers are tailored for specific applications or materials. For instance, slicers like Simplify3D are known for their ability to provide excellent support material generation, which is crucial when you’re working with complex prints that require a lot of supports. These specialized slicers are akin to a chef’s special tools—like a fish spatula or a pastry brush—not essential for everyone, but invaluable for certain tasks.
Integrated Slicers:
Some 3D printers come with integrated slicers, designed to offer a seamless printing experience. These are like all-in-one appliances; while they might not offer the customization of standalone slicers, they provide a straightforward, hassle-free experience. They make the process as simple as popping a capsule into a coffee machine and pressing start.
Choosing the right type of slicer is about balancing your needs for ease of use, customization, and the specific tasks you intend to accomplish. Just like finding the right tool for a job, the right slicer can make your 3D printing experience smoother and more enjoyable, whether you’re crafting simple household items or intricate models.
How Slicers Work
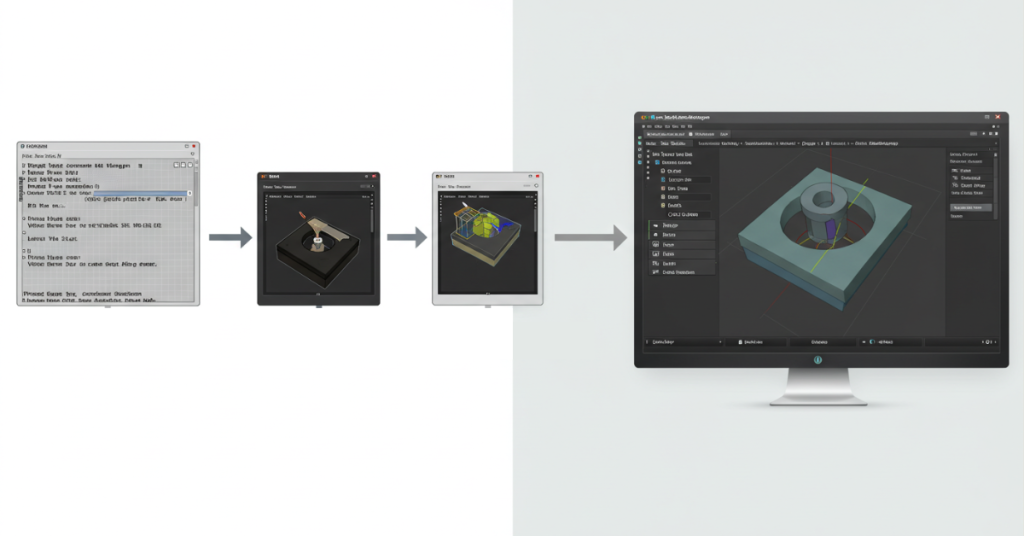
Imagine you’re an architect about to build a house. Before any construction begins, you need a blueprint that details every aspect of the house, from its foundation to the roof. This is similar to how slicers function in the world of 3D printing. They create a detailed blueprint for your 3D printer, instructing it on how to construct your design, layer by layer, from the ground up.
Step-by-Step Process:
File Importation: It all starts when you load your 3D model into the slicer. Think of this like loading a roll of film into a camera. You’re setting up the raw material from which your final product will be developed.
Model Slicing: Once the model is loaded, the slicer begins slicing it horizontally into thin layers—imagine slicing a loaf of bread. Each slice represents a cross-section of your model. This is where the slicer earns its name, breaking down a complex 3D model into manageable, printable layers.
Path Planning: After slicing, the slicer determines the optimal path the printer’s nozzle should take to lay down each layer. This path planning is akin to plotting a road trip route. The slicer calculates the most efficient way to travel across the model to minimize printing time and material usage while maximizing quality.
Support Generation: For models with overhangs or complex geometries, the slicer automatically generates support structures. Think of these like scaffolding around a building under construction. They support the model during printing but are removed once the print is complete.
G-code Creation: Finally, the slicer converts all this information into G-code, which is the language that your 3D printer understands. It’s like translating instructions into action, turning the “what” and “how” into the precise movements and material extrusions needed to bring your 3D model to life.
By the end of this process, your slicer has effectively mapped out every detail of the printing process. Just as a conductor leads an orchestra through a symphony, ensuring each note is played at the right moment, the slicer orchestrates the 3D printer’s every move to ensure each layer harmonizes perfectly with the next. This meticulous process is what allows you to transform a digital file into a tangible, three-dimensional object.
Features of Slicers
Have you ever tried to bake a cake without a recipe? You might know you need flour, eggs, and sugar, but without specific instructions, it’s tough to get a tasty result. That’s a lot like trying to 3D print without a slicer. A slicer doesn’t just guide your printer; it provides the crucial “recipe” that turns a digital model into a physical masterpiece.
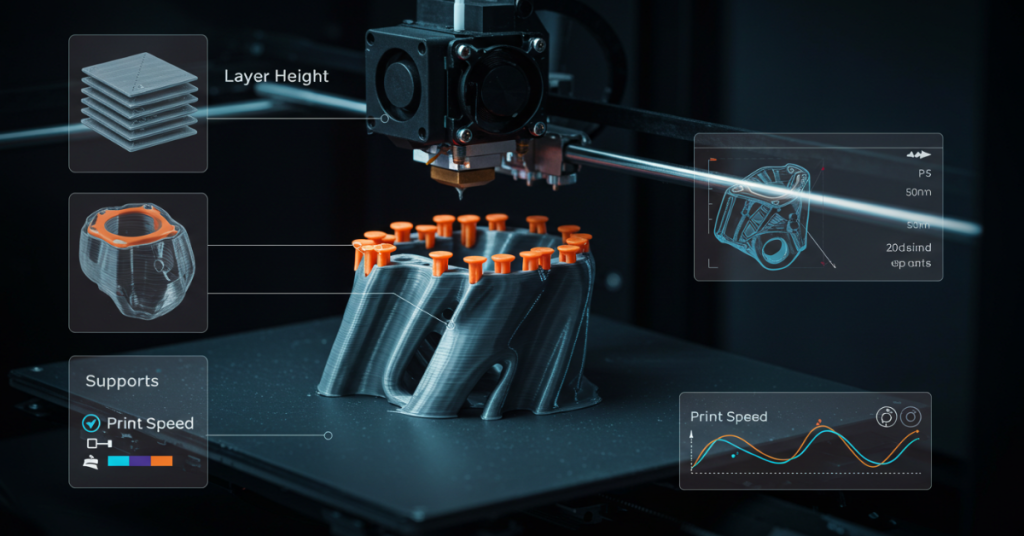
Customizable Layer Height: Imagine you’re painting a picture. Would you use a fine brush for broad strokes? Similarly, slicers allow you to adjust the layer height—the thickness of each layer of your print. A thinner layer height is like using a fine brush, ideal for detailed, high-resolution prints, while a thicker layer is like a broad brush, perfect for quicker, less detailed objects.
Infill Patterns and Density: Think of infill as the skeleton of your 3D printed object. It’s what gives your print internal structure and strength. But not all skeletons need to be the same. Slicers offer various infill patterns—like triangles, hexagons, or grids—that you can choose based on the balance you need between strength and material usage. It’s a bit like choosing the frame for a building; the right structure can make all the difference.
Support Generation: Have you ever seen a tree that looks like it’s defying gravity? In 3D printing, certain parts of a model might do just that, and without support, they’d flop like a branch unsupported. Slicers automatically generate these support structures, which act like scaffolding during the print process. These supports ensure that every part of your model is backed up, just like a dancer relies on a partner in a lift.
Temperature and Speed Settings: If you’ve ever tried to fry an egg on high heat, you know it cooks too fast and unevenly. Slicers let you adjust the temperature and speed of your print, ensuring that each layer has just the right amount of heat and time to set perfectly, much like adjusting a stove to get that perfectly fried egg.
Advanced Features: For those who love to tinker, modern slicers are like a playground. They come packed with advanced features, such as the ability to modify the G-code directly, integrate with CAD software for real-time adjustments, or even simulate the print before starting, giving you a sneak peek into how the print process will unfold.
In a nutshell, slicers are the unseen heroes of 3D printing. They don’t just translate; they transform and optimize. With a good slicer, your 3D printer is like an artist with the finest brushes and colors at their disposal, ready to bring your visions to life.
Choosing the Right Slicer
Choosing the right slicer for your 3D printing needs can feel a bit like picking the right pair of shoes for a marathon. You want something that fits well, supports your stride, and can go the distance without giving you blisters. Similarly, the right slicer should fit your project requirements, support your design needs, and seamlessly carry you from concept to creation without a hitch.
Ease of Use: Are you a beginner just dipping your toes into the world of 3D printing? Then you might want a slicer that’s easy to navigate, with a clean interface and straightforward settings. It’s like starting with a cookbook that doesn’t just throw recipes at you but explains each step in simple terms.
Features: What kind of projects are you tackling? If you’re working on highly detailed models or complex prints, you’ll need a slicer that offers advanced features like detailed support customization, layer-by-layer analysis, and extensive material settings. It’s akin to needing a high-performance car with fine-tuning capabilities if you’re a race car driver.
Compatibility: Consider the compatibility of the slicer with your 3D printer. It’s frustrating when you find a great software only to discover it doesn’t sync up with your hardware. It’s like finding the perfect smartwatch, only to realize it doesn’t pair with your phone.
Community and Support: Is there a strong community behind the slicer? A robust community means a wealth of shared knowledge, tips, and troubleshooting help, much like having a team of coaches and fellow runners to turn to for advice and support.
Cost: Budget is always a consideration. Are you looking for a free slicer or are you willing to invest in a premium version for more features and support? It’s similar to deciding whether to buy generic running shoes or splurge on a high-end pair designed for performance and durability.
In essence, choosing the right slicer is about finding the perfect balance between your specific needs and the features that a slicer offers. Just like picking the right tools for a gourmet meal or the right type of paint for a masterpiece, the correct slicer can make your 3D printing experience smoother, more enjoyable, and ultimately more successful.
Advanced Slicer Settings
Venturing into the advanced settings of a slicer can feel like stepping into the cockpit of an airplane. There are dials, switches, and readouts, but once you know what they do, you’re equipped to fly much more effectively. Advanced slicer settings give you that pilot’s control over your 3D prints, allowing you to fine-tune every aspect of the printing process to achieve superior results.
Temperature Control: Have you ever noticed how a slight change in oven temperature can be the difference between a perfectly baked cake and a burnt one? Similarly, in 3D printing, the temperature settings in a slicer can significantly affect the quality of your print. Adjusting the extruder temperature can help improve layer adhesion in challenging materials like ABS, while tweaking the bed temperature might reduce warping.
Print Speed Adjustments: Imagine trying to paint a delicate watercolor with a wide, stiff brush—it’s not ideal. The same principle applies to 3D printing. Slowing down the print speed can improve the accuracy and finish of detailed parts, much like using a fine brush for detailed artwork. Conversely, for larger, less detailed prints, increasing the speed can save time without sacrificing quality.
Layer Adjustments: Think of each layer of your print as a single step in a staircase. The height and thickness of each step (layer) can drastically affect the overall look and feel of your staircase (print). By adjusting these settings, you can either make your print finer and more detailed, or quicker and less refined, depending on your needs.
Retraction Settings: Ever seen a hot glue gun ooze glue even when you’re not squeezing the trigger? In 3D printing, oozing can happen too, leading to unwanted strings between different parts of your print. Retraction settings pull the filament back slightly when moving between sections, which helps prevent this stringing. It’s like lifting the scissors from the paper between cuts to ensure clean lines.
Custom G-code: Delving into custom G-code is like writing your own script for how a scene in a play should unfold. You can program specific behaviors for the printer to follow at certain times, such as pausing at a particular layer to change filament colors or adjusting fan speeds at critical points to enhance cooling.
Exploring these advanced settings can transform your printing process, providing a level of customization that standard settings simply can’t match. Just like a chef adjusts his ingredients and cooking techniques to perfect a dish, you can adjust these slicer settings to perfect your 3D prints.
Slicers and Print Quality
Think of a slicer as your personal 3D printing chef. Just as the quality of a meal can hinge on the chef’s skill in choosing the right ingredients and the perfect cooking time, the quality of a 3D print depends largely on how well the slicer is set up. The slicer’s settings are the ingredients and techniques that determine whether your final print is a gourmet dish or a fast-food snack.
Layer Resolution: Imagine if you were building a sandcastle. The finer the sand you use, the more detailed and smooth your castle will look. In 3D printing, layer resolution plays a similar role. A lower layer height means thinner layers, which can help in capturing intricate details and producing a smoother finish on the surface of the print. However, it will take more layers—and thus more time—to complete the print.
Infill Density and Pattern: Consider how the framework of a building provides strength and support. In 3D printing, infill density and pattern determine the internal structure of your print. Higher infill density makes your print stronger but uses more material and takes longer. Different infill patterns offer trade-offs between strength, material use, and print time, allowing you to tailor the internal structure to the needs of your project.
Supports: Have you ever seen a vine climbing a trellis? Without the trellis, the vine might not be able to grow upward and flourish. Supports in 3D printing work like a trellis, providing a temporary structure for parts of your model that overhang or can’t support themselves during printing. Effective support settings ensure these parts are accurately printed without drooping, much like how the trellis supports the vine until it is strong enough to sustain itself.
Temperature and Speed: These settings are like adjusting the heat and timing when baking cookies. Too hot and your cookies will burn; too slow and they may come out too hard. Similarly, if the extruder temperature is too high, your print might have blobs or strings; if the speed is too fast, layers may not bond well, leading to a weak print.
Calibration: Even the best recipes will fail if your oven isn’t calibrated correctly. In 3D printing, ensuring your printer is well-calibrated to interpret the slicer’s G-code accurately is crucial. This means regularly checking that the print bed is level, the extruder is clean, and the filament is feeding smoothly.
By fine-tuning these elements within your slicer software, you can dramatically enhance the quality of your prints. Just as a skilled chef adjusts his techniques and ingredients to achieve culinary perfection, mastering your slicer settings allows you to consistently produce high-quality, precise 3D prints.
Future of Slicing Software
Imagine standing at the edge of a vast ocean, ready to dive into its depths to uncover hidden treasures. That’s the future of slicing software in the world of 3D printing—it’s vast, exciting, and full of potential. As we look ahead, the trajectory of slicing software is not just about enhancing features; it’s about revolutionizing how we approach and execute 3D printing.
Automation and AI Integration: What if your slicing software could learn from each print, adapting and optimizing itself to improve outcomes each time? The future holds potential for artificial intelligence (AI) to take a front seat in slicing software, offering automated adjustments based on real-time feedback and predictive analytics. This would be like having a GPS system that doesn’t just react to the road as you travel but anticipates changes and adjusts your route automatically.
Cloud-Based Collaboration: Imagine if teams across the globe could collaborate on a 3D printing project with the same ease as editing a document online. Cloud-based slicing platforms are likely to become more prevalent, enabling real-time collaboration, slicing parameter sharing, and even remote printing capabilities. This would effectively turn slicing software into a collaborative tool, similar to how cloud services have revolutionized file sharing and team projects.
Enhanced Material Compatibility: Just as a chef experiments with new ingredients to create innovative dishes, future slicing software will expand its compatibility with a wider array of materials. Each material might come with its own ‘recipe’ for success, programmed into the slicer to ensure optimal print quality, whether it’s with traditional plastics, advanced composites, or even new bio-materials.
Greater Integration with Design Software: Think of the seamlessness when a skilled artist takes a concept through sketching to painting without changing tools. Future slicers will likely integrate more deeply with 3D modeling and CAD software, creating a unified platform that streamlines the process from design to print. This integration would help eliminate the current back-and-forth between different software packages and streamline the workflow, making 3D printing more accessible and efficient.
Sustainability Features: As environmental awareness grows, so does the push for sustainability in technology. Future slicing software might include features that optimize designs for environmental impact, such as minimizing material waste, enhancing energy efficiency, or even suggesting recyclable or biodegradable materials.
As we peer into the horizon, the future of slicing software in 3D printing appears as a beacon of innovation. It promises not just to follow the trends but to set them, ensuring that 3D printing continues to be at the cutting edge of technology, creativity, and collaboration. Just as explorers discover new lands, slicing software will continue to explore new realms of possibility, making the future of 3D printing an exciting journey to watch.
Case Studies
Diving into specific case studies of slicers in action is like peering through a magnifying glass to observe the intricacies of a craftsman’s work. These examples not only showcase the capabilities of different slicers but also illuminate their impact on various industries and applications. Let’s explore a couple of these narratives to understand how slicers translate digital dreams into tangible realities.
Medical Prosthetics and Implants: Consider the medical field, where precision is not just a preference but a necessity. Slicers have played a pivotal role in creating custom prosthetics and implants tailored to individual patients. For example, a hospital might use advanced slicer software to convert MRI scans into 3D printable models. This allows for prosthetics that aren’t just close fits but are perfect matches to the patient’s anatomy. It’s akin to a tailor making a bespoke suit that fits every contour of your body, except here, it’s potentially life-changing medical aids.
Architectural Models: In the realm of architecture, envision how the transition from drawing board to model can be streamlined with slicing technology. Architects use slicers to create detailed scale models of their designs, allowing them to test and modify structures before full-scale construction begins. This process is like a chef tweaking a recipe by first trying out a small sample dish; it saves time, resources, and allows for adjustments in a low-risk environment.
Custom Automotive Parts: Imagine a vintage car enthusiast looking to restore a classic model where parts are no longer available. Slicers enable the custom fabrication of these parts, perfectly adapted to fit unique specifications. The process involves scanning the old part, modeling it in 3D software, and using a slicer to prepare the model for printing in a suitable material. This scenario is similar to finding a lost piece of a jigsaw puzzle and crafting a replacement piece that fits seamlessly into place, restoring the original picture.
Educational Tools and Models: In education, slicers are used to bring complex concepts to life. From historical artifacts that students can hold in their hands to scientific models that demonstrate abstract theories, the ability to create accurate, tangible replicas makes learning more interactive and engaging. It’s like turning abstract mathematical problems into a set of physical blocks that students can manipulate to better understand the concepts.
Each of these case studies demonstrates the transformative power of slicers across different fields, acting not just as tools for creation but as bridges connecting digital designs with real-world applications. Through these examples, we see how slicers are not merely backstage technicians but are spotlight performers that bring the digital stage to life.
Community and Resources
Have you ever joined a club or group where everyone shares the same interests and passions? The community around slicer software and 3D printing is much like that—a vibrant and supportive club where enthusiasts, professionals, and newcomers alike gather to share knowledge, solve problems, and push the boundaries of what’s possible with 3D printing.
Online Forums and Platforms: Imagine a virtual town square where people from all over the world meet to exchange ideas. Online forums such as Reddit’s r/3Dprinting, the Ultimaker Community, or the Prusa forums are bustling hubs where users can ask for advice, share their success stories, or seek troubleshooting help. These platforms act like a continuous, global workshop, accessible anytime, where the collective wisdom of the community is just a post away.
Social Media Groups: Think of social media groups as casual meetups at a local café where people chat about their latest projects and challenges. Platforms like Facebook and LinkedIn host numerous 3D printing groups where members share images of their prints, discuss slicer settings, and collaborate on projects. These groups are not only about sharing knowledge but also about encouraging each other and celebrating each other’s successes.
Webinars and Tutorials: Have you ever attended a workshop or a class where a skilled instructor walks you through a process step-by-step? Many companies and community leaders offer webinars and video tutorials that help users understand the intricacies of slicer software. These resources are like guided tours through the functionalities of slicers, providing both foundational knowledge and insights into advanced techniques.
Open Source Projects: Imagine a community garden where everyone contributes to the growth and benefits equally from the harvest. Open-source slicer projects like Slic3r or MatterControl are developed and refined by a community of developers who contribute their skills to improve the software. These projects offer a wealth of learning opportunities, as even beginners can delve into the source code, understand the mechanics behind the slicer, and contribute to its development.
Documentation and Support: Just as a library offers resources on every subject under the sun, the documentation provided by slicer software developers is an invaluable resource for users. Comprehensive manuals, frequently asked questions (FAQs), and detailed guides allow users to self-educate at their own pace, providing a solid foundation that enables users to utilize slicer software effectively.
The community and resources available to slicer users are integral to the evolution and enjoyment of 3D printing. They ensure that anyone, anywhere, can start their journey into 3D printing with a network of support and a library of knowledge at their fingertips. It’s not just about solving problems; it’s about growing and learning together in a field that is forever advancing and changing.
Conclusion
Have you ever reached the end of a long hike, turned around, and marveled at the distance you’ve covered? That’s the feeling we get when we look back at the journey of slicer software in the world of 3D printing. From its humble beginnings to the sophisticated tool it has become today, the slicer has been instrumental in shaping the landscape of digital fabrication.
Slicers, like skilled conductors of an orchestra, harmonize the complex interplay of design, material, and machine to create objects that were once confined to the realm of imagination. They ensure that each layer of material is placed with precision, much like a painter who meticulously adds strokes to bring a canvas to life. Without slicers, our 3D printers would be like orchestras without conductors—capable of producing sound but not a symphony.
As we look to the future, the possibilities are as expansive as the horizon. With advances in AI, cloud computing, and material science, slicers are set to become even more intuitive, powerful, and accessible. They will continue to evolve, bringing more people into the fold of 3D printing, whether they are hobbyists, educators, professionals, or visionaries looking to push the boundaries of what’s possible.
So, as you step into the world of 3D printing, remember that the slicer is your guide, your tool, and your partner in creation. It’s not just about translating a design into a print; it’s about realizing your creative potential and bringing your ideas to life in three dimensions. And with each print, you’re not just creating objects; you’re expanding the limits of your imagination and contributing to a technology that continues to revolutionize how we think about making and manufacturing.
FAQs
- What is the best slicer for beginners?
For beginners, Ultimaker Cura is highly recommended due to its user-friendly interface and extensive online community. It comes with preset profiles for different printers and materials, which simplifies the setup process. Another good option is PrusaSlicer, especially for users of Prusa 3D printers, as it is tailored to offer excellent out-of-the-box settings for these machines. - How do slicer settings affect print quality?
Slicer settings directly influence the appearance, strength, and print time of your 3D printed objects. For instance, lower layer heights can result in smoother surfaces but will increase the print time. Higher infill density makes the print stronger but uses more material. Temperature settings need to be optimized to avoid problems like warping or stringing, ensuring that each layer adheres properly without deformities. - Can I use multiple slicers for different projects?
Absolutely, using different slicers for various projects can be beneficial as each slicer might offer unique features suited for specific types of prints. For example, you might use Cura for its material profiles and ease of use but switch to Slic3r for its advanced customization options when working on a project that requires fine-tuned support structures. - What are the system requirements for running slicing software?
Most slicing software requires a relatively modest set of hardware specifications. Generally, you’ll need a computer with at least 4 GB of RAM, a dual-core processor, and about 250 MB of free disk space. However, more complex models or higher settings of slicing precision might benefit from more powerful hardware to reduce processing time. - Are there any free slicers available?
Yes, there are several free slicers available that offer robust features and are widely used within the 3D printing community. Some of the most popular free slicers include Ultimaker Cura, PrusaSlicer, and Slic3r. These programs are continually updated and supported by a community of developers and users, making them great resources for both beginners and experienced printers alike.