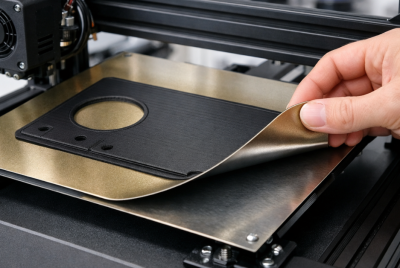
Top 10 3D Printer Glues for Flawless Bed Adhesion
Have you ever eagerly started a 3D print, only to find your creation warped or detached from the build plate hours later? If so, you’re not alone. The secret to successful 3D printing often lies in one crucial element: bed adhesion. And that’s where 3D printer glue comes into play.
Imagine you’re building a house. No matter how beautiful your design or how high-quality your materials, if the foundation isn’t solid, the whole structure is at risk. In 3D printing, bed adhesion is that foundation. It’s the unsung hero that can make the difference between a flawless print and a frustrating tangle of plastic.
Now, you might be thinking, “Can’t I just use any old glue?” Well, not quite. 3D printer adhesives are specially formulated to withstand the high temperatures of the print bed, provide the right level of stickiness, and release the print when it’s done. They’re the Goldilocks of the adhesive world – not too sticky, not too loose, but just right.
Why 3D Printer Glue Matters
The Foundation of Successful Prints
Think of 3D printer glue as the foundation of a house. Without a solid foundation, even the most beautifully designed structure will crumble. Similarly, without proper adhesion, your 3D prints are doomed to fail, no matter how perfect your design or settings are.
But let’s dig a little deeper. Why is bed adhesion so crucial? Here’s the breakdown:
- First Layer Integrity: The first layer of your print is like the roots of a tree. If it’s not firmly anchored, everything that comes after is compromised. Good adhesion ensures your first layer sticks properly, creating a stable base for the rest of your print.
- Dimensional Accuracy: When your print adheres well, it stays exactly where it should. This means the dimensions of your final product will match your design specifications. Poor adhesion can lead to shifting or warping, throwing off your measurements.
- Stress Distribution: As your print builds up layer by layer, it creates internal stresses. A well-adhered base helps distribute these stresses evenly, preventing warping or separation from the build plate.
- Temperature Management: Proper adhesion helps manage the temperature differential between the heated bed and the cooling plastic. This is especially important for materials prone to warping, like ABS.
- Print Completion: Nothing’s more frustrating than coming back to your printer only to find a tangled mess of filament instead of your intended object. Good bed adhesion significantly increases the chances of your print completing successfully.
- Quality of Details: For prints with fine details, especially on the bottom layer, proper adhesion is critical. It ensures these details are crisp and well-defined, rather than blurred or missing.
By using the right 3D printer glue, you’re not just sticking your print to the bed; you’re setting the stage for a successful, high-quality final product. It’s an often overlooked aspect of 3D printing, but mastering bed adhesion can take your prints from good to great. After all, in the world of 3D printing, a strong foundation isn’t just important – it’s everything.
Overcoming Common Printing Challenges
3D printing can sometimes feel like a battle against the forces of physics. But with the right 3D printer glue, you can overcome these common adversaries:
- Warping Warping is like the bully of the 3D printing world. It occurs when parts of your print cool unevenly, causing the edges to curl up.
o How glue helps: The right adhesive creates a strong bond between the print and the bed, resisting the pulling forces as the plastic cools.
o Example: ABS is notorious for warping. A high-temperature resistant glue like Magigoo can keep those corners firmly in place.
- Lifting Lifting is warping’s sneaky cousin. Instead of dramatic curling, you might see subtle separation from the build plate, especially at corners.
o How glue helps: A good adhesive increases the surface tension, making it harder for edges to peel away.
o Example: For materials like PETG that can be prone to lifting, a spray adhesive like 3DLAC can provide even, strong adhesion across the entire base.
- Poor First Layer Adhesion If your first layer doesn’t stick, your print is doomed before it really begins.
o How glue helps: It provides a tacky surface for that crucial first layer to grip onto.
o Example: For PLA prints, even a simple glue stick like Elmer’s Purple can dramatically improve first layer adhesion.
- Bed Separation During Printing Sometimes a print adheres well initially, but separates partway through. This often happens with tall prints or those with a small base.
o How glue helps: Stronger adhesives can withstand the forces exerted as the print grows taller.
o Example: For challenging prints, a specialized product like Layerneer BED WELD can provide industrial-strength adhesion.
- Stringing and Oozing While primarily a retraction issue, poor bed adhesion can exacerbate stringing by allowing small parts to move slightly.
o How glue helps: By keeping parts firmly in place, it reduces the chances of filament being dragged between separate sections.
o Example: A thin layer of hairspray like AquaNet can provide just enough tackiness to keep small parts stable.
- Elephant’s Foot This occurs when the bottom of the print bulges out slightly, caused by the weight of the print combined with a too-hot bed.
o How glue helps: While it doesn’t directly prevent this, good adhesion allows you to reduce bed temperature slightly, minimizing the effect.
o Example: UHU glue stick provides good adhesion without requiring extremely high bed temperatures.
- Inconsistent Layer Lines If your print isn’t sticking well, it can shift slightly between layers, leading to visible inconsistencies.
o How glue helps: Solid adhesion keeps your print stable, allowing for clean, consistent layer lines.
o Example: A product like Dimafix can keep your print rock-solid throughout the process.
Remember, the key to overcoming these challenges isn’t just slathering on more glue. It’s about choosing the right adhesive for your material and applying it correctly. With the proper 3D printer glue in your arsenal, you’ll be well-equipped to tackle these common printing pitfalls head-on. Happy printing!
Factors to Consider When Choosing 3D Printer Glue
Compatibility with Filament Types
When it comes to 3D printer glue, one size definitely doesn’t fit all. Different filaments have unique properties that affect how they adhere to the print bed. Let’s dive deeper into the world of filament-glue compatibility:
PLA (Polylactic Acid)
PLA is often considered the “beginner’s filament” due to its ease of use.
- Adhesion characteristics: Generally easier to adhere, but can still benefit from the right glue.
- Recommended glues:
- Elmer’s Disappearing Purple Glue Stick
- AquaNet Extra Super Hold Hairspray
- Magigoo Original
- Why it works: PLA doesn’t require extremely high bed temperatures, so these milder adhesives work well without risking over-adhesion.
ABS (Acrylonitrile Butadiene Styrene)
ABS is known for its strength and heat resistance, but it’s also notorious for warping.
- Adhesion characteristics: Requires strong adhesion and a heated bed to prevent warping.
- Recommended glues:
- Layerneer BED WELD
- Dimafix 3D Printing Adhesive
- 3DLAC 3D Printer Adhesive Spray
- Why it works: These stronger adhesives can withstand the high bed temperatures needed for ABS and provide enough hold to combat warping.
PETG (Polyethylene Terephthalate Glycol)
PETG combines the ease of use of PLA with greater strength and temperature resistance.
- Adhesion characteristics: Can be tricky, needs a balance between too much and too little adhesion.
- Recommended glues:
- Magigoo Original
- UHU Glue Stick
- BuildTak
- Why it works: These options provide enough stick without creating too strong a bond, which can be an issue with PETG.
TPU (Thermoplastic Polyurethane)
TPU is a flexible filament, which presents unique adhesion challenges.
- Adhesion characteristics: Flexible filaments have unique adhesion requirements; too much stick can make removal difficult.
- Recommended glues:
- Blue painter’s tape (not a glue, but works well)
- Magigoo Flex
- Light application of PVA-based glue stick
- Why it works: These options provide just enough tack to hold the print down without making it impossible to remove.
Nylon
Nylon is hygroscopic and can be challenging to print with.
- Adhesion characteristics: Requires very good adhesion and often a high bed temperature.
- Recommended glues:
- Wolfbite 3D Printer Adhesive
- Dimafix 3D Printing Adhesive
- Magigoo PA (specifically for nylon)
- Why it works: These adhesives are designed to withstand the high temperatures needed for nylon and provide strong adhesion.
HIPS (High Impact Polystyrene)
Often used as support material, but can be printed on its own.
- Adhesion characteristics: Similar to ABS, prone to warping and needs strong adhesion.
- Recommended glues:
- ABS juice (ABS dissolved in acetone)
- 3DLAC 3D Printer Adhesive Spray
- Layerneer BED WELD
- Why it works: These provide the strong hold necessary for this warp-prone material.
PC (Polycarbonate)
Known for its strength and heat resistance, PC requires high printing temperatures.
- Adhesion characteristics: Needs very strong adhesion and high bed temperatures.
- Recommended glues:
- Magigoo PC (specifically for polycarbonate)
- Dimafix 3D Printing Adhesive
- Wolfbite 3D Printer Adhesive
- Why it works: These adhesives can withstand the extreme temperatures required for PC while providing the necessary strong bond.
Remember, these are general guidelines. Your specific printer, bed material, and environmental conditions can all affect adhesion. Don’t be afraid to experiment to find the perfect combination for your setup. The key is to balance adequate adhesion for successful prints with easy removal once the print is complete. Happy printing!
Temperature Resistance
When it comes to 3D printer glues, temperature resistance is not just a nice-to-have feature—it’s often crucial for successful prints. Let’s dive deeper into why this matters and how it affects your printing process.
Why Temperature Resistance Matters
- Bed Temperatures Vary: Different filaments require different bed temperatures:
o PLA: typically 50-60°C
o PETG: usually 70-80°C
o ABS: often 100-110°C
o Nylon: can require up to 120°C
- Maintaining Adhesion: As your print progresses, the bed remains hot. The glue needs to maintain its adhesive properties throughout the print duration, which could be hours.
- Preventing Degradation: Some adhesives can break down or even burn at high temperatures, potentially releasing fumes or damaging your print surface.
- Ease of Removal: Temperature-resistant glues often have the added benefit of releasing the print when cooled, making removal easier.
Types of Temperature Resistance in 3D Printer Glues
- Low Temperature Resistance (up to 60°C)
o Suitable for: PLA and other low-temperature filaments
o Examples: Basic glue sticks, some hairsprays
o Pros: Easy to apply and remove
o Cons: May lose effectiveness quickly at higher temperatures
- Medium Temperature Resistance (60-90°C)
o Suitable for: PETG, some flexible filaments
o Examples: Magigoo Original, 3DLAC
o Pros: Versatile for a range of common filaments
o Cons: May not hold up for very long prints at high temperatures
- High Temperature Resistance (90°C and above)
o Suitable for: ABS, Nylon, Polycarbonate
o Examples: Layerneer BED WELD, Dimafix, Wolfbite
o Pros: Can withstand extreme bed temperatures
o Cons: May be overkill for lower temperature prints, potentially making removal difficult
Considerations When Choosing Temperature-Resistant Glues
- Maximum Temperature Rating: Always check the manufacturer’s specifications for the maximum temperature the glue can withstand.
- Duration of Effectiveness: Some glues may hold up initially but lose effectiveness over time at high temperatures. Look for products designed for long-duration prints.
- Reactivation Properties: Some high-temp glues reactivate when heated and release when cooled, which can be very convenient.
- Compatibility with Bed Material: Ensure the glue is compatible with your bed material (glass, PEI, etc.) at high temperatures.
- Safety Considerations: High-temperature glues should not emit harmful fumes when heated. Look for non-toxic options.
Testing Temperature Resistance
Before committing to a long, high-temperature print, it’s wise to test your glue:
- Apply the glue to your bed as you normally would.
- Heat the bed to the required temperature for your filament.
- Let it sit at this temperature for an hour or more.
- Check if the glue has degraded, burned, or lost its tackiness.
Temperature Resistance and Print Quality
The right temperature-resistant glue can significantly improve your print quality:
- Prevents Warping: By maintaining adhesion throughout the print, it keeps corners and edges down.
- Ensures Consistent First Layers: A stable adhesive base means your crucial first layers will be even and well-stuck.
- Reduces Print Failures: Fewer prints will detach mid-process, saving time and filament.
Remember, while temperature resistance is important, it’s just one factor to consider. The best 3D printer glue for you will depend on your specific printer, the filaments you use most often, and your typical print settings. Don’t be afraid to experiment with different options to find your perfect match. Happy printing!
Ease of Application and Removal
When it comes to 3D printer glues, the devil is often in the details. How easily you can apply and remove the adhesive can significantly impact your printing workflow and overall experience. Let’s dive deeper into this crucial aspect:
Application Methods
- Stick Applicators
o Examples: Elmer’s Glue Stick, UHU Stick
o Pros:
Easy to control application area
No mess or overspray
o Cons:
May require multiple passes for even coverage
Can leave streaks if not applied carefully
- Spray Adhesives
o Examples: 3DLAC, AquaNet Hairspray
o Pros:
Quick and easy to apply
Provides even coverage over large areas
o Cons:
Potential for overspray
May require masking of surrounding areas
- Liquid Applicators
o Examples: Magigoo, Layerneer BED WELD
o Pros:
Often come with specialized applicators for precise control
Can provide strong, even adhesion
o Cons:
May require practice to apply evenly
Some may dry quickly, requiring swift application
- Brush-On Adhesives
o Examples: ABS slurry, some PVA glues
o Pros:
Allows for targeted application
Can be good for touching up specific areas
o Cons:
Time-consuming for large areas
May leave brush strokes if not applied carefully
Application Tips
- Clean Surface: Always start with a clean, dry print bed for best adhesion.
- Thin Layers: In most cases, thinner layers are better. You can always add more if needed.
- Even Coverage: Aim for consistent coverage to prevent print irregularities.
- Reapplication Frequency: Some glues may need reapplication after every print, while others can last for multiple prints.
Removal Methods
- Water-Soluble Adhesives
o Examples: Many PVA-based glue sticks
o Removal: Can often be removed with warm water and light scrubbing
o Pros: Easy and safe to remove
o Cons: May not be suitable for water-sensitive materials
- Temperature-Sensitive Adhesives
o Examples: Magigoo, Dimafix
o Removal: Often release when the bed cools down
o Pros: Can make print removal almost effortless
o Cons: May require patience while waiting for the bed to cool
- Alcohol-Soluble Adhesives
o Examples: Some specialized 3D printing adhesives
o Removal: Can be dissolved or loosened with isopropyl alcohol
o Pros: Quick to remove without water
o Cons: Requires handling of alcohol, which may not be suitable for all users
- Mechanical Removal
o Examples: Necessary for some stronger adhesives
o Removal: May require a scraper or spatula
o Pros: Can remove stubborn residues
o Cons: Risk of damaging the print bed if not done carefully
Removal Tips
- Wait for Cooling: Always allow the print bed to cool before attempting removal.
- Use the Right Tools: A flexible scraper can help remove prints without damaging the bed.
- Leverage Physics: Sometimes, a slight twist can help break the adhesion bond.
- Stubborn Prints: For really stuck prints, try placing the bed in the freezer for a few minutes.
Balancing Application and Removal
The ideal 3D printer glue strikes a balance between easy application, strong adhesion during printing, and easy removal post-print. Consider these factors:
- Print Volume: If you print frequently, prioritize glues that are quick to apply and remove.
- Material Compatibility: Ensure your removal method won’t damage your prints (e.g., water for water-soluble prints).
- Bed Material: Some adhesives may be easier to remove from glass beds compared to PEI sheets, for example.
- Environmental Factors: Consider ventilation for spray adhesives or the availability of water/alcohol for certain removal methods.
Remember, what works best can vary based on your specific printer, materials, and environment. Don’t be afraid to experiment with different application and removal techniques to find what works best for your setup. The goal is to find a method that integrates smoothly into your 3D printing workflow, enhancing your productivity and print quality without becoming a hassle. Happy printing!
Environmental Considerations
As 3D printing becomes more widespread, it’s increasingly important to consider the environmental impact of our printing practices, including the adhesives we use. Let’s dive deeper into the environmental aspects of 3D printer glues:
Eco-Friendly Formulations
- Water-Based Adhesives
o Examples: Many PVA-based glue sticks
o Pros:
Generally lower in volatile organic compounds (VOCs)
Easier to clean up without harsh chemicals
o Cons:
May not be as effective for high-temperature prints
- Biodegradable Options
o Examples: Some newer, specialized 3D printing adhesives
o Pros:
Break down more easily in the environment
Often made from renewable resources
o Cons:
May be more expensive
Performance can vary compared to traditional options
- Natural Ingredient-Based Adhesives
o Examples: Adhesives using plant-based ingredients
o Pros:
Renewable sources
Often lower toxicity
o Cons:
May have shorter shelf life
Could be less effective for certain materials
VOC Emissions
Volatile Organic Compounds (VOCs) are a key environmental concern with some adhesives.
- Low-VOC Options
o Look for adhesives specifically labeled as low-VOC
o These reduce indoor air pollution and are better for respiratory health
- Ventilation Considerations
o Even with low-VOC options, proper ventilation is important
o Consider setting up your printer in a well-ventilated area or using an enclosure with air filtration
Packaging and Waste
- Recyclable Packaging
o Some manufacturers are moving towards recyclable or biodegradable packaging
o Look for options with minimal plastic packaging
- Refillable Options
o Some adhesives come in refillable containers, reducing overall waste
- Bulk Purchasing
o Buying in larger quantities can reduce packaging waste per unit
Energy Consumption
- Application Method
o Spray adhesives might use propellants, which can have a higher carbon footprint
o Stick or brush-on options generally have lower energy requirements for application
- Temperature Requirements
o Adhesives that work at lower temperatures can indirectly save energy by allowing lower bed temperatures
Water Usage and Pollution
- Water-Soluble vs. Solvent-Based
o Water-soluble adhesives are generally easier on the environment during cleanup
o However, consider the water usage required for cleaning
- Proper Disposal
o Even for water-soluble adhesives, avoid washing large amounts down the drain
o Check local regulations for proper disposal of adhesive residues
Sustainability in Manufacturing
- Sustainable Production Practices
o Some companies are adopting more sustainable manufacturing processes
o Look for brands that are transparent about their environmental practices
- Carbon Footprint
o Consider the carbon footprint of shipping when ordering adhesives
o Local options, if available, might have a lower overall environmental impact
Longevity and Efficiency
- Durability
o Adhesives that last longer and require less frequent application can be more environmentally friendly in the long run
- Effectiveness
o More effective adhesives can reduce failed prints, saving filament and energy
Alternatives to Traditional Adhesives
- Textured Print Surfaces
o Options like PEI sheets or textured glass can reduce or eliminate the need for additional adhesives
- Mechanical Solutions
o Brims and rafts in slicer settings can improve adhesion without chemical adhesives, though they use more filament
Making Informed Choices
- Research Brands
o Look for companies with strong environmental commitments
o Check for environmental certifications or eco-labels
- Balance Performance and Eco-Friendliness
o The most eco-friendly option isn’t always the best performer
o Find a balance that works for your printing needs while minimizing environmental impact
- Stay Informed
o The field of eco-friendly adhesives is evolving
o Keep an eye out for new, more sustainable options as they become available
Remember, while individual choices may seem small, collectively they can have a significant impact. By considering the environmental aspects of 3D printer glues, we can contribute to a more sustainable 3D printing community. Every step towards eco-friendly practices helps in creating a more sustainable future for this exciting technology.
Top 10 3D Printer Glues for Flawless Bed Adhesion
Pros:
- Easy application with pen-like applicator
- Works well with various filaments
- Temperature activated for easy removal
Cons:
- Pricier than some alternatives
- May require reapplication for long prints
Pros:
- Affordable and widely available
- Purple color helps with even application
- Works great for PLA
Cons:
- Not ideal for high-temperature prints
- May require frequent reapplication
Pros:
- Quick and easy spray application
- Strong hold for ABS and other tricky filaments
- Large coverage area
Cons:
- Overspray can be messy
- Strong odor during application
Pros:
- Extremely strong adhesion
- Works with a wide range of filaments
- Temperature resistant
Cons:
- Can be difficult to remove if overapplied
- More expensive than basic options
Pros:
- Inexpensive and easy to find
- Works surprisingly well, especially for PLA
- Quick application
Cons:
- Not specifically designed for 3D printing
- Can leave residue on the print bed
Pros:
- No need for reapplication between prints
- Excellent adhesion for most filaments
- Durable and long-lasting
Cons:
- Initial cost higher than liquid adhesives
- Can be damaged if removed improperly
Pros:
- Affordable and easy to use
- Works well with PLA and PETG
- Non-toxic formula
Cons:
- May not be strong enough for ABS
- Requires frequent reapplication
Pros:
- Excellent for high-temperature printing
- Very strong adhesion, great for ABS
- Temperature-activated release
Cons:
- Can be overkill for simple PLA prints
- More expensive than basic options
Pros:
- Specifically designed for 3D printing
- Works well with a variety of filaments
- Easy to apply and remove
Cons:
- Limited availability compared to other options
- May require experimentation to find the right application amount
Pros:
- Excellent for high-temperature filaments
- Long-lasting, doesn’t need frequent reapplication
- Easy removal when cooled
Cons:
- More expensive than basic options
- May be too strong for some PLA prints
How to Apply 3D Printer Glue Effectively
Preparing Your Print Bed
Proper preparation of your print bed is crucial for successful adhesion. It’s like laying the foundation for a house – get this right, and you’re setting yourself up for success. Let’s dive into the details:
- Cleaning the Bed
A clean bed is essential for good adhesion. Here’s how to do it right:
a) Remove Old Adhesive
- Use a plastic scraper to gently remove any old glue or filament residue
- Be careful not to scratch the bed surface
b) Initial Cleaning
- Warm water and mild dish soap can remove most debris
- For stubborn residues, try a 50/50 mix of vinegar and water
c) Deep Cleaning with Isopropyl Alcohol (IPA)
- Use 90% or higher IPA for best results
- Apply with a lint-free cloth or paper towel
- This removes oils and other contaminants that water might miss
d) Handling the Bed
- Always handle the cleaned bed by its edges to avoid leaving fingerprints
- Consider wearing clean nitrile gloves for extra precaution
- Ensuring the Bed is Completely Dry
Moisture is the enemy of good adhesion. Here’s how to ensure your bed is bone-dry:
a) Air Drying
- Allow the bed to air dry in a dust-free environment
- You can use a fan to speed up the process, but avoid dusty areas
b) Heat Drying
- For faster results, heat the bed to about 50°C (122°F) for a few minutes
- This evaporates any remaining moisture
c) Lint-Free Wipe Down
- After drying, give the bed a final wipe with a clean, lint-free cloth
- This removes any last bits of dust that might have settled
- Leveling Your Bed
A level bed is crucial for consistent adhesion across the entire print surface:
a) Manual Leveling
- Use the paper method: adjust until a piece of paper barely slides between the nozzle and bed at all four corners and center
- Repeat the process at least twice for accuracy
b) Automatic Bed Leveling
- If your printer has auto-leveling, run the routine before applying adhesive
- Some printers allow you to save a mesh of the bed’s contours for future use
c) Z-Offset Adjustment
- Fine-tune your Z-offset for the perfect first layer height
- This is typically done through your printer’s settings or slicer software
- Temperature Considerations
The bed’s temperature can affect adhesive application:
a) Cold Application
• Most adhesives are designed to be applied to a cold bed
• This allows for even spreading and proper setting of the adhesive
b) Pre-heating for Some Adhesives
• Some specialized adhesives may recommend application to a warm bed
• Always check the manufacturer’s instructions
- Surface Texture
Different bed materials may require different preparation:
a) Glass Beds
- Ensure the surface is free from any micro-scratches
- Some users lightly sand with very fine grit sandpaper for better adhesion
b) PEI Sheets
- Light sanding with high-grit sandpaper can rejuvenate the surface
- Be gentle to avoid damaging the PEI coating
c) Textured Surfaces
- Clean thoroughly, ensuring no debris is trapped in the texture
- You may need less adhesive on naturally tacky surfaces
- Environmental Factors
Consider your printing environment:
a) Humidity
- In high-humidity environments, you might need to take extra care in drying
- Consider using a dehumidifier in your printing area
b) Dust Control
- Minimize dust in your printing area
- Consider an enclosure or cover for your printer when not in use
- Pre-Application Inspection
Before applying adhesive:
a) Visual Check
- Look for any remaining debris or imperfections
- Ensure the surface is uniformly clean and dry
b) Touch Test
- Lightly run your fingertip across the surface
- It should feel smooth and free from any residue
Remember, the time you invest in properly preparing your print bed will pay off in successful prints and fewer adhesion-related issues. A well-prepared bed is the foundation of great 3D printing, setting the stage for flawless first layers and ultimately, successful prints. Happy printing!
Application Techniques
Applying 3D printer glue is indeed an art form, and mastering the right technique can make a world of difference in your printing success. Let’s dive deeper into the various application methods and tips for each type of adhesive:
- Stick Glues
Stick glues, like Elmer’s Purple Glue Stick or UHU Glue Stick, are popular due to their ease of use.
Technique:
- Apply in a thin, even crosshatch pattern
- Start with diagonal lines in one direction, then overlay with lines in the opposite direction
- Ensure coverage extends slightly beyond your print area
Tips:
- Don’t press too hard; let the glue glide smoothly
- For larger prints, divide the bed into sections and apply section by section
- Allow a few seconds between layers for the glue to set slightly
Pros:
- Easy to control application area
- No mess or overspray
Cons:
- May require multiple passes for even coverage
- Can leave streaks if not applied carefully
- Spray Adhesives
Spray adhesives, like 3DLAC or AquaNet hairspray, offer quick and even coverage.
Technique:
- Hold the can about 20-30 cm (8-12 inches) away from the bed
- Use short, controlled bursts rather than a continuous spray
- Move the can in a smooth, sweeping motion across the bed
Tips:
- Cover areas you don’t want to spray (like belts or motors)
- Apply in a well-ventilated area or use a spray booth
- Allow the spray to settle for a minute before printing
Pros:
- Quick and easy to apply
- Provides even coverage over large areas
Cons:
- Potential for overspray
- May require masking of surrounding areas
- Liquid Applicators
Liquid adhesives, such as Magigoo or Layerneer BED WELD, often come with specialized applicators.
Technique:
- Apply in a thin, even layer using the provided applicator
- Use a circular motion to spread the adhesive
- Ensure complete coverage without oversaturating
Tips:
- Less is often more – start with a thin layer and add if needed
- Some liquids dry quickly, so work in small sections
- For textured beds, ensure the liquid gets into the grooves
Pros:
- Often come with specialized applicators for precise control
- Can provide strong, even adhesion
Cons:
- May require practice to apply evenly
- Some may dry quickly, requiring swift application
- Brush-On Adhesives
Brush-on adhesives, like ABS slurry or some PVA glues, offer precise application.
Technique:
- Use a soft, wide brush for even application
- Apply in long, smooth strokes
- Build up thin layers rather than one thick layer
Tips:
- Clean the brush thoroughly after use to prevent hardening
- For ABS slurry, apply while it’s still warm for better spreading
- Allow each layer to dry slightly before applying the next
Pros:
- Allows for targeted application
- Good for touching up specific areas
Cons:
- Time-consuming for large areas
- May leave brush strokes if not applied carefully
For those looking to refine their application skills further:
a) Gradient Application:
- Apply more adhesive at the edges and corners where lifting often occurs
- Gradually reduce the amount towards the center
b) Pattern-Based Application:
- For complex prints, apply adhesive in a pattern matching your print’s base shape
- This can save material and provide targeted adhesion
c) Temperature-Based Application:
- For some adhesives, applying to a slightly warm bed (30-40°C) can improve spreading
- Always check the manufacturer’s recommendations first
d) Multi-Layer Technique:
- For challenging materials, apply a base layer, let it dry, then add a second thin layer
- This can provide extra holding power for warping-prone filaments
- Common Mistakes to Avoid
- Overapplication: You’re not frosting a cake! A thin, even layer is usually sufficient.
- Uneven coverage: Patchy adhesion leads to patchy prints. Take your time to ensure uniformity.
- Applying to a hot bed: Unless specified, apply to a cool bed for best results.
- Ignoring environmental factors: Humidity and temperature can affect adhesive performance.
- Rushing the process: Allow proper drying time between application and printing.
- Maintenance Between Prints
- For stick and liquid glues, you can often reactivate the adhesive by wiping with a damp cloth
- Spray adhesives might need a quick touch-up spray between prints
- Always remove any loose filament or debris before reapplying or reactivating
Remember, the perfect application technique often comes with practice and might vary depending on your specific printer, bed material, and filament type. Don’t be afraid to experiment and fine-tune your method to find what works best for your setup. The goal is to achieve that perfect balance of strong adhesion during printing and easy removal once complete. Happy printing!
Common Mistakes to Avoid
Even experienced makers can fall into these traps. Let’s dive deeper into common mistakes when applying 3D printer glue and how to avoid them:
- Overapplication
The Mistake: Applying too much adhesive, thinking more is better.
Why It’s a Problem:
- Excess glue can create an uneven print surface
- It can interfere with the first layer height
- Removal can be unnecessarily difficult
- Wasted material and potential mess
How to Avoid:
- Start with a thin, even layer
- Remember, you can always add more if needed
- Use the right amount for your bed size and print area
- Follow manufacturer recommendations for application thickness
- Uneven Coverage
The Mistake: Applying adhesive inconsistently across the print bed.
Why It’s a Problem:
- Parts of the print may adhere well while others lift
- Can lead to warping or failed prints
- Inconsistent first layer quality
How to Avoid:
- Use a systematic approach (e.g., crosshatch pattern for sticks, sweeping motion for sprays)
- Take your time and focus on consistency
- In good lighting, check for any missed spots or over-applied areas
- For large beds, consider dividing into sections and tackling one at a time
- Applying to a Hot Bed
The Mistake: Applying adhesive to a heated print bed.
Why It’s a Problem:
- Many adhesives are designed to be applied at room temperature
- Heat can cause the adhesive to dry too quickly or unevenly
- Can alter the adhesive’s properties, reducing effectiveness
How to Avoid:
- Always check the manufacturer’s instructions
- Allow the bed to cool completely before application
- If warm application is recommended, follow specific temperature guidelines
- Ignoring Environmental Factors
The Mistake: Not considering how temperature and humidity affect adhesive performance.
Why It’s a Problem:
- High humidity can interfere with adhesive drying and effectiveness
- Temperature fluctuations can affect adhesive properties
- Can lead to inconsistent results between prints
How to Avoid:
- Be aware of your printing environment’s conditions
- In high humidity, allow extra drying time or use a fan
- Consider using a printer enclosure to maintain consistent conditions
- Adjust your technique seasonally if necessary
- Rushing the Process
The Mistake: Not allowing proper drying time between application and printing.
Why It’s a Problem:
- Wet adhesive can interfere with the first layer
- May not provide optimal adhesion
- Can lead to messy prints or poor bed adhesion
How to Avoid:
- Follow manufacturer guidelines for drying time
- For quick-dry adhesives, still allow a minute or two before printing
- Use this time to double-check your print settings and filament
- Neglecting Bed Preparation
The Mistake: Applying new adhesive over old residue or on a dirty bed.
Why It’s a Problem:
- Old residue can create an uneven surface
- Dirt or oils can interfere with adhesion
- Can lead to inconsistent results and failed prints
How to Avoid:
- Always clean the bed thoroughly before applying new adhesive
- Remove old adhesive completely
- Use isopropyl alcohol for a final clean before application
- Using the Wrong Adhesive for Your Filament
The Mistake: Not matching the adhesive to your specific filament type.
Why It’s a Problem:
- Different filaments have different adhesion requirements
- Using the wrong adhesive can lead to poor adhesion or over-adhesion
- Can result in warped prints or difficulty in removal
How to Avoid:
- Research which adhesives work best with your filament type
- Consider having multiple adhesives for different materials
- Test new adhesive-filament combinations on small prints first
- Inconsistent Reapplication
The Mistake: Not reapplying or refreshing the adhesive consistently between prints.
Why It’s a Problem:
- Adhesive effectiveness can diminish over time or multiple prints
- Can lead to unexpected adhesion failures
How to Avoid:
- Develop a routine for checking and reapplying adhesive
- For long-lasting adhesives, know their effective lifespan
- Keep an eye out for signs of reduced effectiveness (e.g., prints lifting at edges)
- Ignoring Adhesive Shelf Life
The Mistake: Using old or expired adhesives.
Why It’s a Problem:
- Adhesives can degrade over time, losing effectiveness
- Can lead to unexpected print failures
How to Avoid:
- Check the expiration dates on your adhesives
- Store adhesives properly (usually in a cool, dry place)
- If an adhesive’s consistency or performance changes, consider replacing it
- Over-Relying on Adhesives
The Mistake: Using adhesives to compensate for other printing issues.
Why It’s a Problem:
- Masks underlying problems like poor bed leveling or incorrect temperatures
- Can lead to inconsistent results and frustration
How to Avoid:
- Ensure your printer is properly calibrated and maintained
- Use adhesives as part of a holistic approach to good bed adhesion
- Address other factors like bed leveling, nozzle height, and print temperatures
Remember, applying 3D printer glue effectively is a skill that develops with experience. Don’t be discouraged if you make these mistakes – every error is a learning opportunity. By being aware of these common pitfalls and actively working to avoid them, you’ll be well on your way to achieving consistently successful prints. Happy printing!
Maintenance and Cleaning Tips
Keeping Your Print Bed in Top Shape
A well-maintained print bed is indeed like a well-oiled machine – it’s crucial for consistent, high-quality prints. Let’s dive deeper into how to keep your print bed in pristine condition:
- Regular Cleaning Routine
After Each Print:
- Remove any leftover filament or adhesive residue
- Use a plastic scraper for stubborn bits, being careful not to scratch the surface
- Wipe down with a microfiber cloth to remove dust and small particles
Deep Cleaning:
- Perform a thorough clean every 5-10 prints or when switching materials
- Use isopropyl alcohol (IPA) 90% or higher for best results
- For stubborn residues, consider specialized 3D printer bed cleaners
Cleaning Technique:
- Use circular motions to avoid streaking
- Pay extra attention to the center of the bed where most printing occurs
- Allow the bed to dry completely before the next use
- Proper Handling and Storage
- Always handle the bed by its edges to avoid leaving fingerprints
- If removing the bed, place it on a clean, soft surface
- When not in use, cover your printer to protect the bed from dust
- Regular Inspection
Check for Scratches:
- Inspect the bed surface regularly for any scratches or damage
- Minor scratches can often be buffed out with fine-grit sandpaper (1000 grit or higher)
- For glass beds, consider replacing if deep scratches are present
Evenness:
- Check that the bed is still perfectly flat
- Uneven beds can lead to adhesion issues and print quality problems
Coating Integrity:
- For beds with special coatings (like PEI), check for any peeling or wear
- Reapply or replace coatings as needed
- Temperature Management
- Avoid rapid temperature changes which can stress the bed material
- Allow the bed to cool naturally after printing
- For glass beds, never place a hot bed on a cold surface
- Adhesive Residue Management
- Avoid letting adhesive build up over time
- For water-soluble adhesives, use warm water and mild soap occasionally
- For tougher residues, use a mixture of baking soda and water as a gentle abrasive
- Rejuvenation Techniques
For PEI Sheets:
- Lightly sand with very fine-grit sandpaper (2000 grit or higher) to restore texture
- Clean thoroughly after sanding to remove any particles
For Glass Beds:
- Use a glass cleaner occasionally to restore shine
- Consider a razor blade scraper for tough residues (use with extreme caution)
For Textured Surfaces:
- Use a soft-bristled brush to clean between textured patterns
- Compressed air can help remove particles from tight spaces
- Addressing Warping
- If you notice bed warping, check and adjust bed leveling screws
- For removable beds, ensure they’re properly seated each time
- Consider upgrading to a more stable bed material if warping is persistent
- Calibration and Leveling
- Regularly check and adjust bed leveling
- For auto-leveling systems, periodically verify their accuracy
- Update your bed leveling mesh after any significant changes or maintenance
- Managing Different Materials
- Keep track of which areas of the bed are used for different materials
- Some materials (like PETG) can bond strongly to certain surfaces – use appropriate release agents
- Seasonal Adjustments
- Be aware that ambient temperature and humidity can affect bed performance
- You may need to adjust your maintenance routine seasonally
- Consider using an enclosure to maintain consistent conditions
- Upgrades and Replacements
- Know the lifespan of your bed material and plan for replacement
- Consider upgrading to more durable or effective bed surfaces as your skills advance
- Keep spare beds on hand for quick swaps during maintenance
- Documentation
- Keep a log of your maintenance activities
- Note any recurring issues or successful techniques
- This can help you optimize your maintenance routine over time
Remember, a well-maintained print bed is the foundation of successful 3D printing. It’s not just about cleaning, but also about understanding how your bed responds to different materials, temperatures, and printing conditions. By developing a comprehensive maintenance routine, you’ll ensure consistent print quality and extend the life of your print bed.
Treat your print bed with care, and it will reward you with flawless first layers and successful prints time after time. Happy printing!
Removing Stubborn Adhesive Residue
Even with the best practices, you’ll occasionally encounter stubborn adhesive residue that just won’t budge.
Here’s an in-depth look at how to tackle this common issue:
- Identify the Adhesive Type
Before attempting removal, identify the type of adhesive you’re dealing with:
- Water-soluble (e.g., PVA-based glue sticks)
- Alcohol-soluble
- Heat-resistant
- Specialized 3D printing adhesives
This knowledge will guide your removal strategy.
- Basic Removal Techniques
a) Warm Water Method:
- Ideal for water-soluble adhesives
- Soak a cloth in warm water and place it on the residue for a few minutes
- Gently scrub with a soft sponge or cloth
- Repeat if necessary
b) Isopropyl Alcohol (IPA) Technique:
- Effective for many adhesives
- Apply 90% or higher IPA to a microfiber cloth
- Rub in circular motions
- For stubborn spots, let the IPA sit for a minute before wiping
c) Plastic Scraper Approach:
- Use a plastic scraper at a 45-degree angle
- Apply gentle pressure to avoid scratching the bed
- Work slowly and methodically across the residue
- Advanced Removal Methods
a) Heat Gun Technique:
- Useful for heat-resistant adhesives
- Use a heat gun on low setting, moving constantly to avoid overheating
- As the adhesive softens, scrape gently with a plastic scraper
- Be cautious not to warp or damage the print bed
b) Freezing Method:
- Effective for some types of adhesives
- Place the print bed in the freezer for 10-15 minutes
- The cold can make some adhesives brittle and easier to remove
- Scrape immediately after removing from the freezer
c) Vinegar and Baking Soda Paste:
- Mix equal parts white vinegar and baking soda into a paste
- Apply to the residue and let sit for 10-15 minutes
- Scrub gently with a soft brush or cloth
- Rinse thoroughly with water
- Chemical Solutions (Use with Caution)
a) Commercial Adhesive Removers:
- Products like Goo Gone or Un-Du can be effective
- Always test on a small area first
- Follow manufacturer’s instructions carefully
b) Acetone (for specific materials only):
- Effective on some adhesives, but can damage certain bed materials
- Use only on glass or metal beds, never on plastic or coated surfaces
- Apply with a cloth and rub gently
- Specialized Techniques for Different Bed Materials
a) Glass Beds:
- Can withstand more aggressive cleaning methods
- Razor blade scrapers can be used with extreme caution
- Glass cleaner can help as a final step
b) PEI Sheets:
- Avoid abrasive materials or harsh chemicals
- IPA is usually the safest and most effective option
- For tough residues, consider light sanding with very fine grit (2000+) sandpaper
c) Textured Surfaces:
- Use a soft-bristled brush to get into crevices
- Compressed air can help dislodge particles
- Be patient and gentle to avoid damaging the texture
- Prevention Strategies
- Apply thin, even layers of adhesive to minimize buildup
- Clean the bed regularly to prevent residue accumulation
- Use the right amount of adhesive for your print – more isn’t always better
- Post-Removal Care
- After removing stubborn residue, always clean the bed thoroughly
- Check for any damage that may have occurred during the removal process
- Re-level your bed if you used any aggressive removal techniques
- When to Seek Professional Help or Replace
- If residue persists despite multiple removal attempts
- If you notice damage to the print bed surface
- When the cost of your time and materials for cleaning exceeds replacement cost
- Environmental and Safety Considerations
- Ensure proper ventilation when using chemical cleaners
- Wear gloves to protect your skin from irritants
- Dispose of cleaning materials properly, especially when using solvents
- Learning from the Experience
- Keep notes on which removal methods work best for different adhesives
- Adjust your adhesive application technique based on removal difficulties
- Consider switching to easier-to-remove adhesives if you frequently encounter stubborn residues
Remember, patience is key when dealing with stubborn adhesive residue. Rushed or overly aggressive removal attempts can damage your print bed, potentially causing more problems than the residue itself. Always start with the gentlest method and work your way up to more intensive techniques as needed.
By mastering these removal techniques, you’ll be able to keep your print bed in top condition, ensuring consistent, high-quality prints. Happy cleaning and printing!
When to Replace Your Adhesive
Knowing when to replace your 3D printer adhesive is crucial for maintaining print quality and efficiency. Let’s dive deeper into the signs that indicate it’s time for a fresh start:
- Decreased Adhesion Effectiveness
Signs to watch for:
- Prints lifting at the corners or edges more frequently
- First layer not sticking as well as it used to
- Needing to apply more adhesive than usual for the same effect
Why it matters:
- Reduced adhesion can lead to failed prints and wasted material
- Inconsistent adhesion affects print quality and dimensional accuracy
Testing adhesion:
- Perform a small test print in an area you frequently use
- Compare adhesion strength to when the adhesive was new
- Changes in Consistency or Appearance
Visual and tactile cues:
- Glue sticks becoming dry, crumbly, or overly sticky
- Liquid adhesives separating or developing a strange texture
- Spray adhesives coming out unevenly or clogging the nozzle
Smell test:
- An off or sour smell could indicate the adhesive has gone bad
- Some adhesives lose their characteristic scent as they degrade
Application test:
- If the adhesive doesn’t spread or apply as smoothly as before, it may be time to replace
- Age and Storage Conditions
Shelf life considerations:
- Check the manufacturer’s recommended shelf life
- Most adhesives last 1-2 years if stored properly
- Some specialized 3D printing adhesives may have shorter lifespans
Storage impact:
- Adhesives stored in high heat or humidity may degrade faster
- Exposure to direct sunlight can alter adhesive properties
Usage frequency:
- Frequently opened adhesives may dry out or become contaminated quicker
- Consider dating your adhesives when you first open them
- Print Quality Issues
Layer problems:
- If you notice more frequent first layer issues despite proper bed leveling
- Inconsistent layer adhesion that can be traced back to bed adhesion problems
Warping and curling:
- An increase in print warping, especially with materials that previously printed well
- Curling at the edges of prints that didn’t occur before
Surface finish:
- Rougher bottom surfaces on prints where they contact the adhesive
- Inconsistent texture across the base of prints
- Contamination
Visual inspection:
- Visible particles or debris in the adhesive
- Discoloration or separation in liquid adhesives
Performance issues:
- If the adhesive leaves residue on prints that it didn’t before
- Uneven application due to contaminants in the adhesive
Cross-contamination:
- If you’ve accidentally mixed different types of adhesives
- When switching between very different filament materials without thorough cleaning
- Environmental Changes
Seasonal adjustments:
- Some adhesives perform differently in summer versus winter
- Increased humidity might require a switch to a different type of adhesive
Printer modifications:
- If you’ve upgraded your printer (e.g., new bed material, enclosure addition)
- Changes in printing temperature ranges that affect adhesive performance
- Efficiency Considerations
Application time:
- If you find yourself spending significantly more time applying or reapplying adhesive
Material waste:
- When you’re using much more adhesive than before to achieve the same effect
- If failed prints due to adhesion issues become more frequent
- New Material Compatibility
Filament changes:
- When switching to a new type of filament that doesn’t work well with your current adhesive
- If you start printing with materials that require specific adhesion properties
- Allergic Reactions or Sensitivities
Personal health:
- If you develop any skin reactions or respiratory issues when using the adhesive
- When switching to a low-VOC environment and need a more eco-friendly option
- Manufacturer Updates
Product improvements:
- When the manufacturer releases a new version with better performance
- If there’s a recall or known issue with your current batch of adhesive
- Cost-Benefit Analysis
Economic factors:
- When the cost of failed prints exceeds the cost of new adhesive
- If you find yourself using expensive specialized adhesives for simple prints
- Experimentation and Upgrades
Trying new products:
- When you want to experiment with new adhesive technologies
- If you’re looking to solve specific adhesion problems your current product can’t handle
Remember, replacing your adhesive at the right time can save you from frustration, wasted materials, and poor print quality. It’s better to replace a questionable adhesive than to risk a series of failed prints. Keep a log of when you open new adhesives and how they perform over time. This can help you anticipate when replacements might be needed and optimize your printing workflow.
By staying attentive to these signs and proactively replacing your adhesive when needed, you’ll maintain consistent print quality and efficiency in your 3D printing projects. Happy printing!
Conclusion
As we wrap up our journey through the world of 3D printer adhesives, it’s clear that choosing the right glue is far more than a minor detail—it’s a crucial step in your 3D printing process. We’ve explored the top 10 adhesives, each with its unique strengths and ideal use cases, but the takeaway goes beyond just a list of products.
Reflecting on the Importance of Adhesion
Remember when we started, talking about those frustrating moments of finding a failed print? By now, you should feel empowered to tackle those challenges head-on. Proper bed adhesion isn’t just about keeping your print stuck to the bed; it’s about laying the foundation for success in every aspect of your 3D printing projects.
The Right Tool for the Right Job
One size doesn’t fit all in the world of 3D printing adhesives. The variety we’ve explored—from simple glue sticks to high-tech specialized formulas—highlights the importance of matching your adhesive to your specific needs. Consider your most commonly used filaments, your typical print sizes, and even your environmental conditions when making your choice.
Beyond the Adhesive
While we’ve focused on adhesives, it’s important to remember that they’re part of a larger ecosystem in 3D printing. Bed leveling, temperature control, and proper bed preparation all play crucial roles alongside your chosen adhesive. The best adhesive in the world can’t compensate for poor printer setup or maintenance.
Experimentation and Learning
Don’t be afraid to experiment! What works perfectly for one maker might not be ideal for another. The 3D printing community thrives on shared experiences and innovations. Try different adhesives, document your results, and don’t hesitate to share your findings with others.
Looking to the Future
The field of 3D printing is ever-evolving, and adhesives are no exception. Keep an eye out for new products and technologies. Today’s cutting-edge solution might become tomorrow’s standard practice. Stay curious and open to new possibilities.
Environmental Considerations
As we advance in our 3D printing journey, it’s also worth considering the environmental impact of our choices. Many manufacturers are moving towards more eco-friendly formulations. When possible, opt for adhesives that align with sustainable practices.
The Bigger Picture
Mastering bed adhesion is more than just solving a technical problem—it’s about elevating your entire 3D printing experience. With the right adhesive, you’re not just preventing print failures; you’re opening doors to more ambitious projects, finer details, and a broader range of materials.
Final Thoughts
As you move forward in your 3D printing adventures, remember that the perfect adhesive solution is out there for you. Whether you’re printing intricate figurines, functional prototypes, or large-scale models, the right adhesive will help bring your visions to life with precision and reliability.
So, armed with this knowledge, go forth and stick it to those printing challenges! Experiment, learn, and most importantly, enjoy the process. After all, at its heart, 3D printing is about creativity and innovation. With the right adhesive as your ally, there’s no limit to what you can create.
Happy printing, and may all your first layers be flawless!
FAQs
- Can I use regular school glue for 3D printing?
While it might work in a pinch for PLA, it’s not ideal. School glue isn’t designed for the heat and precision required in 3D printing. It’s best to use adhesives specifically made for 3D printing or recommended alternatives. - How often should I reapply 3D printer glue?
This varies depending on the glue and your printing frequency. Some makers reapply after every print, while others can go several prints before reapplication. Monitor your adhesion and reapply when you notice it decreasing. - Is 3D printer glue necessary if I have a heated bed?
While a heated bed improves adhesion, many makers still use glue for added insurance, especially with tricky filaments like ABS. It can also protect your print bed from scratches. - Can using too much 3D printer glue cause problems?
Yes, overapplying glue can lead to a messy first layer, difficulty removing prints, and even clogged nozzles if excess glue gets picked up. Always start with a thin, even layer. - Are there any alternatives to commercial 3D printer glues?
Yes! Some makers swear by alternatives like blue painter’s tape, PEI sheets, or even a slurry made from ABS dissolved in acetone for ABS prints. These can be effective, but commercial glues are often more reliable and easier to use.