15 Essential 3D Printing Tips for Perfect Prints Every Time
3D printing is an incredible technology that has revolutionized how we create and innovate. From hobbyists printing custom parts at home to professionals developing prototypes and end-use products, the potential of 3D printing is vast and varied. However, diving into 3D printing can sometimes feel like navigating a maze. There are so many settings, materials, and techniques to master that it can be overwhelming, especially if you’re looking to improve your efficiency and print quality quickly.
But don’t worry! Whether you’re just starting out or looking to fine-tune your skills, this guide is here to help. In just 15 minutes, we’ll cover 15 essential tips that will boost your 3D printing game. Think of this as your quick-start guide to avoiding common pitfalls, optimizing your prints, and making the most of your 3D printer.
Why should you care about these tips? Because every little improvement can save you time, money, and frustration. Imagine spending hours on a print only to have it fail because of a small mistake that could have been easily avoided. With these tips, you’ll gain insights that can prevent such issues and help you produce high-quality prints consistently.
So, grab a cup of coffee, settle in, and let’s get ready to transform your 3D printing experience. By the end of this article, you’ll have a solid understanding of the key aspects of 3D printing and be equipped with practical advice that you can implement right away. Let’s get started!
Tip 1: Master Your Printer’s Settings
When it comes to 3D printing, your printer’s settings are like the control panel of an airplane. If you don’t understand them, you’re likely to crash and burn. But don’t worry, you don’t need to be an engineer to master these settings; a little knowledge goes a long way.
Understanding Basic Settings
First, let’s break down the basics. Most 3D printers allow you to adjust several key settings:
- Layer Height: This determines the thickness of each layer of your print. Smaller layer heights result in smoother surfaces but take longer to print. Larger layer heights are quicker but may sacrifice detail.
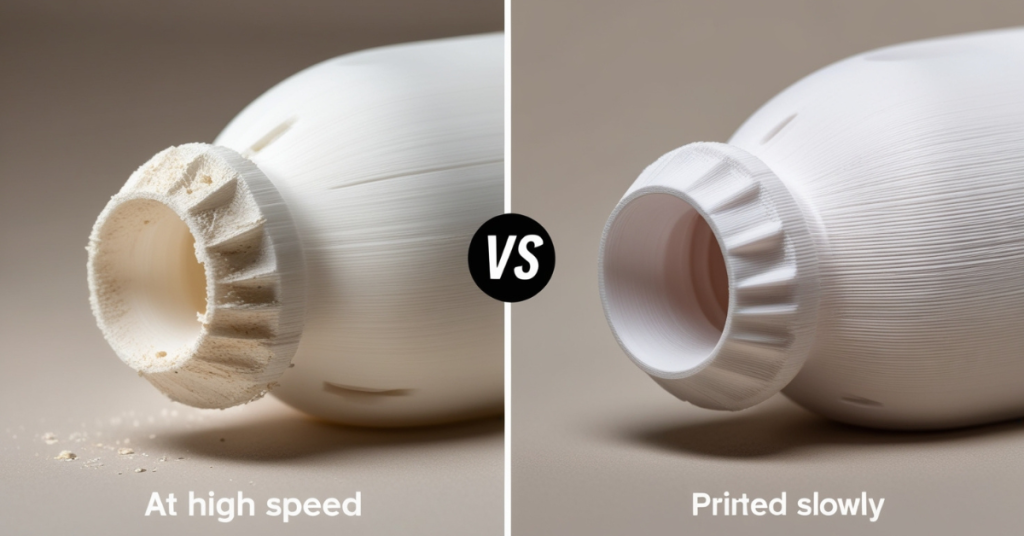
- Print Speed: This controls how fast the printer moves while laying down filament. Higher speeds can save time but might reduce print quality, especially with complex designs.
- Infill Density: This refers to how solid the inside of your print is. A higher infill percentage means a denser, stronger print but uses more material and takes longer. Lower infill percentages save time and material but can make the print less sturdy.
- Nozzle Temperature: The temperature at which the filament is extruded. Different materials require different temperatures, and finding the right one is crucial for good adhesion and print quality.
- Bed Temperature: Some materials require a heated bed to stick properly and avoid warping. Setting the correct bed temperature can make a huge difference in the success of your prints.
Customizing Settings for Optimal Results
Now that you know the basics, it’s time to dive deeper. Each print is unique, and tweaking your settings can help achieve the best results for specific projects.
- Start with a Test Print: Before diving into a major project, do a test print. Use a simple object like a cube or a calibration tool to check your settings. This helps you identify any adjustments needed without wasting time and material on a failed complex print.
- Adjust Layer Height According to Detail Needs: For highly detailed prints, use a smaller layer height (like 0.1mm). For larger, less detailed objects, you can increase the layer height (up to 0.3mm or more) to save time.
- Balance Print Speed and Quality: If you notice that high-speed prints are coming out with poor quality, slow down the print speed. Conversely, if you’re printing something simple and speed is more critical, feel free to increase the speed.
- Tweak the Infill for Strength or Speed: If your print needs to be strong (like a functional part), increase the infill density. If it’s more of a decorative piece, reduce the infill to speed up the process and save material.
- Find the Right Temperatures: Start with the manufacturer’s recommended temperatures for both the nozzle and the bed. If you encounter issues like poor adhesion or warping, adjust the temperatures slightly up or down until you find the sweet spot.
Experiment and Learn
Mastering your printer’s settings is all about experimentation and learning from each print. Don’t be afraid to tweak and adjust as you go. Keep notes on what works and what doesn’t for different materials and projects. Over time, you’ll develop an intuition for the settings that work best for your printer and the specific prints you’re working on.
Remember, the more you understand and customize your printer’s settings, the better your prints will be. It’s like tuning an instrument – the more precisely you adjust it, the better the music (or in this case, the print) will be.
👉 Want to avoid failed prints from the start?
Check out the essential tools we recommend here:
👉 View Recommended 3D Printing Gear
Tip 2: Choose the Right Filament
👉 Need a reliable filament that prints clean and consistently?
👉 Check current price on Amazon:
PLA Filament
Choosing the right filament for your 3D print is like selecting the right ingredients for a recipe. The filament you choose can significantly affect the quality, strength, and appearance of your final product. With a variety of filaments available, it’s important to know which one to use for your specific project.
Different Types of Filaments
Let’s take a closer look at the most commonly used filaments and their unique properties:
- PLA (Polylactic Acid): PLA is the go-to filament for beginners. It’s easy to print with, environmentally friendly, and doesn’t require a heated bed. PLA is great for prototypes, decorative items, and anything that doesn’t need to withstand high stress or heat. It has a low melting temperature (around 180-220°C) and comes in a variety of colors.
- ABS (Acrylonitrile Butadiene Styrene): ABS is known for its strength and durability. It’s perfect for parts that need to endure wear and tear, such as mechanical components or toys. However, ABS requires a heated bed (around 90-110°C) to prevent warping and emits fumes that require good ventilation.
- PETG (Polyethylene Terephthalate Glycol): PETG combines the best of both PLA and ABS. It’s strong, flexible, and easy to print with minimal warping. It’s ideal for objects that need to be durable and slightly flexible, like phone cases or water bottles. PETG prints at temperatures around 220-250°C and sticks well to the print bed.
- TPU (Thermoplastic Polyurethane): TPU is a flexible filament that’s perfect for prints that need to bend or stretch. It’s commonly used for making phone cases, wearable items, and gaskets. TPU can be a bit tricky to print with due to its flexibility, requiring slower print speeds and careful handling.
- Nylon: Nylon is incredibly strong and resistant to wear, making it ideal for functional parts that need to be tough and durable. It’s a bit more challenging to print with, requiring a higher temperature (around 240-260°C) and a well-controlled environment to prevent warping and moisture absorption.
When to Use Each Type
Choosing the right filament depends on the specific requirements of your project. Here are some guidelines to help you decide:
- Prototypes and Decorations: Use PLA for prototypes and decorative items. It’s easy to print with and offers good visual quality.
- Durable Parts: For parts that need to withstand stress, like mechanical components or toys, opt for ABS. Just ensure you have proper ventilation due to the fumes it emits.
- Functional and Flexible Prints: PETG is great for functional parts that need to be both strong and slightly flexible. It’s also suitable for items that will come into contact with food or need to be water-resistant.
- Soft and Elastic Items: Use TPU for prints that need to be flexible and elastic, such as phone cases, wearable items, and seals.
- High-Stress Components: Choose Nylon for parts that need to be extremely tough and wear-resistant. It’s perfect for gears, hinges, and other mechanical components.
Experimenting with Filaments
Don’t be afraid to experiment with different filaments to see what works best for your projects. Here are a few tips to get started:
- Test Prints: Start with small test prints to understand how each filament behaves with your printer settings. This helps you fine-tune your settings without wasting material.
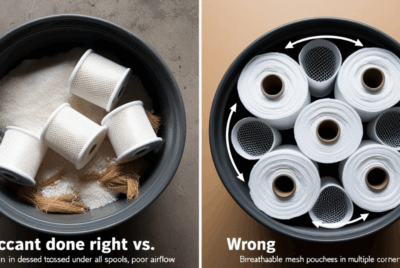
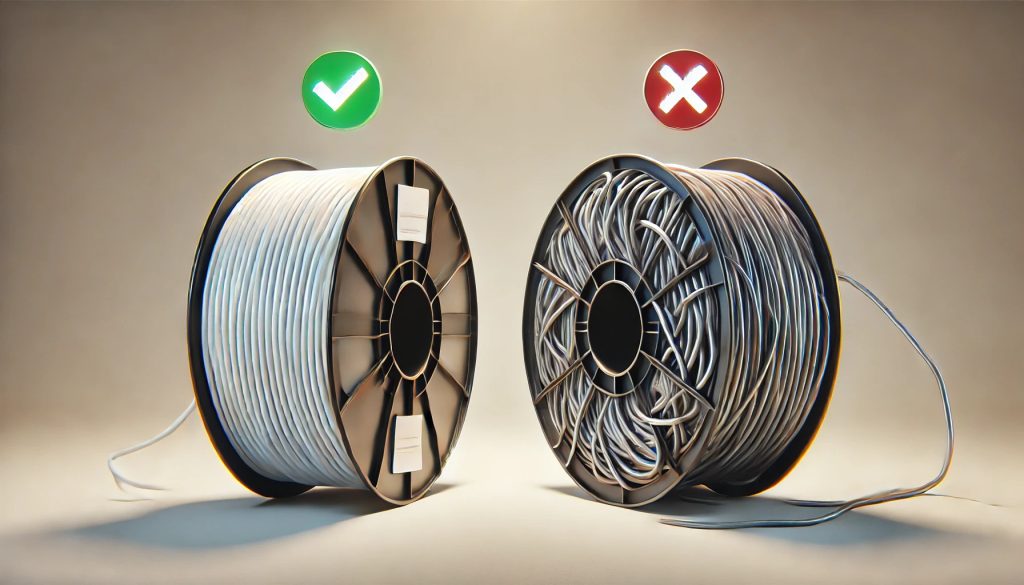
- Storage: Properly store your filaments to prevent them from absorbing moisture. Use airtight containers with desiccants to keep them dry.
- Manufacturer Recommendations: Always check the manufacturer’s recommendations for printing temperatures and settings. This ensures you get the best results and avoid common issues like warping or poor adhesion.
Selecting the right filament is crucial for the success of your 3D prints. By understanding the properties and best uses of each type, you can make informed decisions that enhance the quality and functionality of your projects. Experiment, take notes, and soon you’ll be a filament expert, ready to tackle any 3D printing challenge.
Tip 3: Keep Your Printer Clean
Keeping your 3D printer clean is like maintaining a well-oiled machine. A clean printer not only ensures better print quality but also extends the lifespan of your equipment. Regular maintenance might seem tedious, but it’s a small price to pay for consistent, high-quality prints. Let’s dive into the details of how to keep your 3D printer in top condition.
Regular Maintenance Routines
Just like your car needs regular oil changes, your 3D printer requires routine maintenance to function optimally. Here are some key areas to focus on:
- Print Bed: After every few prints, make it a habit to clean the print bed. Residue from adhesives, filament, and dust can accumulate and affect adhesion. Use isopropyl alcohol and a lint-free cloth to wipe down the bed. If your printer uses a glass bed, ensure it’s completely dry before starting a new print.
- Nozzle: The nozzle can get clogged with leftover filament. Use a thin needle or a dedicated nozzle cleaning tool to clear out any obstructions. For a more thorough clean, you can perform a cold pull (also known as atomic pull) where you heat the nozzle, insert a filament, let it cool, and then pull it out to remove any residue.
- Extruder Gears: The extruder gears can accumulate filament dust and debris, which can affect extrusion. Use a small brush or compressed air to clean the gears and ensure smooth filament feeding.
- Cooling Fans: Dust can build up on your printer’s cooling fans, reducing their efficiency. Use compressed air to blow out the dust from the fans and ensure they are spinning freely.
Tools for Cleaning
Having the right tools on hand makes cleaning your printer easier and more effective. Here are some must-have cleaning tools:
- Soft Brush: A soft brush is ideal for removing dust and debris from the printer’s moving parts and electronics without causing damage.
- Compressed Air: Compressed air cans are perfect for blowing dust out of hard-to-reach places like cooling fans and electronic components.
- Isopropyl Alcohol: Use isopropyl alcohol (at least 70%) with a lint-free cloth to clean the print bed and remove any sticky residue.
- Needle or Nozzle Cleaning Tool: These tools are essential for unclogging nozzles and ensuring smooth filament flow.
- Lubricant: Use a silicone-based lubricant to keep the printer’s moving parts, like the rods and lead screws, running smoothly.
Best Practices for Keeping Your Printer Clean
Implementing a few best practices can make a big difference in maintaining a clean and efficient printer:
- Regular Schedule: Set a regular cleaning schedule based on your usage. If you print frequently, aim to do a quick clean every week and a more thorough clean once a month.
- Keep Your Workspace Clean: A clean workspace reduces the amount of dust and debris that can settle on your printer. Use a dust cover when the printer is not in use to keep it clean.
- Avoid Contaminants: Keep food, drinks, and other potential contaminants away from your printer to prevent accidental spills and messes.
Keeping your 3D printer clean is essential for maintaining print quality and prolonging the life of your equipment. By incorporating regular maintenance routines and using the right tools, you can ensure your printer runs smoothly and produces the best possible prints. Think of it as a little TLC for your trusty machine – it’s a small effort that goes a long way.
Tip 4: Level Your Bed Properly
Leveling your 3D printer’s bed is akin to laying a solid foundation for a house. If the foundation is off, everything built on top will be unstable. Proper bed leveling is crucial for achieving successful prints, as it ensures that the first layer adheres correctly to the print bed. Let’s explore how to level your bed properly and avoid common pitfalls.
Steps to Leveling the Bed
Leveling the bed might seem like a daunting task, but with a systematic approach, it becomes manageable. Here’s a step-by-step guide:
- Preheat the Bed and Nozzle: Start by preheating your printer’s bed and nozzle to the typical printing temperature for the filament you’re using. Materials expand when heated, and preheating ensures you’re leveling the bed under actual printing conditions.
- Home the Printer: Use your printer’s controls to move the print head to its home position. This sets the starting point for leveling.
- Disable Steppers: Disable the stepper motors so you can manually move the print head and bed. This allows for fine adjustments without resistance.
- Adjust the Corners: Begin with one corner of the bed. Place a piece of paper between the nozzle and the bed. Adjust the bed height using the leveling knobs until you feel slight resistance when moving the paper. Repeat this process for all four corners, ensuring consistent resistance.
- Check the Center: After adjusting the corners, move the nozzle to the center of the bed. The paper should have the same slight resistance as it did at the corners. If it doesn’t, make minor adjustments to the corners and recheck the center.
- Repeat as Necessary: Leveling the bed often requires multiple passes. Repeat the process until you achieve consistent resistance across the entire bed.
Common Mistakes to Avoid
Avoiding common mistakes can save you time and frustration:
- Skipping Preheating: Always preheat the bed and nozzle. Skipping this step can lead to inaccurate leveling, as the bed may warp slightly when heated.
- Overtightening Knobs: Avoid overtightening the leveling knobs. This can warp the bed and make leveling more difficult. Adjust gently and evenly.
- Neglecting Regular Checks: Bed leveling isn’t a one-time task. Regularly check and adjust the bed, especially after moving the printer or changing filament types.
- Ignoring Uneven Beds: Some beds have slight warps or imperfections. If your bed isn’t perfectly flat, consider using a glass bed or a flexible build plate to provide a more even surface.
Tools and Techniques for Better Leveling
Using the right tools and techniques can enhance your leveling process:
- Auto Bed Leveling (ABL) Sensors: Consider upgrading your printer with an auto bed leveling sensor like a BLTouch. These sensors automatically measure the bed’s surface and adjust the nozzle height accordingly, reducing the need for manual leveling.
- Feeler Gauges: While a piece of paper works well, feeler gauges offer more precision. Use them to measure and adjust the gap between the nozzle and the bed accurately.
- Mesh Bed Leveling: Some advanced printers and firmware support mesh bed leveling, which compensates for slight imperfections in the bed’s surface by adjusting the nozzle height dynamically during the print.
Leveling your bed properly is essential for achieving high-quality 3D prints. By following a systematic approach and avoiding common mistakes, you can ensure that your first layer adheres well and provides a solid foundation for the rest of your print. Remember, a well-leveled bed is the key to successful and hassle-free 3D printing.
Tip 5: Use a Good Adhesive
Using a good adhesive for your 3D prints is like making sure the first pancake doesn’t stick to the pan. A strong first layer is critical for the success of the entire print, and the right adhesive can make all the difference. Let’s delve into the types of adhesives available and how to use them effectively.
Types of Adhesives
Different adhesives work best with different materials and bed types. Here are some popular options:
- Glue Sticks: Simple and effective, glue sticks are a go-to for many 3D printing enthusiasts. They provide a strong bond for materials like PLA and ABS, and they’re easy to apply and clean off.
- Hairspray: Hairspray, especially those with a high vinyl content, can create an excellent adhesive layer. It’s particularly effective on glass beds and works well with PLA and ABS. Make sure to spray it evenly for the best results.
- Painter’s Tape: Blue painter’s tape is a favorite for its easy application and removal. It works well with PLA and provides a textured surface that helps the filament adhere. Just make sure to smooth out any air bubbles when applying it to the bed.
- PEI Sheets: Polyetherimide (PEI) sheets are a durable and reusable adhesive option. They provide excellent adhesion for a variety of materials, including PLA, ABS, and PETG. PEI sheets can be attached to the bed with clips or adhesive backing.
- Specialized 3D Printing Adhesives: Products like Magigoo and 3D Gloop! are designed specifically for 3D printing. They offer strong adhesion and are formulated for different filament types. These adhesives often have the added benefit of being water-soluble, making cleanup easier.
Application Techniques
Using the right application technique ensures the adhesive works effectively:
- Even Application: Apply adhesives like glue sticks and hairspray evenly across the print bed. Uneven application can lead to poor adhesion and failed prints. For hairspray, hold the can about 8-12 inches away from the bed to ensure a fine mist.
- Smooth Surface: For painter’s tape, ensure the tape is applied smoothly without wrinkles or air bubbles. Overlapping the edges slightly helps create a continuous adhesive surface.
- Coverage Area: Apply adhesive to the entire area where the print will be. If you’re printing a large object, make sure the entire footprint is covered to prevent warping or lifting.
Troubleshooting Adhesion Issues
Sometimes, despite your best efforts, prints may not stick. Here are some troubleshooting tips:
- Check Bed Leveling: An uneven bed is a common cause of poor adhesion. Recheck your bed leveling to ensure it’s properly adjusted.
- Adjust Temperature: Some materials require a heated bed to adhere properly. Make sure your bed temperature is set correctly for the filament you’re using. For instance, PLA generally adheres well at 60°C, while ABS may need around 90-110°C.
- Clean the Bed: Oils from your hands and dust can reduce adhesion. Clean the bed with isopropyl alcohol before applying adhesive.
- Try Different Adhesives: Not all adhesives work equally well with all materials or bed surfaces. If you’re having trouble, try a different adhesive or combination of methods.
Benefits of Using Adhesives
Using the right adhesive offers several benefits:
- Prevents Warping: Adhesives help prevent the edges of your print from lifting off the bed, which is a common issue with larger prints.
- Improves Print Quality: A strong first layer ensures the rest of the print remains stable, leading to better overall quality.
- Reduces Failed Prints: Good adhesion reduces the chances of prints detaching from the bed mid-process, saving you time and filament.
Using a good adhesive is essential for successful 3D printing. By understanding the different types of adhesives and how to apply them correctly, you can ensure strong adhesion and improve your print quality. Whether you prefer glue sticks, hairspray, painter’s tape, PEI sheets, or specialized adhesives, the key is finding what works best for your specific setup and sticking with it—pun intended.
Tip 6: Optimize Your Print Speed
Balancing print speed with print quality is like driving a car—you need to find the right speed to get to your destination safely and efficiently. Printing too fast can lead to poor quality, while printing too slow can be unnecessarily time-consuming. Let’s explore how to optimize your print speed for the best results.
Balancing Speed and Quality
Finding the sweet spot between speed and quality is crucial. Here are some factors to consider:
- Print Complexity: For intricate designs with lots of details, slower print speeds (40-60 mm/s) ensure better precision and smoother surfaces. For simpler, bulkier prints, you can increase the speed (60-100 mm/s) without sacrificing too much quality.
- Layer Height: Thicker layers (0.2-0.3 mm) can be printed faster but with less detail. Thinner layers (0.1-0.15 mm) provide more detail but take longer. Adjust the speed based on the layer height to balance detail and time.
- Material Type: Different materials have different optimal print speeds. PLA can typically be printed faster than ABS or PETG. Check the manufacturer’s recommendations for the best speed settings for your filament.
Adjusting Speed for Different Materials
Each filament type has its own characteristics, and adjusting print speed accordingly can improve results:
- PLA: PLA is forgiving and can be printed at higher speeds (60-100 mm/s). However, for fine details or overhangs, reduce the speed to around 40-60 mm/s.
- ABS: ABS benefits from slower speeds (40-60 mm/s) to prevent warping and ensure better layer adhesion. The heated bed and enclosed printing environment can also help maintain quality at higher speeds.
- PETG: PETG is prone to stringing and oozing. Printing at moderate speeds (40-60 mm/s) helps reduce these issues and maintains strength and durability.
- TPU: Flexible filaments like TPU require slower speeds (20-40 mm/s) due to their elastic nature. Slow speeds help maintain control and prevent filament jams.
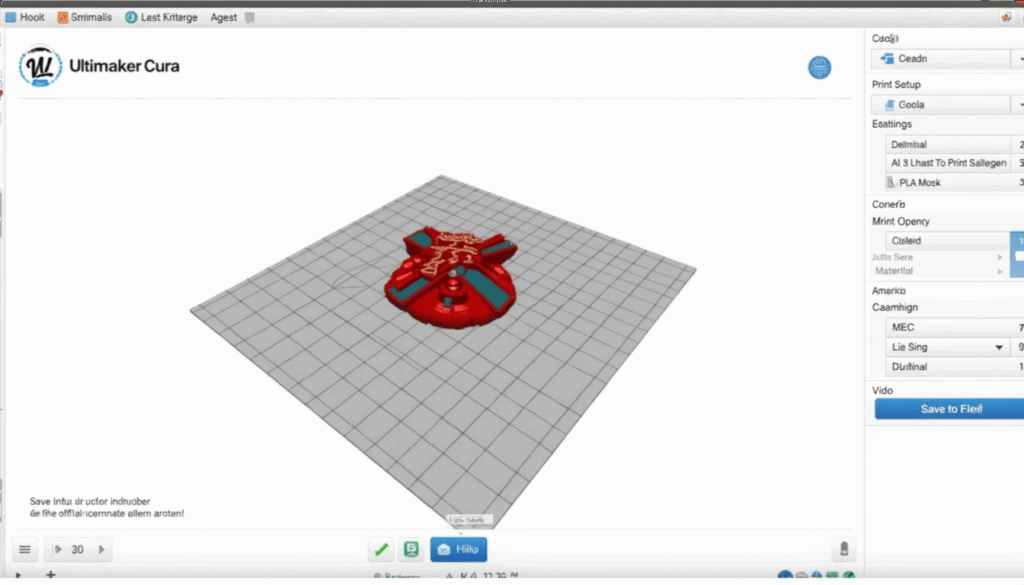
Using Speed Settings in Your Slicer
Your slicer software plays a key role in optimizing print speed. Here’s how to use it effectively:
- Default Settings: Start with the slicer’s default settings for your printer and material. These are usually optimized for a balance of speed and quality.
- Speed Overrides: Most slicers allow you to set different speeds for specific parts of the print, such as infill, perimeters, and supports. For example, you can print infill faster (80-100 mm/s) while keeping the perimeter slower (40-60 mm/s) for better surface quality.
- Acceleration and Jerk Settings: Fine-tune these advanced settings to reduce vibrations and improve print quality at higher speeds. Lower acceleration and jerk settings can reduce ringing and improve detail.
Experimenting with Print Speed
Experimentation is key to finding the optimal speed for your specific printer and projects. Here are some tips:
- Test Prints: Use small test prints with varying speeds to observe the effects on quality and time. This helps you dial in the best settings for different types of prints.
- Monitor Results: Keep an eye on your prints as they progress. If you notice issues like poor layer adhesion, stringing, or ringing, adjust the speed settings and try again.
- Document Settings: Keep a record of the speeds that work best for different filaments and designs. This reference can save time on future projects.
Benefits of Optimizing Print Speed
Optimizing print speed offers several benefits:
- Improved Quality: Balanced speeds result in smoother surfaces, better detail, and stronger prints.
- Time Savings: Efficient speed settings reduce print times without compromising quality, allowing you to complete projects faster.
- Material Efficiency: Fewer failed prints mean less wasted filament, saving you money and resources.
Optimizing your print speed is crucial for achieving high-quality 3D prints efficiently. By balancing speed and quality, adjusting settings for different materials, and using your slicer effectively, you can find the perfect print speed for your projects. Experiment, monitor, and refine your settings to get the best results from your 3D printer.
Tip 7: Fine-Tune the Temperature
Fine-tuning the temperature of your 3D printer is like adjusting the oven for a perfect bake. The right temperature settings are crucial for achieving strong layer adhesion, smooth finishes, and preventing common print issues like warping or stringing. Let’s delve into how to fine-tune the temperature for different filaments and troubleshoot temperature-related problems.
Ideal Temperature Settings for Different Filaments
Each filament type has an optimal temperature range that ensures the best print quality. Here are some general guidelines:
- PLA (Polylactic Acid): PLA is one of the easiest filaments to print with, typically requiring a nozzle temperature between 180°C and 220°C. It’s less prone to warping and doesn’t necessarily need a heated bed, but a bed temperature of 50-60°C can improve adhesion.
- ABS (Acrylonitrile Butadiene Styrene): ABS requires higher temperatures, usually between 220°C and 250°C for the nozzle and 90-110°C for the heated bed. Proper temperature settings are crucial to prevent warping and ensure strong layer adhesion.
- PETG (Polyethylene Terephthalate Glycol): PETG prints best at nozzle temperatures between 220°C and 250°C. The bed should be heated to 70-80°C to avoid warping and improve adhesion.
- TPU (Thermoplastic Polyurethane): Flexible filaments like TPU print well at temperatures between 220°C and 240°C. A bed temperature of 50-60°C helps with adhesion, but it’s not always necessary.
- Nylon: Nylon is a strong and durable filament that requires high temperatures, typically between 240°C and 260°C for the nozzle and 80-100°C for the bed. It’s also prone to absorbing moisture, so keep it dry for best results.
Troubleshooting Temperature Issues
Temperature-related issues can be tricky, but here are some common problems and solutions:
- Poor Adhesion: If your print isn’t sticking to the bed, try increasing the bed temperature slightly. For materials like PLA and PETG, a 5-10°C increase can make a big difference. Ensure the bed is clean and properly leveled.
- Warping: Warping often occurs with materials like ABS. To combat this, increase the bed temperature and ensure the printing environment is enclosed to maintain consistent temperatures. Use adhesives or a brim to improve bed adhesion.
- Stringing: If you notice fine strands of filament between parts of your print, try lowering the nozzle temperature by 5-10°C. Additionally, adjust retraction settings in your slicer to reduce oozing.
- Layer Splitting: If your layers aren’t adhering properly, increase the nozzle temperature. This ensures better layer bonding and reduces the likelihood of prints splitting apart.
- Overheating: Signs of overheating include drooping or sagging layers, especially on overhangs. Lower the nozzle temperature in small increments until the print quality improves.
Finding the Optimal Temperature
Dialing in the perfect temperature for your filament often requires experimentation. Here’s how to find the optimal settings:
- Temperature Towers: Print a temperature tower—a model designed to test different temperatures in a single print. Each section of the tower is printed at a different temperature, allowing you to see which setting produces the best results.
- Manufacturer Recommendations: Always start with the temperature range recommended by the filament manufacturer. These guidelines are a good starting point for fine-tuning.
- Incremental Adjustments: Make small adjustments (5-10°C) to the nozzle and bed temperatures and observe the results. This iterative process helps you zero in on the ideal settings.
Consistency and Monitoring
Maintaining consistent temperatures throughout the print is crucial for quality. Here are some tips:
- Check Calibration: Regularly calibrate your printer’s thermistors to ensure accurate temperature readings. Incorrect readings can lead to inconsistent print quality.
- Monitor During Prints: Keep an eye on your prints, especially in the initial layers. Use monitoring tools or apps to track temperature fluctuations and make real-time adjustments if necessary.
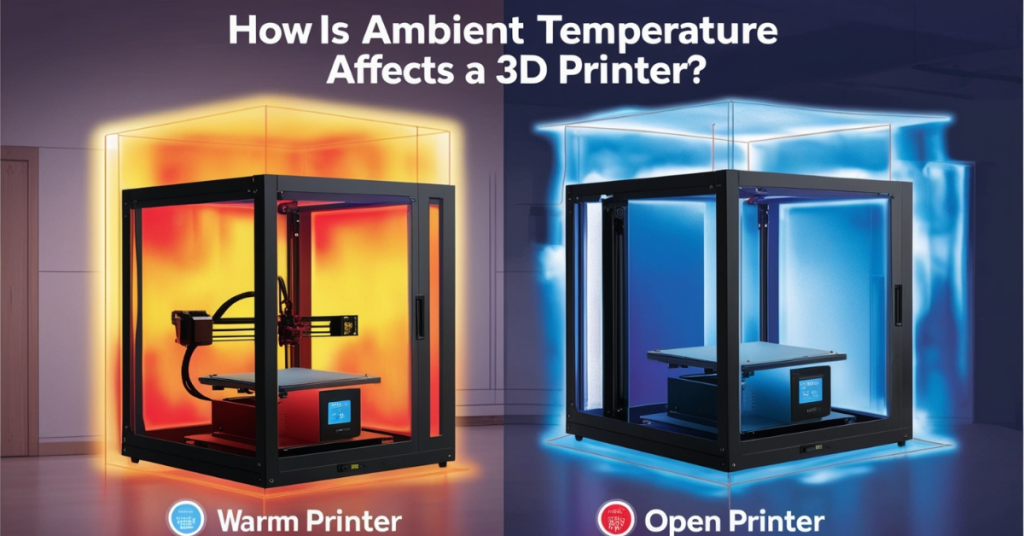
- Environmental Control: Ensure your printing environment is stable. Drafts, ambient temperature changes, and humidity can affect print quality. Consider using an enclosure to maintain a consistent environment.
Fine-tuning the temperature settings for your 3D printer is essential for achieving high-quality prints. By understanding the optimal temperature ranges for different filaments, troubleshooting common issues, and experimenting with incremental adjustments, you can significantly improve your print outcomes. Consistent monitoring and maintaining a stable printing environment further enhance the results, ensuring your prints are smooth, strong, and precise.
Tip 8: Ensure Proper Ventilation
Ensuring proper ventilation in your 3D printing setup is like making sure a kitchen has a good exhaust fan—it’s crucial for maintaining a safe and comfortable environment. 3D printers can emit fumes and particulates, especially when printing with certain materials, so it’s important to manage these emissions effectively. Let’s explore why ventilation matters and how to set up your workspace for optimal air quality.
Importance of Ventilation
Proper ventilation is important for several reasons:
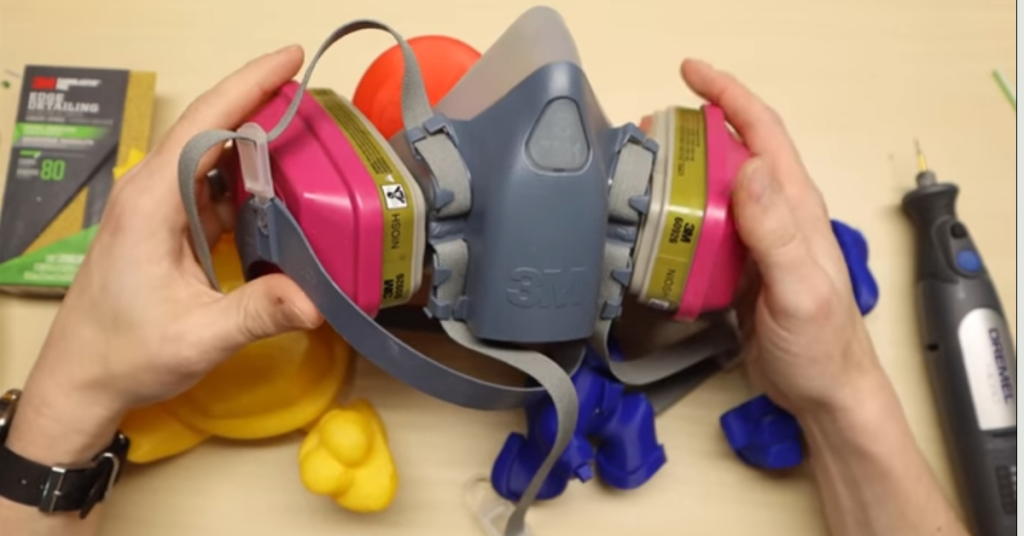
- Health and Safety: Some 3D printing materials, like ABS and Nylon, emit fumes that can be harmful if inhaled over long periods. These fumes can cause respiratory issues and other health problems.
- Reducing Odors: Printing with certain filaments can produce strong odors. Good ventilation helps to dissipate these smells, making your workspace more pleasant.
- Preventing Overheating: Ensuring good airflow around your printer can help prevent overheating of both the printer and the printed object, especially in enclosed spaces.
Setting Up a Ventilated Workspace
Creating a well-ventilated workspace involves a few key considerations:
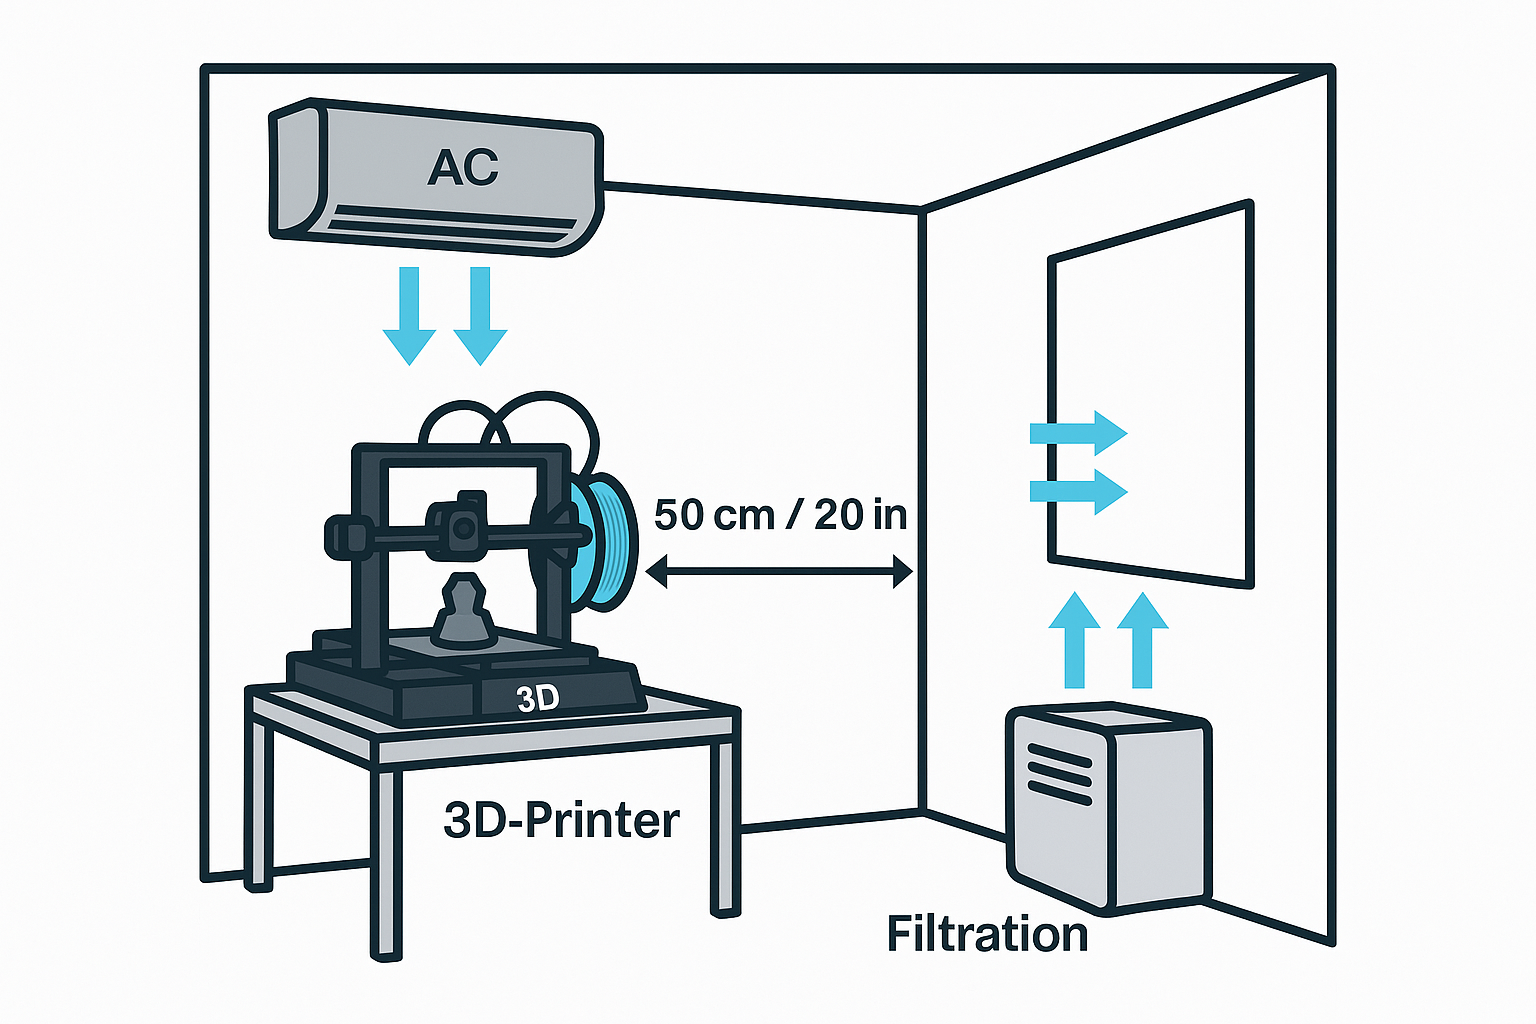
- Location: Place your 3D printer in a well-ventilated area, such as near a window or in a room with good airflow. Avoid confined spaces where fumes can accumulate.
- Ventilation Systems: If possible, set up a dedicated ventilation system. This can be as simple as a fan near a window or as complex as a fume extractor. A fume extractor with a HEPA filter can effectively capture particulates and fumes.
- Enclosures: Using an enclosure for your 3D printer can help contain fumes and direct them towards a ventilation system. Some enclosures come with built-in ventilation fans and filters.
- Air Purifiers: Consider using an air purifier with a HEPA filter in your workspace. This can help remove particulates and improve overall air quality.
DIY Ventilation Solutions
If you’re on a budget, there are several DIY solutions to improve ventilation:
- Box Fan and Filter: Place a box fan in a window with an air filter attached to the intake side. This setup can help draw fumes out of the room while filtering the air.
- Ducting: Use flexible ducting to direct fumes from the printer to a window or an exhaust vent. You can create a hood or cover for the printer with an attached duct to capture fumes more effectively.
- Portable Fume Extractor: Build a portable fume extractor using a small fan, ducting, and a filter. Position it near the printer to capture and filter fumes as they’re emitted.
Filament-Specific Ventilation Needs
Different filaments have different ventilation requirements:
- PLA: PLA is relatively safe and emits fewer fumes compared to other materials. However, good ventilation is still recommended to disperse any minor odors and particulates.
- ABS: ABS emits more noticeable fumes, including potentially harmful styrene. Ensure strong ventilation, such as a fume extractor or an open window with a fan, when printing with ABS.
- PETG: PETG emits fewer fumes than ABS but still benefits from good ventilation. Use a fan or air purifier to keep the air clear.
- Nylon: Nylon can emit fumes that are harmful if inhaled. Use an enclosure with proper ventilation or a fume extractor to ensure safe printing.
Ensuring proper ventilation in your 3D printing setup is essential for maintaining a healthy and comfortable workspace. By setting up a well-ventilated area, using enclosures, and considering DIY ventilation solutions, you can effectively manage fumes and particulates emitted during printing. Remember to adjust your ventilation needs based on the specific filaments you’re using, and prioritize your health and safety in your 3D printing endeavors.
Tip 9: Use Support Structures Wisely
Using support structures wisely in 3D printing is like scaffolding in construction—it’s essential for achieving complex designs but must be used thoughtfully to minimize effort and material. Supports are crucial for printing overhangs, bridges, and intricate geometries, but they also require careful planning to ensure they can be removed cleanly and don’t mar the final print. Let’s explore how to use support structures effectively and efficiently.
When to Use Supports
Understanding when to use supports is key to achieving successful prints:
- Overhangs: Any part of your model that extends out at an angle greater than 45 degrees usually needs support to prevent sagging or drooping.
- Bridges: Long horizontal sections that span gaps without touching the bed require support underneath to maintain structural integrity.
- Complex Geometries: Models with intricate details, internal cavities, or large protrusions often need supports to print correctly.
Types of Supports
Different types of supports serve various purposes:
- Standard Supports: These are the most common type of supports and are generated automatically by most slicer software. They are simple to use and effective for general purposes.
- Tree Supports: Tree supports are designed to save material and are easier to remove. They branch out like a tree and provide support with minimal contact to the model. This reduces the risk of damaging the surface when removing the supports.
- Custom Supports: Some slicers allow you to manually place supports where you think they are needed. This gives you greater control and can help minimize the amount of support material used.
Optimizing Support Settings
Fine-tuning your support settings can improve the ease of removal and the quality of your prints:
- Density: Lower support density reduces material usage and makes supports easier to remove but may not provide enough stability for larger overhangs. Adjust the density based on the complexity and weight of the overhangs.
- Pattern: The support pattern (grid, zigzag, lines) affects how easily the supports can be removed and how well they support the print. Zigzag and lines are often easier to remove and work well for most prints.
- Support Overhang Angle: Adjusting the overhang angle threshold can help reduce the amount of support material. A higher angle will reduce supports but may risk overhang quality, while a lower angle increases support but ensures better print quality.
- Support Interface Layers: Adding a few interface layers between the support and the model helps in creating a smooth separation. These layers act as a buffer, making support removal easier and reducing surface imperfections.
Removing Supports Cleanly
Removing supports without damaging your print is an art in itself. Here are some tips:
- Use Proper Tools: Tools like needle-nose pliers, flush cutters, and deburring tools can help you remove supports cleanly and safely.
- Go Slow: Take your time when removing supports. Rushing can damage the print or leave unwanted marks.
- Post-Processing: After removing the supports, use sandpaper or a file to smooth out any rough areas where the supports were attached. This helps achieve a clean and polished finish.
Reducing the Need for Supports
Whenever possible, design your models to minimize the need for supports:
- Orient the Model Strategically: Position your model on the print bed to reduce the number of overhangs and bridges. Sometimes a simple rotation can eliminate the need for extensive supports.
- Use Chamfers and Fillets: Adding chamfers (angled edges) or fillets (rounded edges) to overhangs can reduce the angle and eliminate the need for supports.
- Break the Model into Parts: For very complex designs, consider breaking the model into smaller parts that can be printed without supports and then assembled post-print.
Using support structures wisely is crucial for achieving high-quality 3D prints with complex geometries. By understanding when to use supports, optimizing their settings, and carefully removing them, you can ensure that your prints come out well and with minimal post-processing. Always consider design adjustments that can reduce or eliminate the need for supports, making your printing process more efficient and effective.
Tip 10: Calibrate Your Printer Regularly
Regular calibration of your 3D printer is like tuning a musical instrument—it ensures that everything is in harmony and working as it should. Calibration affects the precision and quality of your prints, making it a critical step in the 3D printing process. Let’s explore why calibration is important, what needs to be calibrated, and how to do it effectively.
Importance of Regular Calibration
Calibrating your printer regularly helps to:
- Ensure Accuracy: Calibration ensures that the dimensions of your prints are accurate and that the printer components are aligned correctly.
- Improve Print Quality: Proper calibration minimizes issues like layer shifting, warping, and poor adhesion, resulting in smoother and more detailed prints.
- Extend Printer Lifespan: Regular maintenance and calibration can prevent wear and tear on the printer’s components, prolonging its lifespan.
What Needs to Be Calibrated
Several aspects of your 3D printer require regular calibration:
- Bed Leveling: Ensures the print bed is perfectly flat and at the correct distance from the nozzle, which is crucial for good first-layer adhesion.
- Extruder Calibration: Involves adjusting the extruder steps per millimeter (steps/mm) to ensure that the correct amount of filament is being extruded.
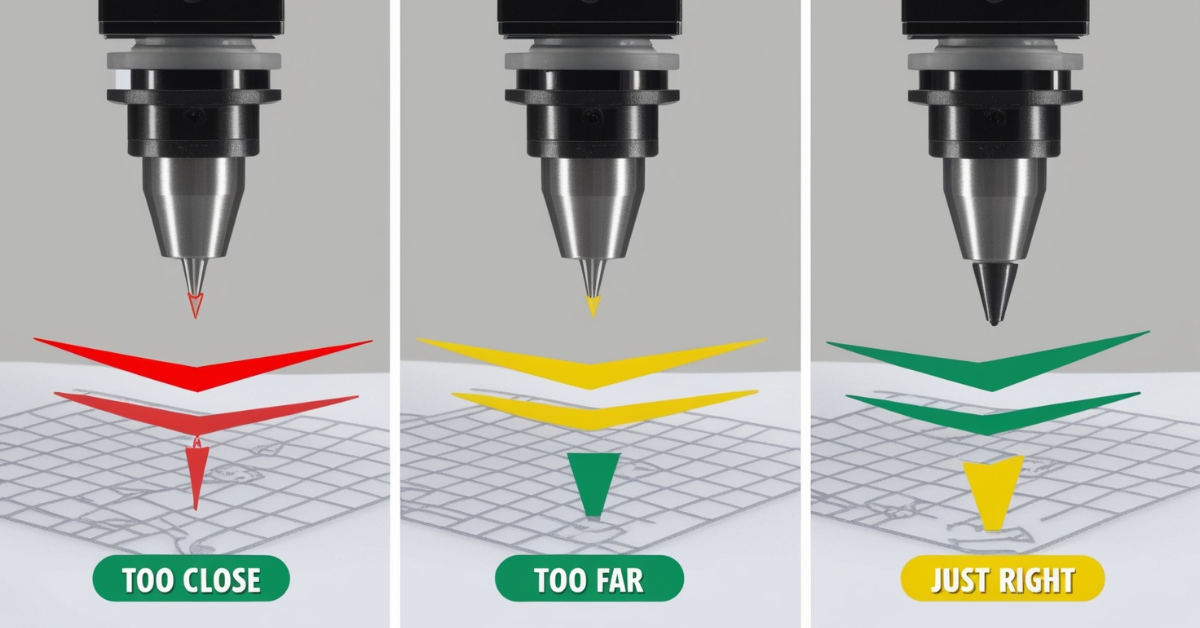
- Nozzle Height: The distance between the nozzle and the bed needs to be precise to avoid issues like dragging or insufficient adhesion.
- XYZ Axes Calibration: Ensures that the printer’s movement along the X, Y, and Z axes is accurate and aligned.
- Flow Rate: Adjusting the flow rate ensures the printer extrudes the right amount of filament, affecting layer bonding and print quality.
Calibration Steps
Here’s how to calibrate the key aspects of your 3D printer:
- Bed Leveling:
- Manual Leveling: Use the printer’s interface to move the nozzle to each corner of the bed. Place a piece of paper between the nozzle and the bed and adjust the bed height until you feel slight resistance when moving the paper.
- Auto Bed Leveling (ABL): If your printer is equipped with ABL, follow the manufacturer’s instructions to run the leveling process. The printer uses sensors to automatically adjust the bed level.
- Extruder Calibration:
- Measure Filament: Mark a 100mm length of filament from where it enters the extruder.
- Extrude Filament: Use the printer controls to extrude 100mm of filament.
- Check Measurement: Measure the remaining filament. If it’s not exactly 100mm, adjust the extruder steps/mm in the printer’s firmware.
- Nozzle Height:
- Initial Setup: Home the printer and adjust the Z-axis so that the nozzle is just above the bed.
- Fine-Tuning: Use the paper test (slight resistance with a piece of paper) to set the exact distance between the nozzle and the bed.
- XYZ Axes Calibration:
- Print a Calibration Cube: Use a simple cube model to test the accuracy of the X, Y, and Z axes.
- Measure the Cube: After printing, measure the dimensions of the cube with calipers. Compare the measurements to the intended dimensions and adjust the steps/mm for each axis accordingly.
- Flow Rate:
- Print a Flow Calibration Model: Use a model designed to test flow rate.
- Adjust Flow Rate: Check for under-extrusion or over-extrusion and adjust the flow rate in your slicer settings until the print quality improves.
Benefits of Regular Calibration
Regular calibration offers several benefits:
- Consistent Quality: Ensures that every print meets your quality standards, reducing failed prints and wasted material.
- Optimal Performance: Keeps your printer running smoothly and efficiently, preventing issues that could lead to downtime.
- Cost Savings: Reduces the need for replacement parts and repairs by maintaining the printer in good condition.
Calibrating your 3D printer regularly is essential for achieving high-quality, accurate prints. By taking the time to level the bed, calibrate the extruder and nozzle height, and fine-tune the XYZ axes and flow rate, you can ensure your printer operates at its best. Make calibration a routine part of your 3D printing process to enjoy consistent results and prolong the lifespan of your machine.
👉 Pro Tip: Accurate measurements make a huge difference in print quality.
👉 Use a reliable digital caliper for precise calibration:
👉 Check Digital Caliper Price on Amazon
Tip 11: Avoid Overhangs and Bridges
Avoiding overhangs and bridges in your 3D prints is like steering clear of potholes on a road trip—they can be challenging to navigate and can disrupt your journey to a successful print. Overhangs and bridges are areas where the printed material has little or no support underneath, making them prone to sagging, drooping, or failing altogether. Let’s explore strategies to minimize overhangs and bridges and how to manage them effectively when they are unavoidable.
Understanding Overhangs and Bridges
- Overhangs: These are sections of your print that extend outward from the main structure at an angle. If the angle exceeds 45 degrees, the filament may not have enough support, leading to poor print quality.
- Bridges: Bridges are horizontal structures that span gaps between two points. Without adequate support, the filament can droop, resulting in uneven surfaces and structural weaknesses.
Designing to Avoid Overhangs and Bridges
Good design practices can help you minimize overhangs and bridges:
- Optimize Model Orientation: Orient your model on the print bed to reduce the number of overhangs and bridges. Sometimes, a simple rotation can eliminate problematic areas.
- Use Chamfers and Fillets: Replace sharp overhangs with chamfers (angled edges) or fillets (rounded edges). This approach reduces the overhang angle and provides better support for the filament.
- Split the Model: For complex designs, consider splitting the model into smaller parts that can be printed separately and then assembled. This method can eliminate the need for extensive supports and improve print quality.
- Add Support Structures: If overhangs and bridges are unavoidable, use support structures to provide the necessary backing. While this may require additional post-processing, it ensures the print succeeds.
Managing Overhangs and Bridges
When you must print overhangs and bridges, employ these techniques to improve the results:
- Cooling: Proper cooling is crucial for managing overhangs and bridges. Use a fan to direct airflow onto the print, which helps the filament solidify quickly and maintain its shape.
- Print Speed: Slower print speeds can improve the quality of overhangs and bridges by giving the filament more time to cool and harden. Adjust the speed in your slicer settings for better results.
- Layer Height: Thinner layers can help manage overhangs and bridges by reducing the amount of unsupported material in each layer. Experiment with lower layer heights to find the best balance between speed and quality.
- Support Structures: Use your slicer software to add supports under overhangs and bridges. Tree supports are particularly effective for minimizing contact with the model and making removal easier.
Post-Processing
After printing, clean up your model to remove any imperfections caused by overhangs and bridges:
- Support Removal: Carefully remove support structures using pliers, cutters, or a deburring tool. Take your time to avoid damaging the print.
- Sanding and Smoothing: Use sandpaper or files to smooth out any rough areas where supports were attached. This step helps achieve a clean finish and improves the overall appearance of the print.
Advanced Techniques
For those looking to push the boundaries, advanced techniques can help manage overhangs and bridges:
- Dual Extrusion: If your printer supports dual extrusion, use one extruder for the main material and the other for a soluble support material like PVA. This approach allows you to print complex overhangs and bridges with supports that dissolve in water, leaving a clean surface.
- Mesh Modifiers: Some slicer software allows you to apply different settings to specific parts of the model. Use mesh modifiers to adjust settings like speed, cooling, and layer height specifically for overhangs and bridges.
Avoiding overhangs and bridges when possible and managing them effectively when necessary is essential for successful 3D printing. By designing with fewer overhangs, using supports wisely, and employing proper printing techniques, you can achieve higher-quality prints with fewer issues. Remember, thoughtful design and careful planning are your best tools for tackling the challenges of overhangs and bridges in 3D printing.
Tip 12: Keep an Eye on Your Prints
Monitoring your 3D prints is like keeping an eye on a simmering pot—you need to watch it closely to catch any issues before they boil over. Keeping an eye on your prints can save you time, material, and frustration by catching problems early. Let’s explore why monitoring your prints is important, how to do it effectively, and the tools that can help.
Importance of Monitoring
Monitoring your prints helps to:
- Catch Issues Early: Detecting problems like layer shifts, poor adhesion, or extruder jams early allows you to stop the print and fix the issue, saving time and filament.
- Ensure Quality: Continuous monitoring ensures that the print is progressing as expected, maintaining the quality of the output.
- Reduce Waste: By catching errors early, you can avoid wasting filament on failed prints, making your 3D printing process more efficient and cost-effective.
How to Monitor Your Prints
There are several ways to keep an eye on your prints, from manual checks to automated monitoring:
- Manual Checks: Periodically check on your print in person. Look for signs of trouble, such as the print detaching from the bed, unusual noises, or filament not extruding properly.
- Live Cameras: Set up a webcam or IP camera to monitor your prints remotely. This allows you to check the progress from another room or even while you’re away from home.
- Dedicated Monitoring Systems: Some 3D printers come with built-in monitoring systems or have the option to add them. These systems can provide real-time feedback and alerts.
Tools and Apps for Monitoring
Several tools and apps can help you monitor your prints more effectively:
- OctoPrint: OctoPrint is a powerful, open-source software that allows you to control and monitor your 3D printer remotely. With a webcam attached, you can view a live feed of your print, receive notifications, and even stop the print if something goes wrong.
- 3D Printer Apps: Many 3D printer manufacturers offer mobile apps that connect to your printer, providing real-time updates and allowing you to monitor and control the printer from your smartphone or tablet.
- Time-Lapse Cameras: Time-lapse cameras capture your print at regular intervals, creating a video that can help you identify when and where things went wrong.
Best Practices for Monitoring
To effectively monitor your prints, follow these best practices:
- Initial Layer Check: Pay special attention to the first few layers. Proper adhesion and a solid foundation are crucial for a successful print. If you notice any issues, stop the print and fix them before continuing.
- Regular Intervals: Check on your print at regular intervals, especially during longer prints. This helps ensure that everything is running smoothly.
- Notifications and Alerts: Set up notifications or alerts through your monitoring system to get instant updates if something goes wrong. This can include filament runout sensors, thermal runaway protection, or layer shift detection.
Troubleshooting On-The-Fly
When you catch an issue during a print, quick action can often save the print:
- Pause and Adjust: If your printer allows it, pause the print to fix minor issues like cleaning the nozzle or adjusting the bed level.
- Filament Changes: If you need to change the filament mid-print, do it carefully to avoid disrupting the print. Some printers have a filament change feature that makes this process easier.
- Restart if Necessary: Sometimes, it’s better to stop the print and restart after addressing the issue. This is especially true if the problem is severe and affects the print’s structural integrity.
Keeping an eye on your prints is essential for achieving high-quality, successful 3D prints. By monitoring your prints through manual checks, live cameras, and dedicated apps, you can catch and fix issues early, ensuring that your prints turn out as expected. Employing best practices and using the right tools will help you maintain control over the printing process and reduce the risk of failed prints.
Tip 13: Post-Processing Techniques
Post-processing your 3D prints is like giving a freshly baked cake its final decorations—it transforms a good print into a great one. Post-processing can enhance the appearance, strength, and functionality of your 3D prints, taking them to the next level. Let’s explore various post-processing techniques to help you achieve professional-looking results.
Smoothing and Polishing
Smoothing and polishing can improve the surface finish of your prints:
- Sanding: Start with coarse-grit sandpaper (around 100-200 grit) to remove the roughest imperfections, then move to finer grits (up to 2000 grit) for a smooth finish. Sand in a circular motion to avoid visible scratches. Wet sanding, using water to lubricate the sandpaper, can yield even better results, especially for PLA and ABS prints.
- Filing: Use needle files or hobby files to reach tight spots and remove small imperfections. This is particularly useful for detailed models with intricate parts.
- Chemical Smoothing: For ABS prints, acetone vapor smoothing can produce a glossy finish. Place the print in a sealed container with a small amount of acetone. The acetone vapors will gently melt the surface, smoothing out layer lines. Be cautious and work in a well-ventilated area when using acetone.
Painting and Finishing Touches
Adding color and finishing touches can dramatically improve the appearance of your prints:
- Priming: Apply a primer to your print before painting. Primers help the paint adhere better and provide a uniform surface. Use a spray primer for an even coat.
- Painting: Use acrylic paints for most 3D prints. They are easy to work with, dry quickly, and come in a wide variety of colors. Apply thin coats to avoid obscuring details. For a more professional finish, consider airbrushing, which provides a smooth and even coat.
- Detailing: Use fine brushes for detailing small areas and adding intricate designs. For realistic effects, experiment with techniques like dry brushing (using a dry brush to apply a small amount of paint) and washes (diluted paint applied to crevices).
- Clear Coating: After painting, apply a clear coat to protect the paint and give your print a finished look. Matte, satin, and gloss finishes are available, depending on your preference.
Assembly and Bonding
Some prints are too large or complex to print as a single piece and require assembly:
- Joining Parts: Use super glue, epoxy, or specialized plastic adhesives to bond printed parts together. Ensure the surfaces are clean and fit well before applying adhesive.
- Pinning: For extra strength, consider using pins or dowels to align and reinforce the joints. Drill small holes in the mating parts and insert metal or plastic pins before applying adhesive.
Filling Gaps and Seams
To achieve a seamless look, fill gaps and seams between assembled parts:
- Filler Putty: Use a filler putty or plastic filler to fill gaps and smooth out seams. Apply the putty with a small spatula or your finger, then sand it smooth once it dries.
- Bondo: Automotive body fillers like Bondo can also be used for larger gaps or structural repairs. Apply, sand, and prime the area before painting.
Enhancing Strength and Durability
Improve the strength and durability of your prints through these techniques:
- Annealing: Heat-treating (annealing) certain filaments, like PLA, can increase their strength and heat resistance. Carefully heat the print in an oven to just below the filament’s melting point and hold it at that temperature for a specified time.
- Epoxy Coating: Applying a thin layer of epoxy resin to the surface can enhance the strength and give a glossy finish. This is especially useful for functional parts that need to withstand stress.
Specialized Post-Processing Techniques
For advanced projects, consider these specialized techniques:
- Electroplating: Adding a metal coating through electroplating can give your prints a metallic appearance and improve their durability. This process typically involves applying a conductive layer before the metal coating.
- Vacuum Forming: Create molds from your 3D prints using vacuum forming. This technique is useful for producing multiple copies of a part or creating complex shapes from different materials.
Post-processing is a crucial step in the 3D printing workflow that can significantly enhance the appearance and functionality of your prints. From smoothing and painting to assembly and strength enhancements, there are numerous techniques to refine your creations. Experiment with different methods to find what works best for your projects and take your 3D prints to the next level.
Tip 14: Learn from Failures
Learning from failures in 3D printing is like a seasoned chef perfecting a recipe—it’s a process of continuous improvement through trial and error. Each failed print provides valuable insights that can help you refine your techniques and achieve better results in future projects. Let’s explore how to analyze and learn from 3D printing failures effectively.
Common Printing Issues
Understanding common printing issues is the first step to learning from them. Here are some frequent problems and their potential causes:
- Warping: Warping occurs when the edges of a print lift off the bed, causing distortion. It is often caused by uneven cooling and poor bed adhesion.
- Layer Shifting: Layer shifting happens when layers misalign during printing. This can be due to loose belts, inadequate stepper motor current, or physical obstructions.
- Stringing: Stringing refers to fine strands of filament that stretch between parts of the print. It is usually caused by improper retraction settings or printing at too high a temperature.
- Under-Extrusion: Under-extrusion results in thin or missing layers. Potential causes include a clogged nozzle, insufficient extruder steps/mm, or a low flow rate.
- Over-Extrusion: Over-extrusion produces thick layers and blobs of filament. This can result from excessive flow rate or incorrect extruder calibration.
Analyzing Failures
When a print fails, take the time to analyze what went wrong. Here’s a systematic approach to diagnosing issues:
- Examine the Print: Look closely at the failed print. Identify where the problem occurred (e.g., at the base, mid-print, or near the top) and what the symptoms are (e.g., warping, stringing, layer shifting).
- Review Printer Settings: Check your slicer settings, including temperature, print speed, layer height, and retraction settings. Compare these with the recommended settings for the filament and printer you are using.
- Inspect Hardware: Examine your printer for mechanical issues. Check for loose belts, dirty or clogged nozzles, and ensure the bed is level. Verify that the extruder is properly calibrated and the filament is feeding smoothly.
- Environmental Factors: Consider the environment in which you are printing. Drafts, ambient temperature, and humidity can affect print quality. Make adjustments as needed, such as using an enclosure or controlling room temperature.
Learning from Each Failure
Each failure is an opportunity to improve. Here’s how to learn and adapt:
- Adjust and Retry: Based on your analysis, make the necessary adjustments to your settings or hardware. Print a small test object to see if the changes have resolved the issue.
- Document Findings: Keep a log of your printing issues and the solutions you applied. Note the specific settings and conditions that led to successful prints. This documentation will be invaluable for troubleshooting future prints.
- Seek Advice: Join 3D printing communities and forums. Share your experiences and learn from others who have faced similar issues. Community members often provide valuable insights and solutions.
- Experiment: Don’t be afraid to experiment with different settings, filaments, and techniques. Controlled experimentation helps you understand the capabilities and limitations of your printer and materials.
Continuous Improvement
Continuous improvement is the key to mastering 3D printing. Here’s how to keep growing your skills:
- Stay Informed: Keep up with the latest developments in 3D printing technology and techniques. Follow blogs, watch tutorials, and read articles to expand your knowledge.
- Try New Materials: Experiment with different types of filaments. Each material has unique properties and challenges, offering new learning opportunities.
- Upgrade Your Equipment: As you become more proficient, consider upgrading your printer or adding accessories like auto bed leveling sensors or better cooling systems. These enhancements can improve print quality and reliability.
- Reflect on Progress: Periodically review your progress and reflect on how far you’ve come. Celebrate your successes and use them as motivation to tackle more challenging projects.
Learning from failures is an integral part of the 3D printing journey. By systematically analyzing problems, making informed adjustments, and continuously seeking to improve, you can turn setbacks into stepping stones for success. Remember, every failure is a learning opportunity that brings you closer to mastering the art of 3D printing.

Tip 15: Join the 3D Printing Community
Joining the 3D printing community is like joining a club of enthusiastic chefs—everyone shares recipes, tips, and tricks to improve their craft. The 3D printing community is a rich resource of knowledge, support, and inspiration that can help you grow as a maker. Let’s explore the benefits of being part of this community and how to get involved.
Benefits of Community Involvement
Being active in the 3D printing community offers numerous advantages:
- Knowledge Sharing: Access a wealth of information from experienced users. Learn new techniques, troubleshoot issues, and stay updated on the latest advancements in 3D printing.
- Support and Guidance: Get help with specific problems, from hardware malfunctions to slicer settings. Community members are often willing to share their expertise and solutions.
- Inspiration and Ideas: Discover creative projects and innovative uses of 3D printing. Seeing what others create can spark new ideas and motivate you to try new things.
- Networking Opportunities: Connect with like-minded individuals, potential collaborators, and industry professionals. Networking can open doors to new opportunities and collaborations.
- Access to Resources: Many communities provide access to free or discounted resources, such as design files, tutorials, and software tools.
How to Get Involved
Getting involved in the 3D printing community is easy and rewarding. Here are some ways to participate:
- Online Forums: Join popular online forums like Reddit’s r/3Dprinting, 3D Hubs Talk, and the Ultimaker Community. These platforms are great for asking questions, sharing your projects, and learning from others.
- Social Media Groups: Follow and join groups on social media platforms like Facebook, Twitter, and Instagram. Look for groups dedicated to specific printers, filaments, or techniques to find content tailored to your interests.
- Maker Spaces and Local Clubs: Many cities have maker spaces or local clubs where you can meet other 3D printing enthusiasts in person. These spaces often provide access to equipment and offer workshops and events.
- YouTube Channels and Blogs: Subscribe to YouTube channels and follow blogs that focus on 3D printing. Content creators often share detailed tutorials, product reviews, and project ideas.
- Discord Servers: Join Discord servers dedicated to 3D printing. These real-time chat communities are perfect for quick advice, live discussions, and connecting with other enthusiasts.
- Events and Meetups: Attend 3D printing events, such as trade shows, maker fairs, and meetups. These events provide opportunities to see the latest technology, participate in workshops, and network with other makers.
Contributing to the Community
Contributing to the community not only helps others but also enhances your own learning:
- Share Your Projects: Post pictures and descriptions of your completed projects. Sharing your successes and failures can inspire others and lead to valuable feedback.
- Offer Help: Answer questions and provide assistance to others, especially beginners. Helping others troubleshoot and solve problems can reinforce your own knowledge.
- Create Tutorials: If you’ve developed a unique technique or solution, create a tutorial or guide to share with the community. This can establish you as a knowledgeable member and help others learn.
- Participate in Challenges: Join community challenges and competitions. These events are fun and push you to improve your skills and creativity.
- Collaborate: Work on joint projects with other community members. Collaboration can lead to innovative ideas and learning opportunities.
Joining the 3D printing community is an invaluable step in your 3D printing journey. By participating in forums, social media groups, local clubs, and events, you gain access to a wealth of knowledge, support, and inspiration. Contributing to the community by sharing your experiences and helping others not only benefits the community but also enhances your own skills and understanding. Embrace the collaborative spirit of the 3D printing community and watch your capabilities grow.
👉 Ready to take your print quality to the next level?
The right tools can save you time, reduce failed prints, and improve accuracy fast.
👉 Explore the exact tools we recommend here:
👉 View Recommended 3D Printing Gear
Conclusion
3D printing is a fascinating journey that combines creativity, technical skills, and a bit of trial and error. The 15 essential tips we’ve discussed can significantly enhance your 3D printing experience, whether you’re a beginner or a seasoned pro. Let’s recap the key points and emphasize the importance of continual learning and experimentation in this exciting field.
Recap of Essential Tips
- Master Your Printer’s Settings: Understanding and fine-tuning your printer’s settings lays the foundation for high-quality prints.
- Choose the Right Filament: Selecting the appropriate filament for your project ensures durability and the desired finish.
- Keep Your Printer Clean: Regular maintenance prevents common issues and extends the life of your printer.
- Level Your Bed Properly: A well-leveled bed is crucial for first-layer adhesion and overall print quality.
- Use a Good Adhesive: Proper adhesion techniques prevent warping and ensure a strong foundation.
- Optimize Your Print Speed: Balancing speed and quality saves time without compromising on the final result.
- Fine-Tune the Temperature: Correct temperature settings for your filament avoid issues like warping and stringing.
- Ensure Proper Ventilation: Good ventilation protects your health and improves print quality by controlling environmental factors.
- Use Support Structures Wisely: Strategic use of supports minimizes material use and post-processing effort.
- Calibrate Your Printer Regularly: Regular calibration maintains accuracy and print quality.
- Avoid Overhangs and Bridges: Designing with fewer overhangs and bridges simplifies the printing process.
- Keep an Eye on Your Prints: Monitoring prints helps catch issues early, saving time and materials.
- Post-Processing Techniques: Smoothing, painting, and assembly enhance the appearance and functionality of your prints.
- Learn from Failures: Each failure is a learning opportunity that brings you closer to perfecting your skills.
- Join the 3D Printing Community: Engaging with the community provides support, inspiration, and new ideas.
Encouragement to Experiment and Learn
3D printing is as much about the journey as it is about the destination. Every print, successful or not, teaches you something valuable. Don’t be discouraged by failures; instead, use them as stepping stones to refine your skills. Experiment with different settings, materials, and techniques. The more you push the boundaries, the more you’ll learn about the capabilities of your printer and your own creativity.
Embrace Continuous Improvement
The world of 3D printing is constantly evolving, with new materials, technologies, and techniques emerging regularly. Stay curious and open to learning. Follow the latest trends, join workshops, and participate in online forums and local maker groups. Sharing your experiences and learning from others will keep you motivated and inspired.
Final Thoughts
By incorporating these 15 essential tips into your 3D printing practice, you’ll enhance your efficiency, improve the quality of your prints, and enjoy the process even more. Remember, the key to mastering 3D printing lies in continual learning and a willingness to experiment. So, go ahead—dive into your next project with confidence, and watch your creations come to life!
FAQs
- What is the Best Filament for Beginners?
PLA is the best filament for beginners due to its ease of use and low printing temperature requirements. - How Often Should I Calibrate My Printer?
Regular calibration is recommended, especially after several prints or when changing filament types. - What Can I Do to Improve Print Adhesion?
Using adhesives like glue sticks or specialized sprays can significantly improve print adhesion. - Are There Any Safety Concerns with 3D Printing?
Ensure proper ventilation and handle heated components with care to avoid burns and inhalation of fumes. - How Can I Reduce Printing Time Without Sacrificing Quality?
Optimize print speed and layer height, and use appropriate infill settings to balance speed and quality.