23 Must-Try Free 3D Printing Projects for Beginners: Start Your 3D Printing Journey Today!
Have you ever wondered what you can create with a 3D printer without spending a dime? Welcome to the world of free 3D prints! Starting with free prints is like dipping your toes in the vast ocean of 3D printing without the fear of drowning. It’s exciting, cost-effective, and a great way to learn the ropes. Whether you’re a complete newbie or just looking for some new projects to try, diving into these free 3D printing projects can be incredibly rewarding.
Imagine holding in your hands a tool or decoration that you made yourself, right from your desk. With 3D printing, you can turn digital designs into physical objects, layer by layer. It’s a bit like magic, but with a touch of technology and creativity. And the best part? You don’t need to start with complex designs or expensive materials. There are plenty of amazing free designs available online that are perfect for beginners.
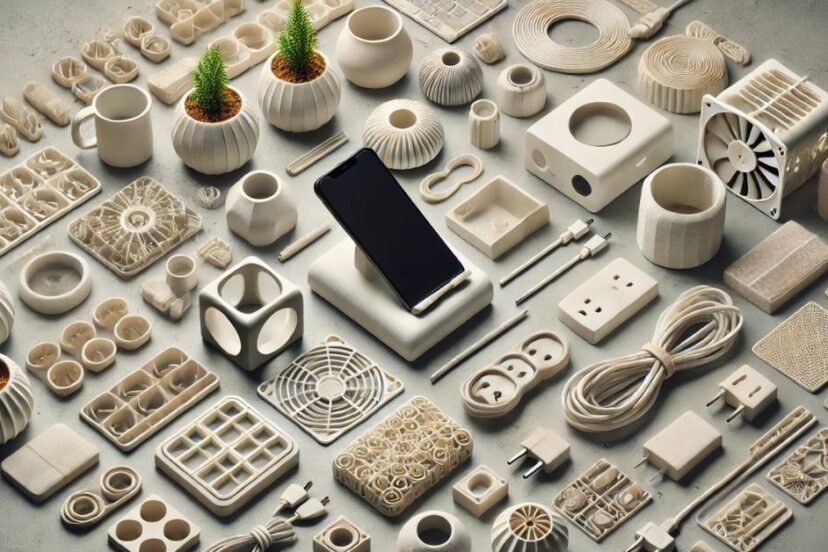
In this article, we’ve curated a list of 23 must-try free 3D printing projects for beginners. These projects range from practical household items like phone stands and cable organizers to fun and decorative pieces like miniature planters and decorative coasters. Each project comes with a brief description, benefits, difficulty level, print time, and where to find the files. So, let’s dive in and start printing!
Understanding 3D Printing Basics
What is 3D Printing?
Imagine being able to create a physical object from a digital file, layer by layer. That’s 3D printing in a nutshell. This revolutionary technology allows you to turn your ideas into tangible items, from small trinkets to complex prototypes. At its core, 3D printing, also known as additive manufacturing, involves building objects from the ground up by adding material layer by layer. This process is guided by a digital 3D model, which serves as a blueprint for the printer.
3D printing is used in various fields, from manufacturing and engineering to healthcare and education. It’s a versatile technology that can produce intricate designs that would be difficult or impossible to create using traditional manufacturing methods. Whether you’re looking to make custom tools, artistic pieces, or educational models, 3D printing offers endless possibilities.
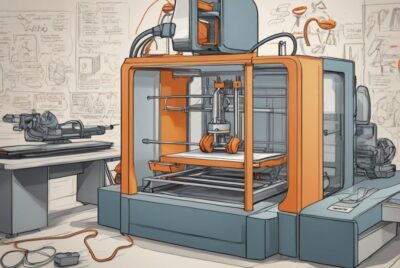
Key Components of a 3D Printer
Before you start printing, it’s essential to understand the main components of a 3D printer:
- Print Bed: This is the surface on which your object will be built. The print bed can be heated to help materials adhere better and prevent warping. Ensuring the print bed is level is crucial for successful prints.
- Extruder: The extruder is responsible for feeding the filament (printing material) into the hot end, where it is melted and deposited onto the print bed. The extruder must maintain the correct temperature for the specific filament you are using.
- Filament: The filament is the material used to create your prints. Common types include PLA (Polylactic Acid), ABS (Acrylonitrile Butadiene Styrene), and PETG (Polyethylene Terephthalate Glycol). Each filament type has unique properties, making it suitable for different applications.
- Hot End: The hot end is where the filament is melted before being extruded onto the print bed. It needs to be precisely controlled to ensure the filament melts correctly and adheres to the previous layers.
- Cooling Fan: The cooling fan helps solidify the melted filament as it is laid down, ensuring that each layer sets correctly before the next one is added.
- Control Board: The control board is the brain of the 3D printer, managing all its functions, including movement, temperature, and extrusion. It reads the digital 3D model and translates it into precise instructions for the printer.
Understanding these components and how they work together is the first step toward mastering 3D printing. With this foundational knowledge, you’ll be better equipped to troubleshoot issues and make the most of your 3D printing experience.
Getting Started with Free Prints
Where to Find Free Prints
The internet is brimming with websites offering free 3D print files, making it easy for beginners to find exciting projects. Some of the most popular platforms include:
- Thingiverse: One of the largest collections of free 3D print files, Thingiverse hosts designs from a wide community of makers. You can find everything from simple household items to intricate art pieces.
- MyMiniFactory: Known for its high-quality, curated content, MyMiniFactory offers a vast array of free designs. It’s a great place to find unique and creative prints.
- Cults3D: Cults3D features a mix of free and paid designs, with a focus on artistic and innovative projects. It’s a fantastic resource for finding both practical and decorative items.
- Pinshape: Another popular platform, Pinshape offers a mix of free and paid 3D print files, with an active community that provides feedback and tips on various designs.
These platforms allow you to search by categories, popularity, and user ratings, helping you to find the best designs suited to your needs and skill level.
Choosing the Right Print for Beginners
Not all prints are created equal, and as a beginner, you’ll want to start with simple designs that won’t take too long to print and don’t require advanced skills. Here are some tips for choosing the right prints:
- Start Simple: Look for items with minimal parts and straightforward designs. Simple shapes and objects will help you understand the basics of 3D printing without overwhelming you.
- Read Reviews: Check the reviews and ratings from other users. High-rated designs with positive feedback are more likely to print successfully and provide a good learning experience.
- Print Time: Choose designs with shorter print times. Starting with quick projects helps you learn and see results faster, keeping you motivated.
- Material Usage: Opt for prints that require minimal filament. This helps you practice without using up too much material, which is both economical and less wasteful.
- Assembly: Avoid prints that require complex assembly or additional tools. Start with single-piece prints or items that require minimal post-processing.
By following these guidelines, you’ll ensure a smoother and more enjoyable introduction to 3D printing. Starting with the right projects will build your confidence and help you develop the skills needed for more complex prints in the future.
Top 23 Free Prints for Beginners
Practical Household Items
- Phone Stand
- Description: A simple and functional phone stand designed to hold your phone at a comfortable viewing angle. It’s perfect for watching videos, video calling, or just keeping your phone within easy reach while you work. This print is easy to make and can be customized with different colors and designs to suit your personal style.
- Benefits: Keeps your phone stable and easily accessible, reduces neck strain by providing a better viewing angle, and helps keep your workspace organized.
- Difficulty Level: Beginner-friendly
- Print Time: Approximately 1-2 hours, depending on the design
- Filament Required: Minimal, approximately 20-30 grams of PLA
- Where to Find: Thingiverse
- Cable Organizer
- Description: A cable organizer designed to keep your various cables neat, untangled, and easily accessible. This print typically features slots or loops where you can insert your cables, preventing them from getting mixed up. It’s perfect for organizing USB cables, headphones, and charging cords on your desk or in your bag.
- Benefits: Reduces clutter, makes it easier to find and use your cables, and extends the life of your cables by preventing damage from tangling.
- Difficulty Level: Beginner-friendly
- Print Time: Approximately 1-2 hours, depending on the design and size
- Filament Required: Minimal, approximately 15-25 grams of PLA
- Where to Find: MyMiniFactory
- Pen Holder
- Description: A stylish and functional pen holder designed to keep your pens, pencils, and other small desk items organized. This print can vary from simple cylindrical designs to more intricate and creative shapes, making it both a practical and decorative addition to your workspace.
- Benefits: Helps keep your desk tidy, makes it easy to find your writing tools, and adds a personal touch to your workspace. It’s also a great way to practice precision and detail in 3D printing.
- Difficulty Level: Beginner-friendly
- Print Time: Approximately 2-3 hours, depending on the complexity of the design
- Filament Required: Moderate, approximately 30-50 grams of PLA
- Where to Find: Cults3D
- Keychain Holder
- Description: A keychain holder designed to keep your keys organized and easily accessible. This print can range from simple wall-mounted hooks to more elaborate designs featuring multiple slots or creative shapes. It’s a practical addition to your home that helps prevent the common problem of misplaced keys.
- Benefits: Keeps your keys in one place, reduces the chance of losing them, and can serve as a decorative piece for your entryway. It’s also a straightforward project that’s perfect for beginners looking to practice basic 3D printing skills.
- Difficulty Level: Beginner-friendly
- Print Time: Approximately 1-2 hours, depending on the design
- Filament Required: Minimal, approximately 20-30 grams of PLA
- Where to Find: Thingiverse
- Toothbrush Holder
- Description: A toothbrush holder designed to keep your toothbrushes organized and hygienic. These holders can range from simple designs with slots for each toothbrush to more creative shapes and themes. They help keep your bathroom tidy and ensure that toothbrushes are stored properly to dry and stay clean.
- Benefits: Keeps toothbrushes off the counter and organized, reduces clutter in the bathroom, and promotes better hygiene by allowing toothbrushes to dry properly. This is an easy and quick print, ideal for beginners.
- Difficulty Level: Beginner-friendly
- Print Time: Approximately 1-2 hours, depending on the design
- Filament Required: Minimal, approximately 20-30 grams of PLA
- Where to Find: MyMiniFactory
Fun and Decorative Prints
- Miniature Planters
- Description: Miniature planters are small pots designed to hold tiny plants like succulents or cacti. These prints can range from simple and sleek designs to more whimsical and intricate shapes, such as animals, geometric patterns, or even themed characters. They add a touch of nature to your home or office and can be used as thoughtful gifts.
- Benefits: Adds greenery and life to small spaces, can be customized to fit any decor style, and serves as a great introduction to 3D printing complex shapes. Miniature planters are easy to print and can help you practice precision in your prints.
- Difficulty Level: Beginner-friendly
- Print Time: Approximately 2-4 hours, depending on the design
- Filament Required: Moderate, approximately 30-50 grams of PLA
- Where to Find: Thingiverse
- Decorative Coasters
- Description: Decorative coasters are designed to protect your surfaces from drink spills and stains while adding a touch of style to your home. These prints can come in a variety of shapes and designs, from simple geometric patterns to more elaborate and themed motifs. They are both functional and aesthetically pleasing.
- Benefits: Protects your furniture, adds a personalized touch to your decor, and can be customized for different themes or occasions. Decorative coasters are easy to print and make excellent gifts or home accessories.
- Difficulty Level: Beginner-friendly
- Print Time: Approximately 1-2 hours per coaster, depending on the design
- Filament Required: Minimal, approximately 15-25 grams of PLA per coaster
- Where to Find: Cults3D
- Vase
- Description: A 3D-printed vase designed to hold flowers and add a touch of elegance to any room. Vases can range from simple, classic shapes to more intricate and modern designs. They are not only functional but also serve as beautiful decorative pieces.
- Benefits: Enhances home decor, provides a functional way to display flowers, and allows for creative expression through various designs and colors. Printing a vase is a great way to practice printing taller objects and experimenting with different infill patterns and wall thicknesses.
- Difficulty Level: Beginner-friendly
- Print Time: Approximately 3-6 hours, depending on the size and complexity of the design
- Filament Required: Moderate, approximately 50-100 grams of PLA
- Where to Find: MyMiniFactory
- Articulated Dragon
- Description: An articulated dragon is a flexible, jointed model that can be posed in various positions. These prints are often designed to be printed in one piece with movable segments, allowing the dragon to be bent and twisted. It’s a fun and visually impressive project that can showcase the capabilities of your 3D printer.
- Benefits: Provides a fun and interactive toy or decoration, helps understand the mechanics of printing articulated joints, and is a great conversation starter. This print is a bit more complex but still beginner-friendly, making it a perfect project to advance your skills.
- Difficulty Level: Beginner-friendly with some intermediate aspects
- Print Time: Approximately 3-5 hours, depending on the size and design
- Filament Required: Moderate, approximately 50-70 grams of PLA
- Where to Find: Thingiverse
- Wall Art
- Description: 3D-printed wall art can range from simple geometric designs to intricate patterns and even custom nameplates or themed decorations. These prints are designed to be hung on walls, adding a personalized touch to your home or office decor. They can be flat or have a three-dimensional effect to create a unique visual impact.
- Benefits: Enhances your living space with custom, unique decorations, allows for creative expression, and can be tailored to fit any theme or style. Printing wall art is a great way to practice working with different design complexities and print sizes.
- Difficulty Level: Beginner-friendly to intermediate, depending on the design complexity
- Print Time: Approximately 2-6 hours, depending on the size and complexity of the design
- Filament Required: Moderate to high, approximately 50-100 grams of PLA or more for larger pieces
- Where to Find: Cults3D
Tools and Gadgets
- Wrench
- Description: A 3D-printed wrench is a handy tool for light-duty tasks. These wrenches are typically designed to be adjustable, allowing them to fit various bolt sizes. While they may not replace your heavy-duty metal tools, they are perfect for quick fixes and adjustments around the house.
- Benefits: Provides a functional tool for minor repairs, helps you understand the mechanics of adjustable parts, and is a great way to practice printing functional objects. This print also demonstrates how 3D printing can be used to create practical, everyday items.
- Difficulty Level: Beginner-friendly
- Print Time: Approximately 1-2 hours, depending on the size and complexity
- Filament Required: Minimal, approximately 20-40 grams of PLA
- Where to Find: Thingiverse
- Screwdriver Handle
- Description: A 3D-printed screwdriver handle designed to fit standard screwdriver bits. This handle can replace a lost or broken handle or simply offer a more ergonomic grip. It can be customized in size and shape to fit comfortably in your hand.
- Benefits: Provides a functional tool for light-duty tasks, helps you understand the mechanics of tool design, and is a great way to practice printing functional objects. Printing a screwdriver handle showcases how 3D printing can be used to create or repair everyday items.
- Difficulty Level: Beginner-friendly
- Print Time: Approximately 1-2 hours, depending on the size and complexity
- Filament Required: Minimal, approximately 20-40 grams of PLA
- Where to Find: MyMiniFactory
- Bottle Opener
- Description: A 3D-printed bottle opener is a practical tool designed to easily open bottles with caps. These openers can come in various shapes and sizes, from simple lever designs to more elaborate and decorative ones. They are strong enough for everyday use and can be customized to include personal touches or themes.
- Benefits: Provides a functional and handy tool for opening bottles, demonstrates the strength and utility of 3D-printed objects, and makes a great addition to your kitchen or bar area. Printing a bottle opener is a straightforward project that introduces you to creating sturdy, everyday items.
- Difficulty Level: Beginner-friendly
- Print Time: Approximately 1-2 hours, depending on the design
- Filament Required: Minimal, approximately 20-30 grams of PLA
- Where to Find: Cults3D
- Headphone Stand
- Description: A 3D-printed headphone stand is designed to keep your headphones organized and easily accessible. These stands can come in various shapes and sizes, from simple hooks to more elaborate designs that hold the headphones securely. They help keep your workspace tidy and prevent your headphones from getting damaged.
- Benefits: Keeps your headphones organized and easily accessible, reduces clutter on your desk, and prevents headphones from being damaged. Printing a headphone stand is a practical project that can be customized to match your personal style or workspace decor.
- Difficulty Level: Beginner-friendly
- Print Time: Approximately 3-5 hours, depending on the design and size
- Filament Required: Moderate, approximately 50-70 grams of PLA
- Where to Find: Thingiverse
- Desk Organizer
- Description: A 3D-printed desk organizer designed to keep your office supplies, such as pens, pencils, paper clips, and sticky notes, neatly arranged. These organizers can come in various configurations with multiple compartments, helping you keep your workspace tidy and efficient.
- Benefits: Reduces desk clutter, keeps office supplies organized and easily accessible, and can be customized to fit your specific needs and style. Printing a desk organizer is a practical project that helps you learn about designing and printing larger objects with multiple compartments.
- Difficulty Level: Beginner-friendly
- Print Time: Approximately 4-8 hours, depending on the size and complexity
- Filament Required: Moderate to high, approximately 100-200 grams of PLA
- Where to Find: MyMiniFactory
Learning Aids
- Geometric Shapes
- Description: Geometric shapes are 3D-printed models of various polygons and polyhedra, such as cubes, spheres, pyramids, and cones. These prints are useful for educational purposes, helping students and teachers visualize and understand geometric concepts. They can also be used as decorative items or as part of more complex projects.
- Benefits: Aids in learning and teaching geometry, provides a tangible way to explore mathematical concepts, and helps develop precision in 3D printing. Printing geometric shapes is a straightforward project that introduces you to the basics of creating accurate, symmetrical objects.
- Difficulty Level: Beginner-friendly
- Print Time: Approximately 1-2 hours per shape, depending on the size and complexity
- Filament Required: Minimal, approximately 10-20 grams of PLA per shape
- Where to Find: Thingiverse
- Puzzle Pieces
- Description: 3D-printed puzzle pieces are designed to fit together to form a complete picture or shape. These puzzles can range from simple, flat jigsaw pieces to more complex, three-dimensional interlocking designs. They are great for educational purposes, cognitive development, and just plain fun.
- Benefits: Enhances problem-solving skills, provides an engaging and interactive learning tool, and can be customized to create unique and challenging puzzles. Printing puzzle pieces is a great way to practice precision and accuracy in 3D printing.
- Difficulty Level: Beginner-friendly
- Print Time: Approximately 1-3 hours, depending on the number and complexity of the pieces
- Filament Required: Minimal to moderate, approximately 20-50 grams of PLA
- Where to Find: Cults3D
- Math Tools
- Description: 3D-printed math tools can include rulers, protractors, compasses, and other instruments that help in learning and teaching mathematics. These tools are essential for geometry and other math-related subjects, providing accurate and durable aids for students and teachers alike.
- Benefits: Enhances understanding and teaching of mathematical concepts, provides durable and precise tools for classroom and home use, and can be customized to include specific measurements or features. Printing math tools is an excellent way to combine practicality with learning, making it a valuable project for beginners.
- Difficulty Level: Beginner-friendly
- Print Time: Approximately 1-2 hours per tool, depending on the size and complexity
- Filament Required: Minimal, approximately 10-20 grams of PLA per tool
- Where to Find: MyMiniFactory
- Periodic Table Blocks
- Description: 3D-printed periodic table blocks are small cubes or tiles, each representing an element from the periodic table. These blocks can include details such as the element’s symbol, atomic number, and weight. They are excellent educational tools for students learning about chemistry, providing a hands-on way to interact with the elements.
- Benefits: Enhances understanding of the periodic table and chemistry concepts, provides a tactile and interactive learning experience, and can be customized to include additional educational information. Printing periodic table blocks is a straightforward project that helps in learning and teaching complex scientific information in an engaging manner.
- Difficulty Level: Beginner-friendly
- Print Time: Approximately 1-2 hours per block, depending on the size and detail
- Filament Required: Minimal to moderate, approximately 10-20 grams of PLA per block
- Where to Find: Thingiverse
- Braille Alphabet
- Description: 3D-printed Braille alphabet tiles are designed to help visually impaired individuals learn and practice Braille. Each tile features a raised Braille letter along with the corresponding print letter, providing a tactile and educational tool. These tiles can be used for teaching, learning, and creating accessible educational materials.
- Benefits: Enhances accessibility and learning for visually impaired individuals, provides a tactile way to learn and practice Braille, and can be customized to include additional educational information or symbols. Printing Braille alphabet tiles is a meaningful project that combines practicality with social impact.
- Difficulty Level: Beginner-friendly
- Print Time: Approximately 1-2 hours per tile, depending on the size and detail
- Filament Required: Minimal, approximately 10-20 grams of PLA per tile
- Where to Find: Cults3D
Miscellaneous
- Toy Car
- Description: A 3D-printed toy car is a small, functional vehicle that can be used for play or as a collectible item. These toy cars can range from simple models with basic wheels to more detailed designs with moving parts like doors and hoods. They are fun to print and can be customized with different designs and colors.
- Benefits: Provides a fun and interactive toy for children, allows for creative customization, and helps in understanding the mechanics of printing objects with moving parts. Printing a toy car is an engaging project that combines fun with learning, making it perfect for beginners.
- Difficulty Level: Beginner-friendly to intermediate, depending on the complexity
- Print Time: Approximately 2-4 hours, depending on the size and detail
- Filament Required: Moderate, approximately 30-50 grams of PLA
- Where to Find: Thingiverse
- Dice
- Description: 3D-printed dice are small, cube-shaped objects used in various games and activities. These prints can be standard six-sided dice or more complex polyhedral dice used in tabletop games like Dungeons & Dragons. They can be customized with different sizes, colors, and designs to suit your personal preferences or specific game requirements.
- Benefits: Provides functional game accessories, allows for creative customization, and is a great way to practice printing small, precise objects. Printing dice is a straightforward project that helps you understand the importance of accuracy and detail in 3D printing.
- Difficulty Level: Beginner-friendly
- Print Time: Approximately 1-2 hours, depending on the size and number of dice
- Filament Required: Minimal, approximately 10-20 grams of PLA per die
- Where to Find: MyMiniFactory
- Cookie Cutters
- Description: 3D-printed cookie cutters are tools used to cut dough into specific shapes, perfect for baking cookies with unique designs. These prints can range from simple geometric shapes to more intricate and themed designs, such as animals, holiday motifs, or custom patterns. They add a fun and creative element to baking.
- Benefits: Provides a fun and customizable tool for baking, allows for endless creative possibilities in cookie design, and is a great way to practice printing objects with fine details. Printing cookie cutters is an enjoyable project that combines creativity with practicality, making it ideal for beginners.
- Difficulty Level: Beginner-friendly
- Print Time: Approximately 1-2 hours per cutter, depending on the size and complexity
- Filament Required: Minimal, approximately 10-20 grams of PLA per cutter
- Where to Find: Cults3D
Printing Tips and Tricks
Preparing Your Printer
Before hitting the print button, it’s crucial to ensure your printer is set up correctly. Here are some steps to prepare your printer for a successful print:
- Check the Printer’s Manual: Always refer to the printer’s manual for specific setup instructions and troubleshooting tips. Familiarize yourself with the printer’s components and their functions.
- Level the Bed: Bed leveling is crucial for print adhesion and quality. Use the printer’s built-in leveling system or a piece of paper to ensure the print bed is even. This step prevents issues like warping or the print not sticking to the bed.
- Clean the Print Bed: Make sure the print bed is free of dust, grease, and residue from previous prints. Use isopropyl alcohol and a lint-free cloth to clean the bed for better adhesion.
- Preheat the Printer: Preheat the printer to the recommended temperature for the filament you’re using. This ensures the filament melts properly and adheres to the print bed.
Importance of Bed Leveling
A level bed is crucial for successful prints. If the bed isn’t level, your print might not stick properly, leading to failures. Here’s how to achieve a properly leveled bed:
- Manual Leveling: Adjust the screws under the print bed while moving the nozzle to different corners and the center. Use a piece of paper to gauge the distance between the nozzle and the bed, ensuring slight friction when moving the paper.
- Automatic Leveling: Some printers come with an auto-leveling feature. Follow the printer’s instructions to calibrate the bed automatically. This feature can save time and improve print consistency.
Choosing the Right Filament
Not all filaments are created equal. Here’s how to choose the right filament for your projects:
- PLA (Polylactic Acid): PLA is the most beginner-friendly filament due to its ease of use and minimal warping. It’s great for most prints, especially when detail and ease of printing are important.
- ABS (Acrylonitrile Butadiene Styrene): ABS is more durable and heat-resistant than PLA but requires a heated bed and good ventilation due to fumes. It’s suitable for functional parts that need to withstand higher temperatures.
- PETG (Polyethylene Terephthalate Glycol): PETG combines the best of PLA and ABS. It’s strong, flexible, and easier to print than ABS. It’s perfect for parts that need durability and slight flexibility.
Additional Tips
- Use Adhesives: Applying a thin layer of glue stick, hairspray, or painter’s tape to the print bed can help with adhesion, especially for larger prints.
- Monitor the First Layer: The first layer is critical for print success. Watch the first layer closely to ensure it adheres well and is laid down smoothly. Adjust the bed level or nozzle height if necessary.
- Adjust Print Settings: Experiment with different print settings such as layer height, print speed, and temperature. Start with the recommended settings for your filament and printer, then tweak them based on your results.
- Keep the Filament Dry: Store filament in a cool, dry place. Moisture can cause printing issues, so use desiccant packs and airtight containers to keep filament dry.
By following these tips and tricks, you’ll be well on your way to producing high-quality 3D prints. Each project will teach you something new, helping you refine your skills and achieve better results.
Common Printing Issues and Solutions
Warping
Warping occurs when the corners or edges of your print lift off the print bed, causing deformation. This issue is especially common with larger prints and certain materials like ABS.
Causes:
- Uneven print bed
- Inadequate bed adhesion
- Rapid cooling of the print
Solutions:
- Ensure Bed Leveling: Make sure your print bed is level. Use a piece of paper to adjust the bed height until you feel slight friction when moving the paper under the nozzle.
- Improve Bed Adhesion: Use adhesives like glue stick, hairspray, or painter’s tape on the print bed. Additionally, heated beds can help prevent warping by keeping the base layers warm.
- Use Brims or Rafts: Adding a brim or raft to your print can increase the surface area in contact with the bed, improving adhesion.
- Control Cooling: Reduce the cooling fan speed during the initial layers to allow the print to adhere better before cooling rapidly.
Layer Shifting
Layer shifting occurs when the layers of your print do not align properly, resulting in a misaligned or skewed print.
Causes:
- Loose belts or pulleys
- Obstructions or mechanical issues
- Print head moving too fast
Solutions:
- Tighten Belts and Pulleys: Check and tighten the belts and pulleys on your printer to ensure they are secure and have proper tension.
- Inspect for Obstructions: Make sure there are no obstructions on the print bed or in the path of the print head. Regularly check and clean the printer’s mechanical components.
- Adjust Print Speed: Reduce the print speed in your slicer settings. Slower speeds can help improve accuracy and prevent the print head from overshooting.
Stringing
Stringing occurs when small threads of filament remain between parts of your print, creating unwanted “strings” or “hairs” on the final object.
Causes:
- High print temperature
- Inadequate retraction settings
- Excessive movement between print areas
Solutions:
- Optimize Retraction Settings: Increase the retraction distance and speed in your slicer settings. This will help pull the filament back into the nozzle during travel moves, reducing stringing.
- Lower Print Temperature: Reduce the print temperature to minimize filament leakage during travel moves. Experiment with different temperatures to find the optimal setting for your filament.
- Adjust Travel Moves: Minimize the distance the print head travels between different parts of the print.
Using the “combing” feature in your slicer can help keep travel moves within the printed area, reducing stringing.
Poor Layer Adhesion
Poor layer adhesion results in weak prints that can easily break apart. This issue often manifests as layers separating or splitting.
Causes:
- Incorrect print temperature
- Low print speed
- Poor filament quality
Solutions:
- Check Print Temperature: Ensure the print temperature is set correctly for the filament you are using. Higher temperatures can improve layer bonding but may also increase the risk of stringing and warping.
- Increase Print Speed: Sometimes increasing the print speed can help layers bond better. However, this depends on the specific material and printer settings.
- Use Quality Filament: Use high-quality filament from reputable manufacturers. Poor-quality filament can have inconsistent properties that affect layer adhesion.
Overhangs and Bridges
Printing overhangs and bridges can be challenging, leading to sagging or poor surface quality.
Causes:
- Insufficient cooling
- High print speed
- Poor support structures
Solutions:
- Improve Cooling: Use a cooling fan to solidify the filament quickly as it is laid down, especially when printing overhangs and bridges.
- Reduce Print Speed: Slower print speeds can improve the quality of overhangs and bridges by allowing the filament to cool and set properly.
- Use Supports: Enable support structures in your slicer to provide a foundation for overhangs and bridges. After printing, remove the supports carefully to achieve a clean finish.
By understanding these common issues and their solutions, you can significantly improve your 3D printing results and reduce the number of failed prints. Each project you complete will enhance your skills and knowledge, leading to even better prints in the future.
Post-Printing Processes
Removing the Print
Once your print is finished, carefully remove it from the print bed. This step can be tricky, especially if the print is well-adhered to the bed. Here’s how to do it safely:
- Use a Spatula or Scraper: Gently slide a spatula or scraper under the edges of the print to loosen it from the bed. Be careful not to apply too much force to avoid damaging the print or the bed.
- Warm the Bed: If the print is particularly stubborn, gently warming the bed (if it’s not already heated) can help loosen the print. However, make sure not to overheat it, as this can deform the print.
- Be Patient: Take your time and work slowly around the edges of the print. Rushing this process can lead to breakage or damage.
Sanding and Smoothing
After removing your print, you might notice some rough edges or layer lines. Sanding and smoothing can enhance the finish of your print:
- Start with Coarse Grit Sandpaper: Use a coarse grit sandpaper (around 100-200 grit) to smooth out the roughest areas. Sand gently in a circular motion.
- Move to Finer Grits: Gradually move to finer grits (400-600 grit) to achieve a smoother surface. For a polished finish, you can go up to 1000-2000 grit sandpaper.
- Wet Sanding: For a very smooth finish, consider wet sanding. This involves using water along with fine grit sandpaper to reduce friction and achieve a glass-like surface.
- Filing: For intricate details and hard-to-reach areas, small files can be useful to smooth out specific spots.
Painting and Finishing
Painting your 3D print can add a professional and polished look. Here’s how to prepare and paint your prints:
- Prime the Surface: Apply a primer to your print to create a smooth base for painting. Primers also help the paint adhere better to the surface. Use a spray primer for an even coat.
- Choose the Right Paint: Acrylic paints are a popular choice for 3D prints. They are easy to work with and come in a wide range of colors. For a more durable finish, consider using enamel paints.
- Apply Thin Layers: When painting, apply thin layers of paint, allowing each layer to dry completely before adding the next. This prevents drips and ensures an even finish.
- Detail Work: Use fine brushes for detailed areas and small parts. Masking tape can be used to protect areas that you don’t want to paint.
- Seal the Paint: Once you’re satisfied with the paint job, apply a clear coat to protect the paint and give the print a glossy or matte finish. Spray sealants are easy to apply and provide a durable protective layer.
Assembling Multi-Part Prints
If your print consists of multiple parts, you’ll need to assemble them:
- Test Fit: Before gluing or fastening the parts together, test fit them to ensure they align correctly.
- Use the Right Adhesive: For PLA prints, super glue (cyanoacrylate) works well. For ABS prints, acetone can be used to weld parts together. Apply the adhesive sparingly to avoid excess.
- Clamping: Use clamps or rubber bands to hold the parts together while the adhesive sets. This ensures a strong bond.
- Fill Gaps: If there are small gaps between parts, use a filler (like epoxy putty) to smooth them out before painting.
Maintaining Your 3D Printer
Proper maintenance of your 3D printer is essential to keep it running smoothly and producing high-quality prints:
- Regular Cleaning: Clean the print bed, nozzle, and other components regularly to prevent buildup and clogs. Use isopropyl alcohol to clean the bed and a small brush to remove debris from the nozzle.
- Check for Wear and Tear: Inspect belts, pulleys, and other moving parts for signs of wear. Replace any worn-out parts to maintain the accuracy and reliability of your printer.
- Lubrication: Apply lubricant to the moving parts of your printer, such as the Z-axis lead screw and linear bearings. This ensures smooth movement and reduces friction.
- Calibration: Regularly calibrate your printer, including bed leveling and extruder calibration, to ensure optimal performance. This helps maintain print quality and reduces the risk of failed prints.
By following these post-printing processes, you can enhance the quality and appearance of your 3D prints, ensuring they look professional and meet your expectations.
Conclusion
Diving into the world of 3D printing can be an incredibly rewarding experience, especially when you start with free prints. These projects allow you to explore the capabilities of your 3D printer without the initial investment in paid designs. From practical household items to fun and decorative pieces, the range of free prints available ensures there’s something for everyone.
As you embark on your 3D printing journey, remember that patience and practice are key. Each print, successful or not, is a learning opportunity. Don’t be discouraged by initial failures; they are part of the process and help you improve your skills. Start with simple projects, gradually moving to more complex designs as your confidence and expertise grow.
The possibilities with 3D printing are endless. You can create custom tools, unique gifts, educational aids, and even artistic masterpieces. The more you experiment, the more you’ll discover what your printer can do and how you can push the boundaries of your creativity.
Lastly, don’t hesitate to join the 3D printing community. Online forums, social media groups, and local maker spaces are excellent places to seek advice, share your creations, and learn from others. The community is filled with passionate individuals who are always willing to help newcomers.
So, go ahead and start printing. Enjoy the process, embrace the challenges, and celebrate your successes. With each project, you’ll become more proficient and find even more joy in creating something from nothing.
FAQs
- How Long Does It Take to Print an Item?
The time it takes to print an item depends on its size and complexity. Simple prints can take as little as 30 minutes, while more detailed projects might take several hours. - What is the Best Filament for Beginners?
PLA filament is the best choice for beginners. It’s easy to work with, requires lower temperatures, and is less prone to warping compared to other filaments. - Can I Design My Own Prints?
Absolutely! Once you get the hang of printing, you can start designing your own creations using software like Tinkercad or Fusion 360. - How Do I Prevent My Prints from Failing?
To prevent print failures, ensure your printer is well-calibrated, use quality filament, and start with simpler designs to build your confidence and skills. - What Are Some Good Resources for Learning More?
Websites like Thingiverse, YouTube tutorials, and forums such as Reddit’s 3D printing community are excellent resources for learning more about 3D printing.