The Complete How-To: Scanning and Preparing Objects for 3D Printing
In our previous exploration, “3D Scanning: Exploring the World of Digital Replication,” we delved into the fascinating realm of 3D scanning, touching upon its various technologies, applications, and the transformative potential it holds for creators, designers, and engineers alike. We uncovered the foundational methods behind capturing the physical world in digital form, from the precision of laser scanning to the versatility of photogrammetry, and highlighted their significant roles in fields ranging from reverse engineering to cultural preservation. As we venture further into this digital frontier, let’s take a more detailed look at how to refine these digital replicas for the world of 3D printing, enhancing our toolkit for innovation. In this continuation, we aim to bridge the gap between capturing real-world objects and preparing them for the tangible creativity of 3D printing, offering a comprehensive guide to scanning, editing, and optimizing your projects for the best possible outcomes.
Understanding 3D Scanning
3D scanning is a technology that captures the shape of a physical object and converts it into a digital 3D model. This process is fundamental in various industries, including manufacturing, healthcare, and entertainment, but it has also become increasingly popular in the realm of 3D printing for hobbyists and professionals alike. Understanding the nuances of 3D scanning can significantly enhance the quality and realism of 3D printed objects.
How Does 3D Scanning Work?
3D scanners use different technologies to measure the geometry of an object from multiple angles. These technologies include:
- Structured Light Scanning: Projects a pattern of light onto the object and measures deformations in the pattern with a camera.
- Laser Scanning: Uses a laser line or dot to capture the shape of the object as it moves across its surface.
- Photogrammetry: Employs a series of photographs taken around the object from different angles, using software to stitch these images into a 3D model.
Regardless of the method, the goal is the same: to create a point cloud or a set of data points in space that represent the surface of the object. These points are then used to reconstruct the object’s shape in a process called triangulation, which forms a digital mesh.
Why Is 3D Scanning Important for 3D Printing?
3D scanning plays a crucial role in the 3D printing workflow for several reasons:
- Accuracy and Precision: Scanning ensures that the digital model accurately reflects the physical object’s dimensions and details, which is crucial for applications where precision is paramount, such as in custom prosthetics or automotive parts.
- Time Efficiency: Manual modeling of complex objects can be time-consuming and prone to errors. 3D scanning automates this process, capturing every detail in a fraction of the time.
- Realism: For artistic or aesthetic projects, 3D scanning captures the unique textures and nuances of the original object, lending authenticity and realism to the printed piece that manual modeling might not achieve.
- Archiving and Restoration: In preservation efforts, 3D scanning allows for the digital archiving of historical artifacts. These digital models can be used for restoration, analysis, or even reproduction of lost or damaged items.
The Challenges of 3D Scanning
While 3D scanning is powerful, it’s not without its challenges. Reflective, transparent, or very dark surfaces can cause issues for scanners, as they rely on capturing the interaction between light and the object’s surface. Special preparations, such as applying a matte spray or using alternative scanning methods, might be necessary to overcome these hurdles.
Moreover, the complexity of the object can affect the choice of scanning technology. Fine details require high-resolution scanners, while large objects might be better suited to laser scanning for efficiency.
Understanding 3D scanning is the first step in mastering the art and science of 3D printing. By capturing a detailed digital representation of a physical object, enthusiasts and professionals alike can reproduce, modify, and enhance objects in the physical world with unprecedented ease and accuracy. As technology advances, the possibilities for what can be scanned and printed are virtually limitless, opening up new horizons for creativity, innovation, and practical problem-solving in the 3D printing space.
Types of 3D Scanners
3D scanning technology has evolved significantly, offering a range of scanners to suit various needs and budgets. Understanding the main types of 3D scanners can help you choose the right tool for your project.
Structured Light Scanners
Structured light scanners project a series of linear patterns onto an object. They then capture these patterns with one or more cameras. The way these patterns deform when projected onto the object allows the scanner to calculate the depth and surface contours of the object with high precision.
- Best For: Capturing detailed and complex objects with high accuracy.
- Use Cases: Art restoration, dental and medical applications, and detailed engineering parts.
Laser Scanners
Laser scanners emit a laser beam onto the surface of an object and measure the distance to the object using either the time of flight, phase shift, or triangulation methods. These scanners can be handheld or mounted on tripods and are often used for larger objects.
- Best For: Large objects and environments due to their range and speed.
- Use Cases: Industrial design, architecture, and construction, heritage preservation.
Photogrammetry
Photogrammetry uses photographs taken from different angles around an object to create a 3D model. Special software processes these images to identify common points and reconstruct the object’s shape in three dimensions.
- Best For: Cost-effective scanning without the need for specialized hardware (beyond a camera).
- Use Cases: Film and video game production, digital archiving, and DIY 3D printing projects.
Contact Scanners
Contact scanners physically touch the object with a probe to measure its dimensions. These scanners are highly accurate and are not affected by object color or transparency, unlike optical scanners.
- Best For: Objects that can tolerate physical contact without being damaged or deformed.
- Use Cases: Machining and manufacturing, quality control inspections.
Handheld Scanners
Handheld scanners, which can be either structured light or laser-based, offer flexibility and portability. They are manually operated and moved around the object to capture its shape from various angles.
- Best For: Scanning objects of medium size that cannot be easily moved or are in hard-to-reach locations.
- Use Cases: Film and media for props and set designs, automotive industry for custom modifications, archaeology for fieldwork documentation.
Choosing the Right Scanner
Selecting the right scanner depends on several factors:
- Object Size and Location: Large or immovable objects may require portable scanners or photogrammetry.
- Detail and Accuracy Requirements: High-detail projects benefit from structured light or contact scanners.
- Material and Surface Properties: Reflective, transparent, or dark objects may pose challenges for optical scanners.
- Budget Constraints: Photogrammetry can be a cost-effective solution, while professional-grade scanners offer higher accuracy at a higher cost.
Each type of 3D scanner has its unique advantages and limitations. By understanding these differences, you can select the most suitable scanner for your project, whether you’re capturing the intricate details of a historical artifact, designing a custom part, or embarking on a creative 3D printing endeavor. The right scanner not only ensures the fidelity of your digital model but also enhances the overall success of your 3D printing projects.
Preparing Your Object for Scanning
The preparation of your object for 3D scanning is a critical step that can significantly impact the quality and accuracy of your final 3D model. Proper preparation ensures that your scanner captures as much detail as possible, leading to a more precise and faithful representation of the original object.
Cleaning the Object
- Why It Matters: Dirt, dust, and fingerprints can interfere with the scanner’s ability to accurately capture an object’s surface.
- How to Do It: Gently clean the object with a soft brush or cloth. For more stubborn dirt, use a mild cleaning solution appropriate for the object’s material, ensuring it is completely dry before scanning.
Removing Reflective or Transparent Surfaces
- Why It Matters: Many scanners have difficulty with reflective, transparent, or very dark surfaces because these properties can distort the light used in the scanning process.
- How to Do It: Temporarily cover these surfaces with a non-reflective matte spray or similar substance to reduce glare. Ensure that any coatings are easily removable and non-damaging to the object.
Positioning and Mounting
- Why It Matters: The position of your object can affect the scanner’s ability to capture all sides and details. Proper support is also necessary to prevent movement during the scanning process.
- How to Do It: Use supports, stands, or holders to keep the object stable. Position the object so the scanner can easily access all areas of interest. For larger objects, plan your scanning path to cover all surfaces.
Setting Up the Environment
- Why It Matters: The scanning environment can influence the quality of your scan. Too much ambient light, for instance, can interfere with optical scanners, while vibrations can blur details.
- How to Do It: Choose a well-lit area with diffuse, indirect lighting. Avoid direct sunlight and harsh shadows. Ensure the environment is stable and free from vibrations or movements.
Pre-Scan Testing
- Why It Matters: Conducting a pre-scan test helps identify any potential issues with object preparation or scanner settings before committing to the full scanning process.
- How to Do It: Perform a quick, preliminary scan of the object to check for any problems with surface reflectivity, shadows, or incomplete data capture. Adjust the object’s position, lighting, or preparation as necessary based on the test results.
Documentation
- Why It Matters: For complex projects, documenting the setup, scanner settings, and preparation steps can be invaluable for future reference or if you need to replicate the scanning process.
- How to Do It: Take notes or photographs of the setup and any specific preparations made to the object. Record scanner settings and any software configurations used during the scan.
Taking the time to properly prepare your object for 3D scanning can significantly enhance the quality of your scanned models. Attention to detail in cleaning, positioning, and preparing the scanning environment pays off in the accuracy and fidelity of your 3D representations, ensuring that your scanning efforts lead to successful 3D printing outcomes. Whether you’re working on a precise engineering component, a historical artifact, or a custom piece of art, these preparation steps are essential for achieving the best possible scan.
Tips for Scanning Complex Objects
- Understanding Your Scanner’s Capabilities
- Assess the Limitations: Different scanners are suited for different types of objects. Understand the strengths and weaknesses of your scanner, especially concerning resolution and depth of field.
- Optimize Settings: Adjust scanner settings for the best balance between speed and detail, based on the complexity of the object.
- Segmenting the Scan Process
- Divide and Conquer: For very complex objects, consider breaking down the scanning process into smaller, more manageable segments. Scan each part separately and use software to stitch the scans together.
- Focus on Difficult Areas: Pay extra attention to areas with intricate details or hard-to-reach spots. Multiple scans from different angles might be necessary.
- Using Supporting Materials
- Stabilize the Object: Use non-intrusive supports to keep the object steady during scanning without blocking important details.
- Contrast Background: Place the object against a background that contrasts with its color to help the scanner differentiate the object from its surroundings.
- Applying Surface Treatment
- Matte Finish: If the object is shiny, translucent, or very dark, apply a temporary matte spray or powder to reduce reflections and increase surface visibility.
- Removable Coatings: Ensure any coatings used are easy to remove and won’t damage the object’s surface.
- Incremental Adjustments
- Small Movements: When scanning complex objects, small adjustments in the object’s position or the scanner’s angle can make a big difference in capturing missed details.
- Continuous Monitoring: Keep an eye on the scanning process and the preview (if available) to identify areas that may require re-scanning.
- Leveraging Software Tools
- Post-Processing: Utilize software for post-processing scans to fill in gaps, smooth surfaces, or correct errors. Tools like Meshmixer or ZBrush can be invaluable.
- Alignment and Stitching: For objects scanned in parts, software can align and merge these parts into a cohesive model. Accuracy in this step is critical for a seamless final product.
- Experimenting with Lighting
- Adjust Lighting: Experiment with different lighting setups to reduce shadows and highlight details. Indirect lighting can often provide more uniform illumination.
- Polarizing Filters: If using a camera-based scanner or photogrammetry, consider polarizing filters to reduce glare and reflections.
- Practice and Patience
- Trial and Error: Each object might require a different approach. Don’t be afraid to experiment with various techniques to find what works best.
- Patience is Key: Complex objects can require more time to scan properly. Patience during the scanning and post-processing stages ensures the highest quality model.
Scanning complex objects for 3D printing is both an art and a science, requiring a blend of technical knowledge, creativity, and patience. By understanding the intricacies of your scanner, preparing your object meticulously, and employing strategic scanning techniques, you can overcome the challenges posed by complex geometries and surfaces. Remember, the goal is to capture as much detail as possible to create a faithful digital representation of the object, which will serve as the foundation for a successful 3D print.
Scanning Process
- Pre-Scan Preparation
- Object Preparation: Follow the guidelines provided in the “Preparing Your Object for Scanning” section. Ensure the object is clean, properly positioned, and, if necessary, coated with a matte finish to improve scan quality.
- Environment Setup: Prepare your scanning environment by controlling lighting and minimizing movement and vibration. The environment should complement the scanner’s capabilities for optimal results.
- Scanner Calibration
- Calibration is Key: Before starting the scan, calibrate your scanner according to the manufacturer’s instructions. Calibration ensures accuracy and reduces errors, particularly for complex or detailed scans.
- Check Software Settings: Adjust the scanner and software settings based on the object’s size, material, and desired level of detail. This might include resolution, sensitivity, and speed.
- Conducting the Scan
- Start with a Test: Perform a preliminary scan if possible. This allows you to adjust settings and positioning as needed before the full scan.
- Comprehensive Coverage: Scan the object from multiple angles to capture all surfaces and details. For larger objects, this may involve moving the scanner or object systematically to cover the entire area.
- Maintain Focus and Distance: Keep the scanner at the optimal distance from the object, as specified by the manufacturer, to ensure focus and maximize detail capture.
- Monitoring and Adjusting
- Real-Time Monitoring: If your scanner software allows, monitor the scan in real-time to identify any missed areas or details. This enables immediate adjustments, such as rescanning from a different angle.
- Adjust as Needed: Based on the real-time feedback, make incremental adjustments to the scanner’s position or settings to improve the quality of the capture.
- Finalizing the Scan
- Review the Scan: After completing the scanning process, review the digital model in the scanning software. Check for completeness, clarity, and any areas that may have been missed or require improvement.
- Rescan if Necessary: If there are gaps or poorly captured areas, you may need to rescan certain parts of the object. This is particularly common with complex or intricately detailed objects.
- Data Processing
- Initial Processing: Use the scanning software to process the raw data into a coherent 3D model. This may involve aligning multiple scans, merging data points, and smoothing surfaces.
- Refinement: Apply further refinements such as hole filling, detail enhancement, and error correction. Software tools like Meshlab or Meshmixer are valuable for these tasks.
- Exporting for 3D Printing
- File Format: Once satisfied with the scan quality, export the model in a format compatible with your 3D printing software, typically STL or OBJ.
- Pre-Print Adjustments: Before printing, the model may require additional adjustments in 3D printing software, such as scaling, orientation, and the addition of support structures.
The scanning process is a delicate balance between art and science, requiring attention to detail, patience, and a thorough understanding of both the scanning technology and the object being scanned. By meticulously preparing, executing, and refining your scans, you can achieve highly accurate digital models ready for 3D printing, ensuring that the final printed objects meet or exceed your expectations.
Setting Up Your Scanner
- Unpacking and Assembly
- Careful Unboxing: Start by carefully unpacking your scanner and all its components. Handle each piece with care to avoid any damage.
- Assembly: Follow the manufacturer’s instructions to assemble any parts of the scanner that are not already put together. This might include attaching scanning heads, stands, or cables.
- Scanner Calibration
- Importance of Calibration: Calibration is essential for ensuring that your scanner accurately measures the dimensions of the objects it scans. It typically involves using a calibration panel or object of known dimensions provided by the manufacturer.
- Procedure: Follow the specific calibration steps outlined in your scanner’s manual. This usually includes placing the calibration tool at a certain distance and orientation from the scanner and running the calibration software.
- Software Installation and Updates
- Installing Software: Install the scanning software that comes with your scanner on your computer. This software is crucial for controlling the scanner and processing the scanned data.
- Check for Updates: Ensure that you have the latest version of the scanning software. Manufacturers often release updates that improve functionality, add features, or fix bugs.
- Connecting the Scanner to Your Computer
- Physical Connection: Connect the scanner to your computer using the appropriate cable (often USB, Ethernet, or Wi-Fi). Ensure the connection is secure and stable.
- Driver Installation: Your computer may need to install drivers to recognize and communicate with the scanner. Follow any prompts to complete this installation.
- Familiarizing Yourself with the Scanning Software
- Explore the Interface: Spend some time getting to know the scanning software’s user interface. Identify where the main features are, such as scan initiation, scan settings, and data processing tools.
- Adjust Settings: Before scanning, adjust the settings in the software according to your needs. This includes scan resolution, sensitivity, and any specific modes or filters your scanner offers.
- Testing the Setup
- Conduct a Test Scan: Before scanning your intended object, perform a test scan on a simpler object to ensure everything is working as expected. Check that the scanner captures details accurately and the software processes the scan correctly.
- Adjustments: Based on the test scan results, you may need to adjust the scanner’s position, the calibration, or software settings. The goal is to achieve the best possible scan quality for your specific object.
- Environment Preparation
- Lighting: Ensure the scanning area is well-lit, but avoid direct sunlight or harsh shadows that could interfere with the scan.
- Stable Surface: Place the scanner on a stable, vibration-free surface to prevent any movement during the scan.
Properly setting up your scanner is the foundation for successful 3D scanning. By carefully following the steps for calibration, software setup, and testing, you can ensure your scanner is accurately capturing the details of your objects. This attention to the setup process helps minimize errors and improves the overall quality and reliability of your scans, paving the way for exceptional 3D printing results.
Capturing Your Object
- Optimal Positioning
- Strategic Placement: Position your object in a way that exposes as many surfaces as possible to the scanner. Use supports or holders if necessary to stabilize the object without obscuring key features.
- Rotation for Coverage: For objects that can be manually rotated, plan to capture all angles by dividing the object into sections and scanning each section thoroughly before moving to the next.
- Adjusting for Size and Complexity
- Large Objects: For larger objects, you may need to scan in sections or use a scanner that can capture at a distance without losing detail. Incrementally move around the object to ensure full coverage.
- Complex Details: Focus on capturing intricate details by adjusting the scanner’s resolution settings if possible. Multiple passes might be needed to capture fine details accurately.
- Maintaining the Right Distance
- Follow Manufacturer Guidelines: Keep the scanner at the optimal distance from the object, as recommended by the manufacturer. This distance is crucial for ensuring the scanner captures the object with the highest fidelity.
- Adjusting for Clarity: If the scanner produces unclear or distorted results, adjust its distance from the object slightly. Sometimes, small adjustments can significantly improve scan quality.
- Scanning in Passes
- Multiple Passes: Conduct several passes from different angles to ensure all parts of the object are captured. This is especially important for objects with undercuts or hidden areas.
- Overlap for Accuracy: Ensure that each new scanning pass overlaps with the previous one to provide a continuous and accurate representation of the object’s surface.
- Monitoring Scan Quality
- Real-Time Feedback: Use the scanner’s software to monitor the scan quality in real-time. This allows you to identify any missed areas or issues with the scan as they occur.
- Adjustments on the Fly: Be prepared to make immediate adjustments to your scanning process, such as changing the scanner’s angle or distance, to address any issues detected during the scan.
- Using Reference Points
- Markers for Alignment: If your scanner supports it, use reference markers or points on and around your object. These markers help the software accurately align multiple scans of the object.
- Consistency is Key: Ensure that any reference points used remain undisturbed throughout the scanning process to maintain alignment accuracy.
- Environmental Considerations
- Control Lighting: Optimal lighting conditions can vary depending on your scanner type. Some scanners perform better in diffused lighting, while others might require brighter conditions. Avoid direct sunlight and reflective surfaces that could interfere with the scan.
- Minimize Movement: Ensure that both the scanner and object remain as stable as possible. Even minor vibrations can affect the scan’s accuracy.
Capturing your object for 3D scanning is a nuanced process that combines technical precision with an understanding of your specific scanner’s capabilities and the unique characteristics of the object being scanned. By carefully positioning the object, adjusting scanner settings, and methodically covering all angles, you can achieve a detailed and accurate digital model ready for further processing and eventual 3D printing. Remember, patience and attention to detail during this phase can dramatically impact the quality of your final 3D printed object.
Post-Scanning Steps
- Data Alignment and Merging
- Aligning Scans: If your object was scanned in multiple passes or from different angles, the first step is to align these scans together. Use the scanning software to match up common points between the scans, ensuring they form a cohesive model.
- Merging Data: Once aligned, merge the scans into a single 3D model. This process involves combining the data points and meshing them together to create a unified surface.
- Cleaning and Refining the Model
- Removing Artifacts: Scan data often includes noise or artifacts such as stray points, background objects, or supports used during the scan. Use the software’s tools to manually or automatically remove these unwanted elements.
- Smoothing Surfaces: Smoothing tools can help eliminate rough spots or irregularities on the surface of your model, making it more true to the original object’s appearance. However, use smoothing judiciously to avoid losing important details.
- Filling Gaps and Repairing Errors
- Gap Filling: Scans may have missing areas due to the object’s complexity or scanning difficulties. Use filling tools to close these gaps, either automatically or by manually sculpting the missing areas.
- Error Correction: Inspect the model for errors such as holes, non-manifold edges, or inverted normals. Use the software’s repair functions to fix these issues, ensuring the model is solid and printable.
- Optimization for End Use
- Reducing Mesh Complexity: High-resolution scans can produce very dense meshes, which may be more detailed than needed and difficult to handle in 3D printing software. Use mesh decimation tools to reduce the polygon count without significantly affecting the model’s appearance.
- Scaling and Orientation: Adjust the model’s scale to match the intended physical size. Also, orient the model in an optimal position for printing, considering factors like support structure minimization and print bed adhesion.
- Exporting the Model
- Choosing the Right Format: Export your refined model in a format suitable for its next step. For 3D printing, formats like STL or OBJ are commonly used.
- Quality Check: Before finalizing the export, do a quality check to ensure all previously made adjustments are correctly applied and the model is ready for its intended use.
- Preparation for 3D Printing
- Slicing: Import your model into slicing software to convert the 3D model into a series of layers that the 3D printer can build. Adjust settings like layer height, infill density, and support structures as needed.
- Final Review: Before printing, review the sliced model for any potential issues that could arise during printing, such as overhangs that require supports or areas of fine detail that may not print well.
The post-scanning steps are where the raw data captured by your 3D scanner is transformed into a polished, usable 3D model. Through careful alignment, cleaning, refinement, and preparation, you can ensure that your model not only accurately represents the scanned object but is also optimized for its final application, whether that be for visualization, analysis, or 3D printing. By dedicating time and attention to these post-scanning processes, you enhance the value of your scanning efforts and improve the quality of your final outputs.
Editing and Refining Scans
- Mesh Cleanup
- Removing Noise and Artifacts: Raw scans often include extraneous data, such as background objects or noise. Use mesh editing tools to remove these unwanted elements, which can distract from the main object and complicate printing.
- Smoothing and Polishing: Smooth out rough areas to enhance the model’s appearance and feel. This can be particularly important for objects that will be handled or displayed.
- Gap Filling and Repair
- Identifying and Filling Holes: Scans might have holes or gaps where data was missed or obscured. Software tools can automatically identify these areas, allowing you to fill them in to complete the model.
- Repairing Flaws: Look for and repair flaws such as non-manifold edges, inverted normals, and other common scanning anomalies that could affect printing.
- Detail Enhancement
- Sharpening Details: Use editing tools to enhance or sharpen details that are important to the object’s character or function. This step is vital for preserving the uniqueness of the scanned item.
- Manual Sculpting: In some cases, you may need to manually sculpt or refine areas of the model to correct imperfections or enhance details, using digital sculpting tools.
- Rescaling and Orienting
- Adjusting Scale: Ensure that the model is correctly scaled to its intended real-world size. Scanned models may need to be rescaled for various purposes, including fitting a specific print volume or matching a real-world dimension.
- Optimal Orientation: Orient the model for the best printing results. Consider factors like the amount of support needed, the print’s structural integrity, and the visibility of any post-processing marks.
- Simplification and Optimization
- Reducing Mesh Complexity: High-resolution scans can result in very dense meshes that are difficult to process and print. Simplify the mesh to a manageable level of detail without significantly compromising the model’s fidelity.
- Optimizing for Printing: Make adjustments to ensure the model is well-suited for printing. This might include thickening thin elements, adding escape holes for resin printing, or segmenting the model for assembly post-print.
- Texture and Color Editing
- Adjusting Textures: If your scan includes color information, you may need to adjust the texture for realism or to highlight certain features. This can involve color correction, sharpening, or even repainting sections of the texture.
- Preparing for Color Printing: For models intended for full-color 3D printing, ensure the texture map is correctly aligned and optimized for the specific printing technology.
- Final Review and Pre-Processing
- Quality Assurance: Conduct a final review of the model to ensure all edits and refinements meet your standards. Look for any remaining issues that could affect the print quality or the model’s integrity.
- Pre-Processing for Printing: Depending on your 3D printing process, additional pre-processing steps like generating support structures or slicing the model may be required. Use appropriate software to prepare the model for a successful print.
Editing and refining scanned 3D models are vital steps in ensuring that the final digital product is of the highest quality and ready for its intended application, especially in 3D printing. Through careful mesh cleanup, gap filling, detail enhancement, and optimization, you can transform raw scan data into a polished, accurate, and printable model. This process not only enhances the aesthetics and functionality of the final print but also maximizes the value and usability of the scanned data.
Preparing for 3D Printing
- Model Verification and Final Adjustments
- Solidity Check: Ensure the model is watertight and has no holes. A solid model is essential for successful 3D printing.
- Wall Thickness: Verify that the model’s walls are thick enough to be printed. Thin walls might not print correctly or could be too fragile. Use software tools to adjust wall thickness as needed.
- Overhangs and Supports: Identify areas in the model that have overhangs exceeding the angle your printer can handle without supports. Add support structures either manually in the modeling software or automatically in the slicing software.
- Orientation for Printing
- Optimal Positioning: Orient the model in the slicer software to minimize the need for support structures, reduce printing time, and ensure the best possible surface quality. The orientation can significantly impact the strength and final appearance of the printed object.
- Splitting Large Models: For models too large for your print bed, consider splitting them into smaller parts that can be assembled after printing. This not only makes printing easier but also can reduce the need for supports.
- Slicing the Model
- Slicer Settings: Import your model into a slicing software, which converts the 3D model into a series of layers and generates the G-code that instructs the printer. Adjust settings such as layer height, infill density, print speed, and temperature to suit your model and material.
- Preview and Adjust: Most slicers offer a preview of how the print will proceed layer by layer. Use this feature to spot potential problems and adjust settings before starting the actual print.
- Material Selection
- Choose the Right Material: Select a printing material that matches the intended use of the object. Factors to consider include strength, flexibility, temperature resistance, and aesthetic qualities. Common materials include PLA, ABS, PETG, and TPU.
- Material Properties: Each material has unique properties that affect how you should prepare your model for printing. For instance, ABS requires higher temperatures and might warp if cooled too quickly, necessitating a heated bed or enclosure.
- Printer Preparation
- Calibrate Your Printer: Ensure your 3D printer is properly calibrated, including the print bed leveling, extruder alignment, and filament flow. Calibration is crucial for achieving the best print quality and adhesion to the print bed.
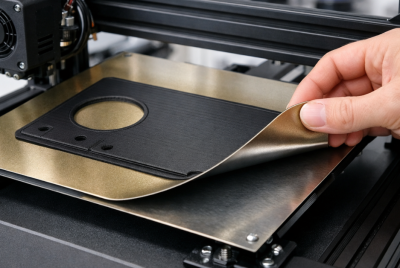
- Clean and Prepare the Print Bed: A clean print bed is essential for good adhesion. Apply adhesives if necessary, depending on the material and printer type. Options include glue stick, hairspray, or specialized adhesives for 3D printing.
- Test Print
- Small Test Prints: Before committing to a full-size print, consider printing a smaller version or a test piece to check the settings and material behavior. This can save time and materials by identifying any issues early.
- Monitoring the Print
- Stay Attentive: Especially for long prints, it’s important to periodically check on the progress. Early detection of issues like warping, shifting layers, or filament jams can save the print from failure.
Preparing for 3D printing is a multifaceted process that bridges the gap between digital modeling and physical creation. By carefully reviewing and adjusting your model, choosing appropriate settings and materials, and ensuring your printer is in optimal condition, you can significantly increase the chances of a successful print. This preparation phase is crucial for translating the precision and detail of your scanned and refined 3D models into tangible, high-quality objects.
Choosing the Right 3D Printer
- Understand the Different Printing Technologies
- Fused Deposition Modeling (FDM): FDM printers work by extruding thermoplastic filaments, such as PLA or ABS, layer by layer to build an object. They are the most common and usually the most affordable type of 3D printer, ideal for beginners and hobbyists.
- Stereolithography (SLA): SLA printers use a laser to cure liquid resin into solid plastic. They are capable of producing prints with high detail and smooth surface finishes, making them suitable for applications requiring precision, such as jewelry or dental models.
- Selective Laser Sintering (SLS): SLS printers use a laser to sinter powdered material, typically nylon, to create objects. This technology allows for strong and complex parts without the need for support structures, suitable for functional prototypes and end-use parts.
- Digital Light Processing (DLP) and Liquid Crystal Display (LCD): Similar to SLA, these technologies use light to cure resin. DLP uses a digital light projector, while LCD uses an array of UV LEDs shining through an LCD screen. Both offer high detail and speed but differ in cost and the intricacies of the light source.
- Consider Your Primary Use Case
- Prototyping vs. Final Products: If you’re primarily creating prototypes, an FDM printer might suffice due to its versatility and material options. For final products, especially those requiring fine detail or smooth finishes, resin-based printers (SLA, DLP, LCD) might be more appropriate.
- Size and Volume: Consider the size of the objects you plan to print. Larger FDM printers can handle big prints, but if you’re focused on smaller, highly detailed objects, a resin printer might be better despite its typically smaller build volume.
- Material Compatibility
- Material Requirements: Different printers support different materials. FDM printers offer a wide range of thermoplastics, from basic PLA to advanced composites. Resin printers, while limited to specific resins, offer materials tailored for toughness, flexibility, or transparency.
- Material Properties: Evaluate the mechanical, thermal, and aesthetic properties you need for your prints. Some applications may require materials with specific characteristics, such as high strength, flexibility, or biocompatibility.
- Resolution and Print Quality
- Layer Resolution: Layer height is a key factor in print quality. Lower layer heights (higher resolution) produce smoother surfaces but increase print time. Resin printers generally achieve higher resolutions than FDM printers.
- Accuracy and Precision: Consider the printer’s ability to accurately reproduce the details of your models. This is particularly important for applications where fit, form, and function are critical.
- Ease of Use and Reliability
- User Interface and Software: A user-friendly interface and reliable slicing software can significantly impact your printing experience. Look for printers with supportive communities and good manufacturer support.
- Maintenance and Upkeep: Understand the maintenance requirements of the printer. FDM printers might need regular nozzle cleaning or bed leveling, while resin printers require handling liquid resin and cleaning parts post-printing.
- Cost and Budget Considerations
- Initial Investment vs. Operating Costs: Beyond the purchase price, consider the ongoing costs of materials, replacement parts, and any required post-processing equipment. Resin and specialized filaments can add to the operating costs.
Choosing the right 3D printer involves balancing your specific needs regarding print quality, material requirements, size constraints, and budget. By carefully considering the different technologies and evaluating how each aligns with your goals, you can select a printer that not only meets your current needs but also supports your future projects. Whether you’re a hobbyist, educator, or professional, the right 3D printer can unlock endless possibilities for bringing your digital creations to life.
Speed vs. Quality
- Layer Height and Resolution
- Layer Height: A key factor affecting both speed and quality. Printing with lower layer heights (higher resolution) results in finer details and smoother surfaces but significantly increases print time. Conversely, higher layer heights (lower resolution) speed up the printing process but can lead to visible layer lines and less detailed prints.
- Optimization: For prototypes or internal parts where detail is less critical, higher layer heights can save time. For final parts or models where aesthetics are important, lower layer heights are preferable.
- Print Speed Settings
Movement Speed: The speed at which the printer head or bed moves. Faster speeds can reduce print time but may introduce vibrations or inaccuracies, especially in intricate parts.
Extrusion Speed: The rate at which material is extruded. Pushing filament or resin too quickly can lead to imperfections like blobs or stringing, while too slow can result in gaps or weak layers.
Balancing Act: Finding the right speed settings involves testing and experience with your specific printer and material. It’s about striking a balance where the print completes in a reasonable timeframe without sacrificing too much quality.
- Material Considerations
- Material Properties: Different materials respond differently to speed. For example, some filaments may require slower speeds to achieve proper layer adhesion and avoid warping, while others might be more forgiving.
- Temperature Control: The printing temperature can affect how quickly materials solidify, impacting both speed and quality. Optimal temperature settings ensure smooth extrusion and solidification suitable for the chosen speed.
- Printer Capabilities
- Hardware Limitations: The design and mechanics of a printer can limit how quickly it can print without losing quality. High-quality linear rails, robust frames, and precise stepper motors can handle higher speeds better than less sturdy models.
- Upgrade Options: Upgrading components such as nozzles, extruders, or firmware can enhance a printer’s ability to handle faster speeds while maintaining quality.
- Application Requirements
- Prototyping vs. Final Products: The intended use of the printed object greatly influences the speed-quality balance. Rapid prototypes might prioritize speed to iterate designs quickly, while final products or visible components might necessitate a focus on quality.
- Aesthetic vs. Functional: Aesthetic pieces benefit from slower speeds and finer details, whereas functional parts might prioritize structural integrity, which can sometimes be achieved at higher speeds with appropriate infill settings.
- Strategies for Balancing Speed and Quality
- Test and Document: Conduct tests at various speed and quality settings to understand their impact on different models and materials. Documenting these results creates a valuable reference for future projects.
- Use Variable Settings: Some slicing software allows for variable layer heights and speeds within a single print, enabling you to optimize speed and quality by adjusting settings for different sections of the print.
- Continuous Learning: Stay informed about new materials, software updates, and printing techniques that can influence the speed-quality trade-off. The 3D printing community is a valuable resource for insights and optimizations.
Balancing speed and quality in 3D printing is an essential skill that improves with experience and experimentation. By understanding the factors that influence this balance, you can make informed decisions that align with your project’s requirements, whether prioritizing rapid output or producing high-fidelity models. Ultimately, the goal is to achieve the best possible outcome within your constraints, leveraging the capabilities of your printer, materials, and software to their fullest potential.
Material Considerations
- Thermoplastics for Fused Deposition Modeling (FDM)
- PLA (Polylactic Acid): Easy to print with, PLA is ideal for beginners. It offers good detail, a wide range of colors, and is biodegradable. Best for cosmetic prints, prototypes, and non-functional items due to its low heat resistance.
- ABS (Acrylonitrile Butadiene Styrene): Known for its strength and durability, ABS is used for functional parts that require toughness and thermal resistance. It can be more challenging to print due to warping and requires a heated bed.
- PETG (Polyethylene Terephthalate Glycol): Combines the ease of printing seen in PLA with the strength and durability of ABS. PETG is also moisture-resistant, making it suitable for outdoor applications.
- TPU (Thermoplastic Polyurethane): A flexible, rubber-like material, TPU is used for parts that need to bend or stretch, such as gaskets, tubes, or phone cases. It requires specific printer settings to handle its elasticity.
- Resins for Stereolithography (SLA) and Digital Light Processing (DLP)
- Standard Resins: Provide high detail and smooth finishes suitable for models, miniatures, and art. Not as strong as some FDM materials and can be brittle.
- Tough and Durable Resins: Designed to mimic the strength and durability of thermoplastics like ABS, these resins are used for functional parts that require higher impact resistance.
- Flexible Resins: Offer varying degrees of flexibility and are used for objects that need to bend or compress, similar to TPU in FDM printing.
- Specialty Resins: Include materials with unique properties such as high temperature resistance, water resistance, or biocompatibility for medical devices.
- Material-Specific Printing Considerations
- Printing Environment: Some materials require controlled environments, such as a heated print bed for ABS or a temperature-controlled chamber to reduce warping and improve layer adhesion.
- Post-Processing Requirements: Certain materials may require post-processing for optimal performance or aesthetics. For instance, ABS can be smoothed with acetone vapor, while SLA prints often need UV curing for full strength.
- Durability and Lifespan: Consider the intended use and environment of the printed object. Materials exposed to sunlight, high temperatures, or mechanical stress should be chosen for their ability to withstand these conditions over time.
- Eco-Friendly Options
- Biodegradable Materials: PLA is popular for its biodegradable properties, made from renewable resources like corn starch. However, biodegradation requires industrial composting conditions.
- Recycled Materials: Some filaments are made from recycled plastics, offering a more sustainable option for environmentally conscious printing.
- Cost and Availability
- Budget Constraints: Material costs can vary significantly, from affordable PLA to more expensive specialty resins. Consider both the initial cost and the volume of material needed for your project.
- Supply Chain: Availability of specific materials or colors can fluctuate, affecting project timelines. It’s wise to have alternatives in mind or stock up on critical materials for important projects.
Selecting the right material for your 3D printing project is a complex decision that influences the print’s success in terms of functionality, appearance, and longevity. By carefully considering the properties required for your application and balancing them against the material’s characteristics, you can achieve optimal results. Whether you’re printing a delicate model that showcases intricate details or a functional part exposed to harsh conditions, the right material choice is key to unlocking the full potential of your 3D printing endeavors.
Conclusion
Begin by succinctly summarizing the main topics covered in the article, such as the importance of choosing the right scanning technology, preparing objects for scanning, the scanning process itself, and the subsequent steps needed to edit and refine scans for 3D printing. Highlight the critical role each step plays in achieving a successful print, from the initial selection of a suitable scanner to the final preparations for printing.
Emphasize the Importance of Precision and Preparation
Reinforce the idea that the quality of the final 3D print is heavily dependent on the attention to detail during the scanning and preparation phases. Stress that while technology offers powerful tools for capturing and reproducing objects in three dimensions, the user’s knowledge, preparation, and patience are irreplaceable components of the process.
Encourage Experimentation and Learning
Encourage readers to embrace the learning curve associated with 3D scanning and printing. Suggest that experimentation with different materials, settings, and techniques is not only part of the process but an opportunity to discover the vast potential of 3D printing technology. Remind them that each project offers a chance to refine their skills and push the boundaries of what they can create.
Highlight the Potential of 3D Printing
Touch on the transformative potential of 3D printing, not just as a hobby or tool for prototyping but as a technology that is reshaping industries, from manufacturing to medicine. Inspire readers to consider the broader applications of their newfound skills and the ways in which they might contribute to innovation in their fields or communities.
Final Thoughts
“Embarking on the journey of 3D scanning and printing opens up a world of creativity and innovation. By understanding the nuances of scanning technologies, mastering the art of preparation, and refining your approach with each project, you unlock the full potential of 3D printing. Whether for personal satisfaction, professional advancement, or contributing to the broader field of technology, the skills you develop today pave the way for the achievements of tomorrow. So, take the leap, start scanning, and let your 3D printing journey begin!”
FAQs
- What’s the best scanner for small, detailed objects?
Structured light scanners are typically best for capturing fine details. - Can I 3D scan an object with my phone?
Yes, photogrammetry apps allow for 3D scanning with smartphone cameras, though the quality varies. - How do I prepare a reflective object for scanning?
Applying a temporary matte spray can help capture its surface more accurately. - What software can I use to refine my 3D scans?
Meshmixer and Blender are popular choices for editing and refining 3D models. - Is 3D printing expensive?
Costs have decreased significantly, making it more accessible than ever. Material and printer type affect the overall expense.